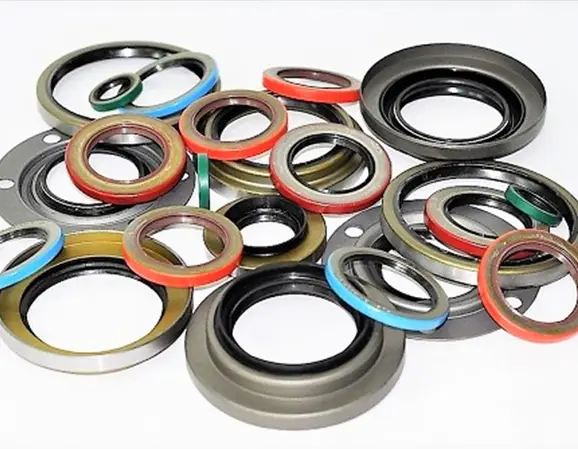
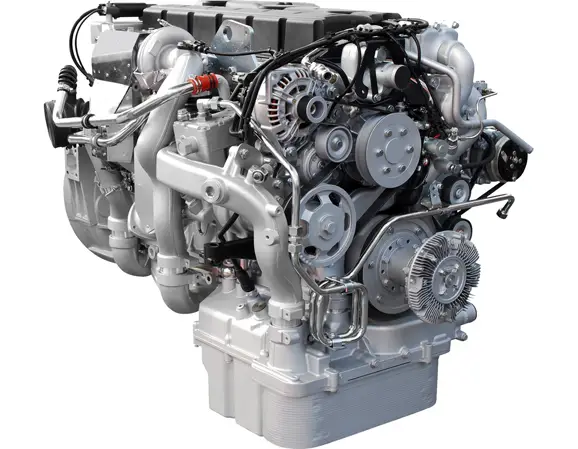

A crankshaft oil seal is a critical engine sealing component designed to retain lubricating oil around the rotating crankshaft while helping prevent dust, moisture, and other contaminants from entering the engine. Although relatively small compared with other engine components, it plays an important role in maintaining lubrication, protecting internal parts, and preventing oil leakage.
Crankshaft oil seals are generally installed at the front and rear ends of an engine. The front crankshaft seal is commonly positioned behind the crankshaft pulley or harmonic balancer, while the rear crankshaft seal is located between the engine and transmission. Their installation positions, dimensions, sealing structures, and replacement procedures can differ considerably depending on the engine design.
For automotive manufacturers, engine rebuilders, repair workshops, and replacement-parts distributors, understanding how a crankshaft oil seal works is essential for selecting the correct product and preventing repeated leakage. A suitable replacement must match more than the nominal dimensions: material compatibility, lip geometry, shaft condition, operating temperature, installation requirements, and engine-specific design all influence sealing performance.
Important technical point: A crankshaft oil seal should not be treated as an isolated rubber component. Its performance depends on the complete sealing system, including the crankshaft surface, housing bore, lubricant, crankcase ventilation, bearing condition, and installation process.
What Is a Crankshaft Oil Seal?
A crankshaft oil seal, also known as a crankshaft seal, crank seal, or crankshaft radial shaft seal, is a dynamic sealing component installed around a rotating crankshaft. Its primary function is to prevent engine oil from escaping through the clearance between the rotating shaft and the stationary engine housing.
The crankshaft converts the reciprocating movement of the pistons into rotational movement. During engine operation, its bearings and related components rely on a continuous supply of lubricating oil. The crankshaft oil seal helps retain this oil inside the engine while allowing the crankshaft to rotate.
Most conventional crankshaft seals use an elastomeric sealing lip that contacts the crankshaft or a specified running surface. Other designs use PTFE sealing elements or integrated seal-and-housing assemblies. The correct design depends on the engine manufacturer’s requirements and the operating conditions.
Main functions of a crankshaft oil seal
Retain engine oil
Prevents lubricant from escaping around the rotating crankshaft and helps maintain the required oil level.
Exclude contaminants
Helps prevent dust, dirt, moisture, and other external contaminants from reaching internal engine components.
Protect engine components
Supports proper lubrication around bearings and other components that depend on engine oil.
Reduce maintenance risks
Helps prevent oil leakage that can contaminate surrounding components and create additional maintenance work.
A crankshaft oil seal does not support the crankshaft or control its bearing clearance. These functions are performed by the engine’s bearing system. Excessive crankshaft movement can therefore affect seal performance even when the seal itself is correctly manufactured.
Where Is the Crankshaft Oil Seal Located?
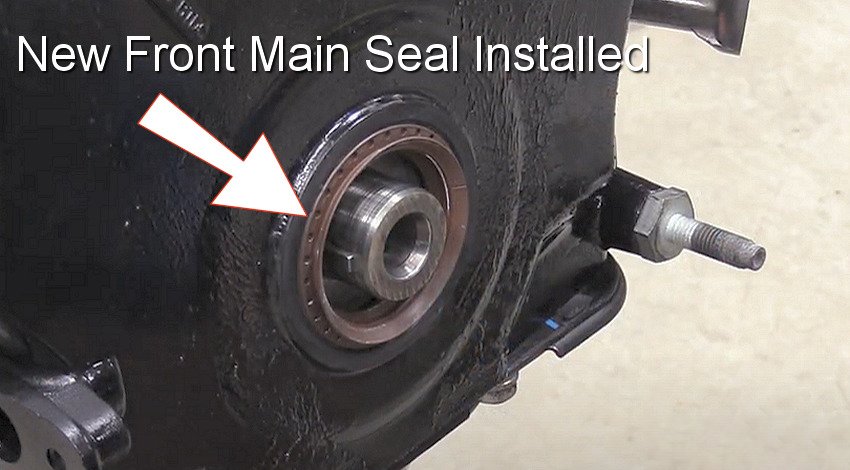
Most conventional engines have a crankshaft oil seal at both ends of the crankshaft. These are commonly referred to as the front crankshaft oil seal and rear crankshaft oil seal. Their positions and replacement procedures are different, so identifying the correct location is the first step when diagnosing an oil leak or sourcing a replacement.
Front crankshaft oil seal
The front crankshaft oil seal is generally installed in the engine front cover, timing cover, or a dedicated seal housing. Its sealing lip contacts the crankshaft nose or a specified sleeve or running surface.
Depending on the engine design, the front seal may be located behind the crankshaft pulley, harmonic balancer, or timing drive components. When it leaks, engine oil may appear around the front cover, crankshaft pulley, lower engine area, or accessory drive components.
Oil contamination around a timing belt or other drive components requires particular attention. Oil can affect some belt materials and may cause additional damage. Follow the vehicle manufacturer’s inspection and replacement procedures if oil reaches the timing drive.
Rear crankshaft oil seal
The rear crankshaft oil seal is installed at the transmission side of the engine, where the crankshaft connects to the flywheel or flexplate. It is commonly called the rear main seal or rear main crankshaft seal.
Depending on the engine design, the rear seal may be pressed directly into the engine block, fitted into a rear cover, or supplied as part of a dedicated seal carrier assembly.
A rear main seal leak may cause engine oil to collect around the lower bellhousing opening or drip from the area between the engine and transmission. However, oil in this location does not automatically confirm rear main seal failure. Oil may also originate from a valve cover gasket, oil pan joint, rear engine cover, or another nearby sealing point.
| Comparison | Front crankshaft seal | Rear crankshaft seal |
|---|---|---|
| Common location | Engine front cover or timing cover. | Engine block or rear seal housing. |
| Nearby components | Crankshaft pulley, harmonic balancer, timing drive. | Flywheel, flexplate, clutch, torque converter, transmission. |
| Typical leak location | Front or lower-front engine area. | Bellhousing or engine-transmission joint. |
| Repair access | May require removal of pulley and front cover components. | Often requires transmission or related assembly removal. |
| Replacement considerations | Inspect crankshaft nose, sleeve, and front housing. | Inspect rear sealing surface, housing, crankshaft movement, and adjacent leaks. |
The front and rear crankshaft oil seals should never be assumed to be interchangeable. Some engines use different lip profiles, directional features, materials, dimensions, or installation depths at each end. Always confirm the correct part number and installation position.
How Does a Crankshaft Oil Seal Work?

A crankshaft oil seal creates a controlled sealing interface between a rotating shaft and a stationary housing. The outer diameter is retained in the housing, while the sealing lip maintains contact with the crankshaft or its designated running surface.
In a conventional radial lip seal, the flexible lip applies a carefully controlled radial load against the shaft. During operation, a thin lubricant film develops at the contact area. This film helps reduce friction and wear while the lip continues to restrict oil leakage.
The sealing action is therefore not simply based on pressing rubber tightly against metal. Lip geometry, contact pressure, shaft surface characteristics, lubricant behavior, temperature, and rotational speed must work together.
The sealing lip
The primary sealing lip is the flexible edge that contacts the rotating shaft. Its geometry determines how the lip distributes contact pressure and maintains the lubricant film. A damaged, hardened, distorted, or worn lip can allow oil to pass through the sealing interface.
The garter spring
Many conventional rubber crankshaft oil seals include a garter spring around the primary lip. The spring helps maintain radial contact force as the sealing element operates and experiences dimensional changes.
Not every crankshaft seal uses a garter spring. Some PTFE and specialized designs use different sealing structures. Buyers and technicians should therefore identify the actual seal construction rather than assuming all rotary seals have the same components.
The metal case or reinforced body
A metal case or reinforcement helps maintain the seal’s shape and provides structural support during installation and operation. Depending on the design, the outside diameter may be exposed metal or covered with elastomer to improve housing retention and sealing.
Auxiliary dust lip
Some crankshaft seals incorporate an additional dust-exclusion lip. This feature helps limit the entry of external contaminants into the primary sealing area. Its design and function vary according to the application.
How the sealing interface works: The primary lip maintains a controlled contact area, while the lubricant film helps limit friction. The seal must retain oil without generating excessive heat or allowing contaminants to damage the shaft and sealing edge.
Main Types of Crankshaft Oil Seals

Crankshaft oil seals can be classified by installation position, sealing material, construction, and application requirements. The most suitable type depends on the engine design and the manufacturer’s specified replacement part.
Front crankshaft seals
Front crankshaft seals are designed for the crankshaft’s front end. They are used in passenger cars, commercial vehicles, diesel engines, agricultural machinery, and other engine-powered equipment. Their design must accommodate the relevant shaft dimensions, speed, lubricant, and front-cover configuration.
Rear main seals
Rear main seals retain engine oil at the transmission side of the crankshaft. Depending on the engine, they may be conventional radial lip seals, PTFE seals, or integrated assemblies. Some designs require specific installation tools and procedures to prevent lip deformation or incorrect positioning.
Conventional rubber crankshaft seals
Conventional rubber crankshaft seals typically use an elastomeric lip, often with a garter spring. They are widely used in automotive engines and can provide reliable dynamic sealing when the compound, dimensions, and lip design match the application.
PTFE crankshaft seals
PTFE crankshaft seals use a polytetrafluoroethylene sealing element. PTFE is valued for its low-friction characteristics and resistance to many chemicals and elevated temperatures. These seals are used in selected modern engine designs and demanding sealing applications.
PTFE seals often have installation requirements that differ from conventional rubber seals. Many designs require a clean, dry shaft and a dedicated installation sleeve. The sealing lip may need to be installed dry, and the protective sleeve should not be removed prematurely. Follow the exact instructions supplied by the seal manufacturer or vehicle manufacturer.
Integrated crankshaft seal assemblies
Some engines use a crankshaft seal integrated into a housing or carrier. The assembly may include a seal, mounting structure, and other application-specific features. Replacement may require changing the complete unit rather than installing only a separate sealing element.
| Seal design | Construction | Important considerations |
|---|---|---|
| Rubber radial lip seal | Elastomeric lip, commonly with a reinforcing case and garter spring. | Check material compatibility, lip condition, and installation lubrication. |
| PTFE seal | PTFE sealing element with application-specific support structure. | Follow dry-installation and sleeve-handling instructions where specified. |
| Seal and housing assembly | Sealing element supplied with a dedicated carrier or housing. | Verify complete assembly compatibility and mounting requirements. |
| Specialized directional seal | May include directional hydrodynamic features or application-specific lip geometry. | Confirm front/rear position and rotation direction before installation. |
Materials Used in Crankshaft Oil Seals
Crankshaft oil seal materials must withstand engine oil, heat, rotational movement, and long-term exposure to the operating environment. Material selection affects resistance to swelling, hardening, wear, and thermal aging.
The most appropriate material depends on the engine manufacturer’s design specification. A material that performs well in one engine may not be suitable for another because lubricant chemistry, temperature, shaft speed, and sealing geometry can differ.
NBR – Nitrile Butadiene Rubber
NBR is widely used in general-purpose automotive oil seals because it offers useful resistance to many mineral-based oils, good mechanical properties, and cost-effective manufacturing characteristics.
It is suitable for many conventional engine sealing applications when the operating temperature and lubricant are within the compound’s specified limits. However, prolonged exposure to excessive heat or incompatible fluids can accelerate hardening, swelling, or loss of elasticity.
HNBR – Hydrogenated Nitrile Butadiene Rubber
HNBR is used in applications where improved heat aging, mechanical strength, and resistance to wear are required compared with conventional NBR grades. It may be suitable for demanding automotive environments, subject to the specific compound formulation and fluid compatibility.
FKM – Fluoroelastomer
FKM is often considered for applications requiring resistance to elevated temperatures and selected oils, fuels, and chemicals. It can be useful in demanding engine environments, but its suitability must be confirmed against the actual lubricant, low-temperature requirements, and seal design.
ACM – Polyacrylate Rubber
ACM is used in certain automotive sealing applications because of its resistance to hot engine oils and aging. It may be considered for selected engine and transmission environments, but low-temperature flexibility and compatibility with particular fluids must be evaluated.
PTFE – Polytetrafluoroethylene
PTFE offers low-friction characteristics and resistance to many chemicals and elevated temperatures. It is used in specialized crankshaft seal designs, particularly where the engine manufacturer specifies a PTFE sealing element. Its installation and handling requirements differ from many conventional elastomeric seals.
| Material | Typical characteristics | Selection considerations |
|---|---|---|
| NBR | Good general oil resistance and mechanical properties. | Confirm operating temperature and lubricant compatibility. |
| HNBR | Improved heat aging and mechanical performance in suitable grades. | Verify the compound’s actual performance limits. |
| FKM | Resistance to elevated temperatures and selected fluids. | Check low-temperature flexibility and specific fluid compatibility. |
| ACM | Useful resistance to selected hot automotive oils. | Evaluate cold flexibility and chemical limitations. |
| PTFE | Low friction and broad chemical resistance. | Follow application-specific shaft and installation requirements. |
Material names alone are not sufficient for technical approval. Different formulations within the same elastomer family can have different properties. For OEM projects and demanding replacement applications, request compound data and confirm compatibility with the specified engine oil and operating conditions.
Common Signs of a Failing Crankshaft Oil Seal
A damaged crankshaft oil seal may cause engine oil leakage, but the visible symptoms depend on whether the front or rear seal is affected and how the engine is configured. Early diagnosis helps prevent unnecessary oil loss and reduces the risk of contamination to nearby components.
Oil leakage around the crankshaft area
Fresh engine oil around the crankshaft pulley, front cover, lower engine area, or bellhousing may indicate a crankshaft seal leak. However, nearby gaskets and joints can produce similar symptoms. Clean the area and trace the highest point of fresh oil before deciding which component has failed.
Oil spots under the vehicle
Oil drops beneath a parked vehicle can be a sign of leakage from the engine or another lubricated system. The location of the oil spot alone is not enough to identify the crankshaft seal as the source because oil can travel along covers, housings, and underbody surfaces.
Falling engine oil level
A leaking crankshaft oil seal can contribute to a gradual reduction in engine oil level. Check the oil level using the manufacturer’s recommended procedure and investigate other possible causes, including oil consumption, filter leakage, oil pan leakage, and other engine seals.
Oil contamination of belts or clutch components
A front crankshaft seal leak may contaminate nearby belts or pulleys. A rear seal leak may allow oil to reach the clutch housing in some manual transmission applications. Oil contamination can reduce component performance and may require inspection or replacement of affected parts according to the manufacturer’s instructions.
Oil around the engine-transmission joint
Oil appearing near the bellhousing may be associated with a rear main seal leak. Before removing the transmission, inspect other possible sources, including the rear of the cylinder head, valve cover area, oil pan joint, and rear engine cover.
Diagnostic caution: Do not replace a rear crankshaft oil seal solely because oil is visible at the engine-transmission joint. Confirm the source of the leak first. Unnecessary transmission removal increases repair time and cost without correcting the actual problem.
Why Do Crankshaft Oil Seals Leak?
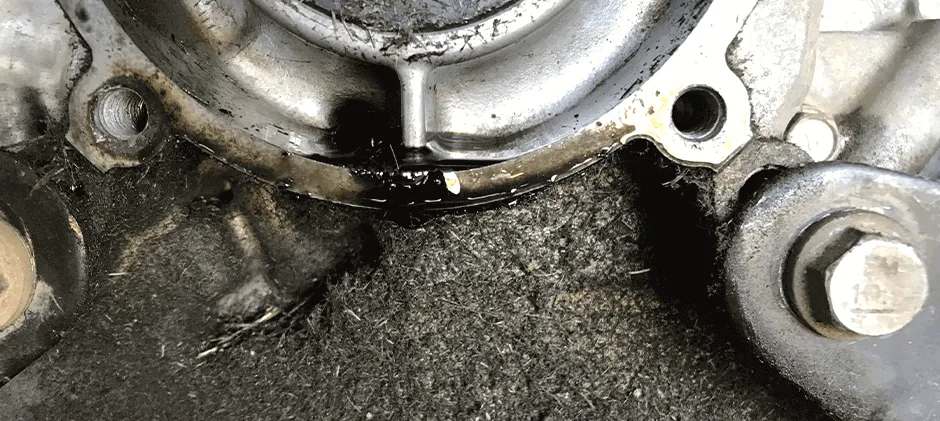
Crankshaft oil seal leakage can result from normal wear, poor material compatibility, incorrect installation, damaged shaft surfaces, abnormal crankcase pressure, or mechanical movement. A replacement seal may also fail prematurely if the original cause is not corrected.
Normal sealing lip wear
The sealing lip operates in continuous contact with a rotating shaft or designated running surface. Over time, friction, heat, and material aging can reduce the lip’s ability to maintain effective contact. The rate of wear depends on shaft condition, lubricant, operating temperature, speed, and material selection.
Excessive engine temperature
High temperatures can accelerate elastomer aging and change the mechanical properties of the sealing lip. Excessive heat may also affect lubricant viscosity and increase friction at the sealing interface.
Damaged or grooved crankshaft surface
A scratch, corrosion mark, wear groove, or unsuitable surface finish can interrupt the sealing interface. A new seal installed on the same damaged running surface may continue to leak because the lip follows the existing defect.
Excessive crankcase pressure
The crankcase ventilation system helps control pressure inside the engine. A restricted or malfunctioning PCV or breather system can contribute to excessive crankcase pressure, depending on the engine design and operating condition.
Excessive pressure can increase the load on engine sealing points and may contribute to oil leakage. If a new crankshaft seal leaks shortly after installation, check the crankcase ventilation system rather than assuming the replacement seal is defective.
Incorrect installation
A seal may be damaged if it is pressed in unevenly, installed at the wrong depth, fitted in the wrong direction, or forced over sharp shaft edges. Conventional rubber seals and PTFE seals may require different installation procedures.
Excessive crankshaft movement or bearing clearance
Excessive crankshaft end play, bearing wear, or abnormal shaft movement can cause uneven sealing lip contact. The result may be localized wear, vibration, or repeated leakage. These conditions require mechanical inspection and measurement according to the engine service specifications.
Incorrect replacement seal
A seal with the wrong dimensions, material, lip profile, or directional design may not provide reliable sealing even if it appears similar to the original component. Cross-reference information and dimensional similarity should always be checked against the actual application.
| Leakage or failure pattern | Possible cause | Recommended check |
|---|---|---|
| Leakage shortly after replacement | Installation damage, incorrect part, or abnormal pressure. | Verify seal identity, installation procedure, and crankcase ventilation. |
| Leakage from one area of the lip | Shaft runout, eccentricity, or local shaft damage. | Inspect shaft surface and measure runout. |
| Hardened or cracked lip | Excessive heat, aging, or material incompatibility. | Review operating temperature and lubricant specification. |
| Oil leakage at several engine joints | Possible crankcase pressure or broader engine sealing issue. | Inspect PCV/breather operation and engine condition. |
| Seal displaced or loose in housing | Incorrect outer diameter, damaged bore, or retention issue. | Measure housing bore and verify the specified seal construction. |
How to Inspect a Crankshaft Oil Seal Before Replacement
Accurate diagnosis helps avoid replacing the wrong component. Before removing a crankshaft oil seal, inspect the surrounding engine area and identify the most likely source of fresh oil.
Step 1: Clean the suspected leakage area
Remove accumulated oil and dirt from the suspected sealing area using a cleaning method suitable for the engine components. Allow the area to dry before checking for new leakage.
Step 2: Identify the highest point of fresh oil
Oil can travel downward or along mating surfaces before dripping. Inspect above the visible oil accumulation and check nearby gaskets, covers, joints, and fittings. Where appropriate, use an approved engine oil dye and inspection procedure to help trace the leak.
Step 3: Inspect the crankshaft sealing surface
Once access is available, inspect the running surface for grooves, scratches, corrosion, and abnormal wear. Check whether the seal runs directly on the crankshaft or on a separate sleeve.
Step 4: Check the housing and alignment
Inspect the seal bore for damage, corrosion, distortion, and contamination. Check the alignment and condition of associated components according to the engine manufacturer’s specifications.
Step 5: Inspect the removed seal
Look for a hardened lip, cuts, uneven wear, deformation, spring displacement, swelling, or other signs of damage. The condition of the removed seal can provide useful evidence, but it should be considered together with shaft and housing inspection findings.
Step 6: Check crankcase ventilation and engine condition
If leakage is repeated or appears at multiple sealing points, inspect the crankcase ventilation system and follow the manufacturer’s diagnostic procedure for pressure-related concerns. Also investigate abnormal crankshaft movement or bearing condition where indicated.
How to Choose the Correct Crankshaft Oil Seal

Selecting the correct crankshaft oil seal requires more than matching the inner diameter, outer diameter, and width. Two seals with similar dimensions may have different lip profiles, materials, case structures, directional features, or installation requirements.
Confirm the original equipment part number
Start with the original equipment number or the manufacturer’s approved replacement reference. This is often the most reliable way to identify the correct seal for a particular engine configuration.
Identify the engine application
Record the vehicle make, model, model year, engine code, displacement, and fuel type where applicable. The same vehicle model may use different engines and sealing arrangements across production years or markets.
Confirm front or rear installation position
Specify whether the required product is a front crankshaft oil seal or a rear main seal. Do not assume the two positions use identical products. Directional seals, PTFE profiles, and integrated housing designs may be position-specific.
Verify all critical dimensions
For conventional radial seals, the main nominal dimensions are usually inner diameter, outer diameter, and width. However, the following details may also be important:
- Seal type and construction.
- Primary lip and auxiliary lip configuration.
- Garter spring presence and design.
- Metal case or rubber-covered outside diameter.
- Installation depth and housing arrangement.
- Directional or hydrodynamic sealing features.
- Material and lubricant compatibility.
Select the appropriate material
Confirm the specified elastomer or PTFE construction and its compatibility with the engine oil, operating temperature, and expected service conditions. Avoid changing from NBR to FKM, HNBR, or PTFE solely because the alternative material appears to offer a higher temperature rating.
Check installation requirements
Confirm whether the replacement requires pre-lubrication, dry installation, a protective sleeve, a special driver, or a specific installation depth. These requirements are particularly important when replacing a conventional rubber seal with a different design.
For distributors and purchasing teams: When requesting a crankshaft seal quotation, provide the OE number, engine application, front/rear position, dimensions, original sample or drawing, material requirements, and expected order quantity. This reduces the risk of incorrect cross-referencing.
Crankshaft Oil Seal Replacement: Important Installation Considerations
Crankshaft oil seal replacement procedures vary significantly between engines. Some front seals can be accessed after removing the crankshaft pulley and related components, while rear seal replacement may require transmission, clutch, flywheel, or flexplate removal.
The following points are general technical considerations, not a substitute for the vehicle-specific service manual. Always follow the manufacturer’s instructions, including required torque values, special tools, seal orientation, and component replacement procedures.
Prepare the installation area
Clean the seal housing and shaft carefully. Remove old sealant and contamination without scratching the bore or running surface. Check for burrs and sharp edges that could damage the new lip during assembly.
Protect the sealing lip
Use a suitable installation sleeve where necessary to protect the lip when it passes over threads, keyways, splines, or sharp shaft transitions. Avoid touching or deforming the sealing edge unnecessarily.
Apply the correct installation lubrication
Many conventional rubber lip seals require a small amount of compatible engine oil on the sealing lip before installation. However, some PTFE crankshaft seals are designed for dry installation. Applying lubricant when the manufacturer specifies dry installation can interfere with the intended run-in process.
Use a suitable seal driver
A correctly sized installation tool helps apply even pressure to the seal body. Avoid hammering directly on the flexible lip or applying uneven force that could distort the seal case or housing.
Install at the specified depth
Incorrect installation depth can place the sealing lip on a worn shaft track, interfere with nearby components, or position the seal incorrectly relative to the housing. Follow the engine manufacturer’s specified installation position.
Inspect before returning the engine to service
Check that the seal is seated evenly and that all removed components have been reassembled correctly. Restore the correct oil level, follow the manufacturer’s startup procedure, and inspect for leakage under the specified operating conditions.
| Installation error | Potential result | Prevention |
|---|---|---|
| Wrong seal reference | Incorrect fit or sealing geometry. | Verify OE number and engine application. |
| Lip damaged during assembly | Immediate or early leakage. | Protect sharp edges and use appropriate installation sleeves. |
| Seal installed unevenly | Distorted case and inconsistent lip contact. | Use a suitable seal driver and controlled pressing force. |
| Incorrect lubrication | Excessive friction or unsuitable PTFE installation conditions. | Follow the exact seal manufacturer’s instructions. |
| Wrong installation depth | Lip contacts a worn track or adjacent components. | Use the specified depth and installation tooling. |
How to Extend the Service Life of a Crankshaft Oil Seal
A crankshaft oil seal’s service life depends on correct product selection and the condition of the engine around it. The following practices can help reduce premature leakage and unnecessary replacement work.
Maintain the correct engine oil level
Check the engine oil level using the vehicle manufacturer’s recommended procedure. Operating with insufficient oil can compromise lubrication and increase wear in engine components. Excessive oil level can also create problems in certain engine designs, so follow the specified filling range.
Use the specified engine oil
Choose engine oil that meets the required viscosity grade and performance specification. Do not assume that a lubricant is suitable simply because it is synthetic, mineral-based, or marketed for high-mileage engines. Fluid compatibility with the sealing material remains important.
Maintain the crankcase ventilation system
Inspect the PCV valve, breather passages, hoses, and related components according to the manufacturer’s maintenance requirements. A restricted ventilation system can contribute to abnormal crankcase pressure and oil leakage.
Prevent engine overheating
Maintain the cooling system and investigate abnormal engine temperatures promptly. Excessive heat can accelerate elastomer aging and affect lubricant performance.
Correct mechanical problems before replacing the seal
If the crankshaft has excessive movement, the sealing surface is grooved, or the housing is damaged, installing a new seal alone may not solve the leakage. Correct the underlying condition according to the engine service specifications.
Keep installation procedures consistent
For engine rebuilders and repair workshops, use documented installation procedures, suitable tools, clean work areas, and application-specific instructions. Consistent installation practices help reduce handling damage and repeated failures.
Crankshaft Oil Seal Applications
Crankshaft oil seals are used in a broad range of engines and equipment. Although the basic sealing principle is similar, the operating conditions and product specifications can vary substantially between applications.
Passenger vehicles
Gasoline and diesel engines used in cars, SUVs, and light commercial vehicles.
Commercial vehicles
Heavy-duty truck and bus engines operating under demanding load and temperature conditions.
Agricultural machinery
Tractors, harvesters, and other diesel-powered agricultural equipment.
Construction equipment
Excavators, loaders, generators, and industrial engine systems.
Marine engines
Selected marine engine applications requiring suitable resistance to operating fluids and environmental conditions.
Engine rebuilding
Replacement and service components used during engine overhaul and remanufacturing.
For each application, the seal must be matched to the engine design, shaft dimensions, lubricant, speed, temperature, and installation arrangement. A seal intended for a passenger-car engine should not be assumed suitable for a heavy-duty diesel engine without technical verification.
What Should B2B Buyers Check When Purchasing Crankshaft Oil Seals?
For importers, wholesalers, distributors, engine rebuilders, and OEM purchasing teams, product identification and supplier evaluation are important parts of controlling replacement quality. An incorrect cross-reference can result in returns, workshop delays, and avoidable warranty claims.
Product identification information
Provide as much application information as possible when requesting a quotation or technical review:
- Original equipment part number or cross-reference number.
- Vehicle make, model, and production year.
- Engine code, displacement, and engine type.
- Front crankshaft seal or rear main seal position.
- Inner diameter, outer diameter, and width.
- Material and seal construction, if specified.
- Original sample, technical drawing, or clear product photographs.
- Required quantity, packaging, and target market.
Manufacturing quality considerations
A professional supplier evaluation should consider more than product appearance. Depending on the application and purchasing specification, relevant quality checks may include:
- Critical dimensional inspection.
- Material identification and compound consistency.
- Elastomer hardness testing where applicable.
- Visual inspection of sealing lips and molded surfaces.
- Garter spring and case inspection for relevant designs.
- Application-specific leakage or performance testing.
- Batch identification and traceability.
- Packaging and protection during international transportation.
Sample approval and application validation
For new applications, customized seals, or alternative materials, request samples and verify their dimensions and construction before approving bulk production. Where required, conduct application-specific validation under representative operating conditions.
Evaluate total procurement cost
The purchase price is only one part of the total cost. Incorrect products can increase labor, downtime, shipping, returns, and warranty expenses. A suitable product with consistent quality and accurate application matching may offer better long-term value than a lower-priced seal that does not meet the required specifications.
B2B sourcing tip: For bulk crankshaft oil seal orders, establish an approved part-number list and confirm critical dimensions, material, seal construction, packaging, and inspection criteria before production. This is especially useful when managing multiple engine platforms or replacement-market references.
Choosing a Crankshaft Oil Seal Manufacturer or Supplier
A reliable crankshaft oil seal supplier should be able to support product identification, technical communication, quality requirements, and stable supply. This is particularly important for distributors and OEM buyers sourcing seals for multiple vehicle models or engine families.
When evaluating a manufacturer, consider the following points:
- Product coverage: Confirm whether the supplier supports front seals, rear main seals, rubber seals, PTFE seals, and relevant seal assemblies.
- Technical capability: Check whether the supplier can review OE numbers, drawings, samples, dimensions, and material requirements.
- Material options: Discuss the suitability of NBR, HNBR, FKM, ACM, PTFE, or other specified materials for the application.
- Quality management: Ask about incoming material checks, production inspection, final testing, and traceability.
- Customization: For non-standard applications, confirm whether sample evaluation, tooling, and technical development can be discussed.
- Supply reliability: Review production lead times, minimum order quantities, packaging, export documentation, and communication arrangements.
KODA Seals provides automotive and industrial sealing products for different application requirements. Buyers can submit an original part number, sample, drawing, or dimensional specification for an initial product review. Final suitability should be confirmed against the engine manufacturer’s requirements and the actual operating conditions.
Explore automotive oil seal products.
Crankshaft Oil Seal Purchasing Checklist
Use this checklist when sourcing replacement crankshaft oil seals, preparing an OEM inquiry, or checking products before installation.
Application identification
- Confirm vehicle and engine application.
- Identify front or rear installation position.
- Check original equipment part number.
- Confirm the engine production version where relevant.
Product specification
- Verify inner diameter, outer diameter, and width.
- Confirm material and compound requirements.
- Check lip configuration and seal construction.
- Confirm whether a housing or installation sleeve is included.
- Review application-specific temperature and lubricant requirements.
Supplier and quality review
- Request technical drawings or samples where needed.
- Confirm critical inspection and testing requirements.
- Review packaging and batch traceability.
- Confirm order quantity and delivery requirements.
Frequently Asked Questions About Crankshaft Oil Seals
FAQ 1: What is the main function of a crankshaft oil seal?
The main function of a crankshaft oil seal is to retain engine oil around the rotating crankshaft and help prevent external contaminants from entering the engine. It creates a dynamic sealing interface between the crankshaft or its running surface and the stationary engine housing.
FAQ 2: What is the difference between a front crankshaft seal and a rear main seal?
The front crankshaft seal is installed at the pulley or timing-cover side of the engine, while the rear main seal is installed at the transmission side, near the flywheel or flexplate. Their dimensions, sealing structures, and replacement procedures may differ. They should not be treated as interchangeable unless the engine manufacturer specifies that they are.
FAQ 3: What are the common symptoms of a bad crankshaft oil seal?
Common symptoms include fresh engine oil around the front or rear crankshaft area, oil spots beneath the vehicle, a falling engine oil level, and oil contamination around nearby components. These symptoms can also be caused by other engine gaskets or seals, so the actual leak source should be confirmed before replacement.
FAQ 4: Can a crankshaft oil seal be replaced without removing the engine?
In many applications, crankshaft oil seals can be replaced without removing the complete engine. However, access requirements depend on the engine design. A front seal may require removal of the crankshaft pulley and related covers, while a rear main seal may require transmission or flywheel removal. Always follow the vehicle-specific service procedure.
FAQ 5: How do I choose the correct replacement crankshaft oil seal?
Start with the original equipment part number and confirm the vehicle, engine code, and front or rear installation position. Verify the inner diameter, outer diameter, width, material, lip design, and housing arrangement. For uncertain or customized applications, provide the supplier with an original sample, drawing, or clear product photographs for technical review.
Technical References and Further Reading
The following technical resources provide additional information about rotary shaft seal operation, crankshaft seal construction, and engine service considerations.
- Parker Hannifin – Rotary Seal Design Guide. Engineering guidance on rotary shaft seal operation, lubricant film, sealing lip behavior, contamination exclusion, and operating conditions.
- SKF – Industrial Seals. Technical and product information on industrial sealing technologies and application requirements.
- KODA – Oil Seals Part 1 . An introduction to oil seal construction, materials, and basic sealing functions.
- KODA – Crankshaft Seal Replacement. Product and application information for front and rear crankshaft seal replacement.
Looking for a Crankshaft Oil Seal Supplier?
Whether you are an automotive parts distributor, wholesale buyer, engine rebuilder, or OEM purchasing engineer, selecting the correct crankshaft oil seal requires accurate application matching and attention to material, dimensions, sealing structure, and installation requirements.
KODA Seals welcomes inquiries for standard crankshaft oil seals, front and rear main seal replacements, custom requirements, and bulk purchasing. Send your OE number, engine application, drawing, or original sample to discuss suitable product options.