
A damaged crankshaft oil seal can cause anything from a minor oil seep to significant lubricant loss, contamination of nearby engine components, and costly unplanned repairs. For automotive repair professionals, fleet maintenance teams, engine manufacturers, and replacement-parts distributors, the key is to identify the actual leakage source, understand the failure mechanism, and select a replacement seal that matches the engine’s operating conditions.
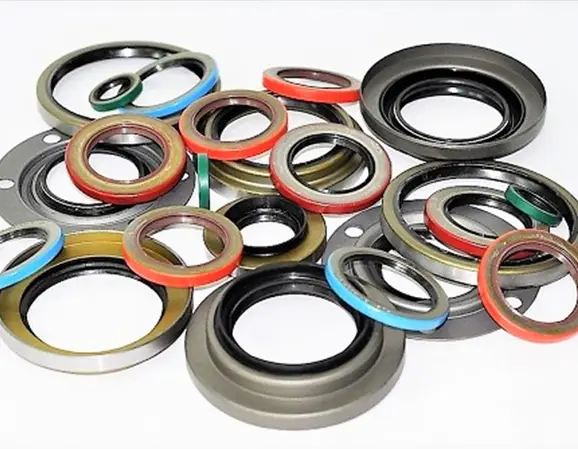
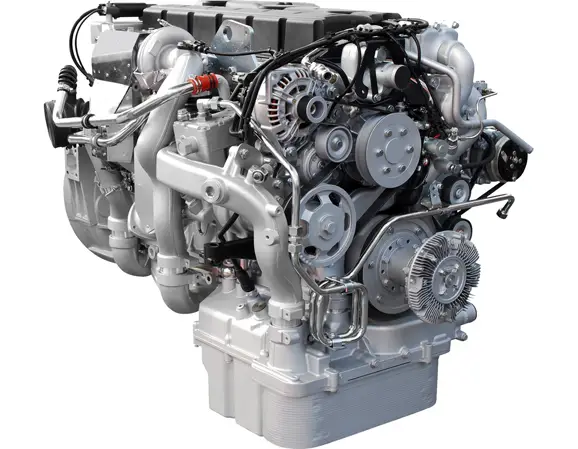
The crankshaft oil seal, also known as a crankshaft radial shaft seal, retains engine oil around the rotating crankshaft while helping prevent external contaminants from entering the engine. Depending on engine architecture, the front crankshaft seal is positioned near the crankshaft pulley and timing drive, while the rear main seal is located between the engine and transmission.
Although these seals perform the same basic function, their dimensions, sealing-lip designs, elastomer compounds, installation procedures, and service requirements can differ considerably. A reliable repair therefore involves more than replacing a worn rubber component: it requires a systematic diagnosis of the sealing system.
Technical priority: Before ordering a replacement crankshaft oil seal, confirm the leakage source, check crankcase ventilation, inspect the shaft sealing surface, and verify the correct part specification. Installing a new seal without correcting the underlying cause can lead to another leak.
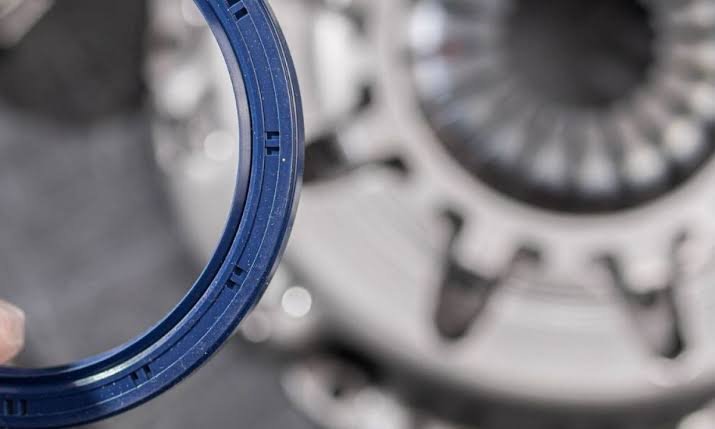 Crankshaft oil seals are designed to maintain a dynamic sealing interface between the rotating shaft and the stationary engine housing.
Recognizing the Symptoms of a Damaged Crankshaft Oil Seal
A crankshaft oil seal rarely fails in exactly the same way in every engine. Leakage rate, shaft speed, engine temperature, crankcase pressure, seal material, and the condition of adjacent components all influence the symptoms. The following signs can help narrow down the cause, but none should be treated as conclusive evidence without inspection.
1. Engine Oil Leakage Around the Front Crankshaft
Oil accumulation around the crankshaft pulley, front timing cover, or lower engine housing may indicate a leaking front crankshaft oil seal. As the crankshaft rotates, oil can escape through a hardened sealing lip, a damaged contact surface, or an improperly installed seal.
However, oil appearing at the front of an engine may also originate from a timing cover gasket, oil pan joint, valve cover gasket, or another component positioned above the crankshaft. Airflow and rotating pulleys can distribute oil away from its original source, making the visible wet area misleading.
Practical diagnostic approach: Clean the affected area, inspect the engine from the highest point of visible oil contamination downward, and observe where fresh oil first appears. If necessary, use an engine-oil-compatible fluorescent dye and ultraviolet inspection equipment according to the product instructions.
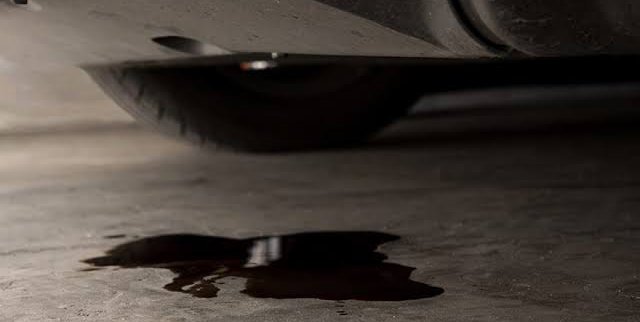
2. Oil Drips Beneath a Parked Vehicle
Oil spots on the garage floor or workshop surface can indicate an external engine oil leak. A small, intermittent stain may reflect early seal deterioration, while repeated wet patches or a steadily increasing leak rate may indicate a more serious problem.
Before attributing the leak to the crankshaft seal, identify the fluid. Engine oil is commonly amber to dark brown or black, depending on its age and condition, whereas automatic transmission fluid and coolant may have different colors and physical characteristics. These characteristics are only preliminary clues, not definitive identification methods.
For fleet operators, recording the oil level, leakage location, operating hours, and approximate leak rate can help prioritize maintenance and distinguish a developing defect from a sudden failure.
3. Falling Engine Oil Level
A leaking crankshaft oil seal can gradually reduce the engine’s oil inventory. If the oil level repeatedly falls between scheduled services, inspect for external leakage as well as other possible causes, including oil consumption through the combustion process.
Insufficient oil can compromise lubrication of bearings, journals, and other moving engine components. Severe oil starvation may result in overheating, accelerated wear, or catastrophic engine damage.
Recommended action: Check the dipstick or electronic oil-level indicator using the vehicle manufacturer’s prescribed procedure. Top up with the specified oil when necessary, but do not use repeated top-ups as a substitute for diagnosing the leak. If the oil-pressure warning illuminates, stop the engine as soon as it is safe to do so and follow the manufacturer’s emergency instructions.
4. Oil Contamination Around the Timing Drive
A leaking front crankshaft oil seal can allow engine oil to reach the timing belt, crankshaft sprocket, pulley, or surrounding timing components. This is particularly important on engines where the timing belt operates in a dry environment.
Oil contamination can adversely affect the durability of certain timing-belt materials and may contribute to premature belt deterioration. The consequences can be especially serious on interference engines, where timing-drive failure may allow piston-to-valve contact.
Warning: If engine oil has reached a timing belt, do not assume that wiping the belt clean is sufficient. Inspect the complete timing-drive system and replace contaminated components when required by the engine manufacturer’s service procedure. Do not continue operating an engine with a potentially compromised timing belt.
5. Burning Oil Smell or Smoke
Oil escaping from a front or rear crankshaft seal may contact a hot exhaust component or another high-temperature surface. This can create a persistent burning-oil smell and, in some cases, visible smoke.
Smoke may also originate from valve cover leaks, turbocharger oil leaks, or other sources. If smoke is accompanied by an active oil leak, a strong burning smell, or signs of fire, stop the engine when safe and arrange a professional inspection rather than continuing to drive.
6. Oil Leakage Between the Engine and Transmission
Oil accumulating at the engine-to-transmission joint is a common reason to investigate the rear main seal. On many vehicles, the rear crankshaft oil seal retains engine oil at the flywheel or flexplate end of the crankshaft.
Nevertheless, oil at this joint does not automatically establish rear main seal failure. Oil can migrate from a rear cover, oil pan interface, cylinder-head area, or other nearby sealing point. Transmission fluid can also be mistaken for engine oil.
On manual-transmission vehicles, engine oil reaching the clutch friction surfaces may cause slipping, judder, or abnormal engagement. A contaminated clutch should be assessed according to the vehicle manufacturer’s repair guidance; cleaning alone should not be assumed to restore reliable friction performance.
7. Repeated Leakage After Seal Replacement
A new crankshaft oil seal that leaks soon after installation should trigger a root-cause investigation rather than an automatic second replacement. Possible causes include an incorrect seal specification, installation damage, a worn shaft track, excessive crankcase pressure, crankshaft runout, or an incorrectly positioned seal.
Review the previous repair records, verify the replacement part number, inspect the crankshaft sealing surface, and check the crankcase ventilation system. Repeatedly replacing the seal without addressing these factors can increase labor costs and vehicle downtime.
Why Crankshaft Oil Seals Fail Prematurely
A crankshaft oil seal is a dynamic sealing component. Its performance depends on the interaction between the elastomer, sealing lip, shaft surface, lubricant, temperature, rotational speed, and housing geometry. A failure investigation should consider the entire operating system rather than focusing exclusively on the removed seal.
Elastomer Aging and Material Incompatibility
Elastomer compounds gradually change during service as a result of thermal exposure, lubricant chemistry, oxidation, and repeated mechanical deformation. Depending on the compound and application, the sealing lip may harden, soften, swell, shrink, crack, or lose its ability to maintain contact with the shaft.
Nitrile rubber (NBR) is widely used in conventional oil-sealing applications because of its useful oil resistance and cost-effectiveness. Fluoroelastomer (FKM) is often selected for applications requiring higher-temperature capability or resistance to particular oils and chemicals. Other compounds, including application-specific polyacrylate and silicone formulations, may be suitable under defined conditions.
No elastomer is universally superior. Material selection must consider the exact lubricant formulation, sustained and peak temperatures, shaft speed, exposure to additives, and the manufacturer’s validated operating limits.
Excessive Temperature and Frictional Heat
Excessive temperature can accelerate elastomer aging and change the behavior of the sealing lip. Frictional heat may increase when the shaft surface is unsuitable, lubrication is inadequate, the lip is damaged, or the seal is incompatible with the operating conditions.
Before specifying a higher-temperature seal, determine whether the engine is experiencing abnormal cooling-system performance, lubricant degradation, incorrect oil levels, or another condition responsible for the excessive heat. A more expensive seal will not correct an unresolved engine problem.
Crankshaft Wear, Grooving, and Surface Defects
The sealing lip operates against a narrow region of the crankshaft surface. Over time, this contact can produce a wear track. Scratches, corrosion, burrs, excessive runout, and surface finish outside the manufacturer’s specified limits can interrupt the sealing interface and create a leakage path.
When inspecting a removed seal, examine the lip contact pattern and compare its position with the shaft wear track. A visible groove that aligns with the sealing lip is a strong reason to investigate shaft wear before installing a replacement.
Depending on the engine design, an approved shaft repair sleeve or another manufacturer-authorized repair may be an option. Such sleeves are not universally suitable, and their use with PTFE seals or other specialized sealing designs must be specifically validated for the application.
Excessive Crankcase Pressure
Crankcase ventilation systems help manage blow-by gases and maintain the intended pressure conditions inside the engine. A blocked breather, malfunctioning positive crankcase ventilation (PCV) valve, restricted hose, or other ventilation fault can increase crankcase pressure and force oil past a sealing interface.
Check the ventilation system before assuming that the seal itself is defective. Where appropriate, measure crankcase pressure using the vehicle manufacturer’s prescribed test procedure and compare the result with the specified limits.
Do not rely on loosening the oil filler cap or observing vapor alone as a definitive pressure test. Engine design, operating temperature, load, and normal blow-by all influence these observations.
Incorrect Installation and Part Selection
Seal damage can occur when the lip catches on a sharp shaft edge, the seal is driven into the housing at an angle, the metal case becomes distorted, or the sealing element is installed with the wrong lubrication procedure.
Incorrect dimensions, lip geometry, material, or installation depth can also cause premature leakage. The correct replacement should be confirmed using the original equipment part number, engine identification, dimensions, and any applicable technical supersession information.
SKF’s CR Seals Handbook provides additional technical information on rotary shaft seal engineering, operating conditions, material selection, and failure analysis.
Front Crankshaft Oil Seal vs. Rear Main Seal
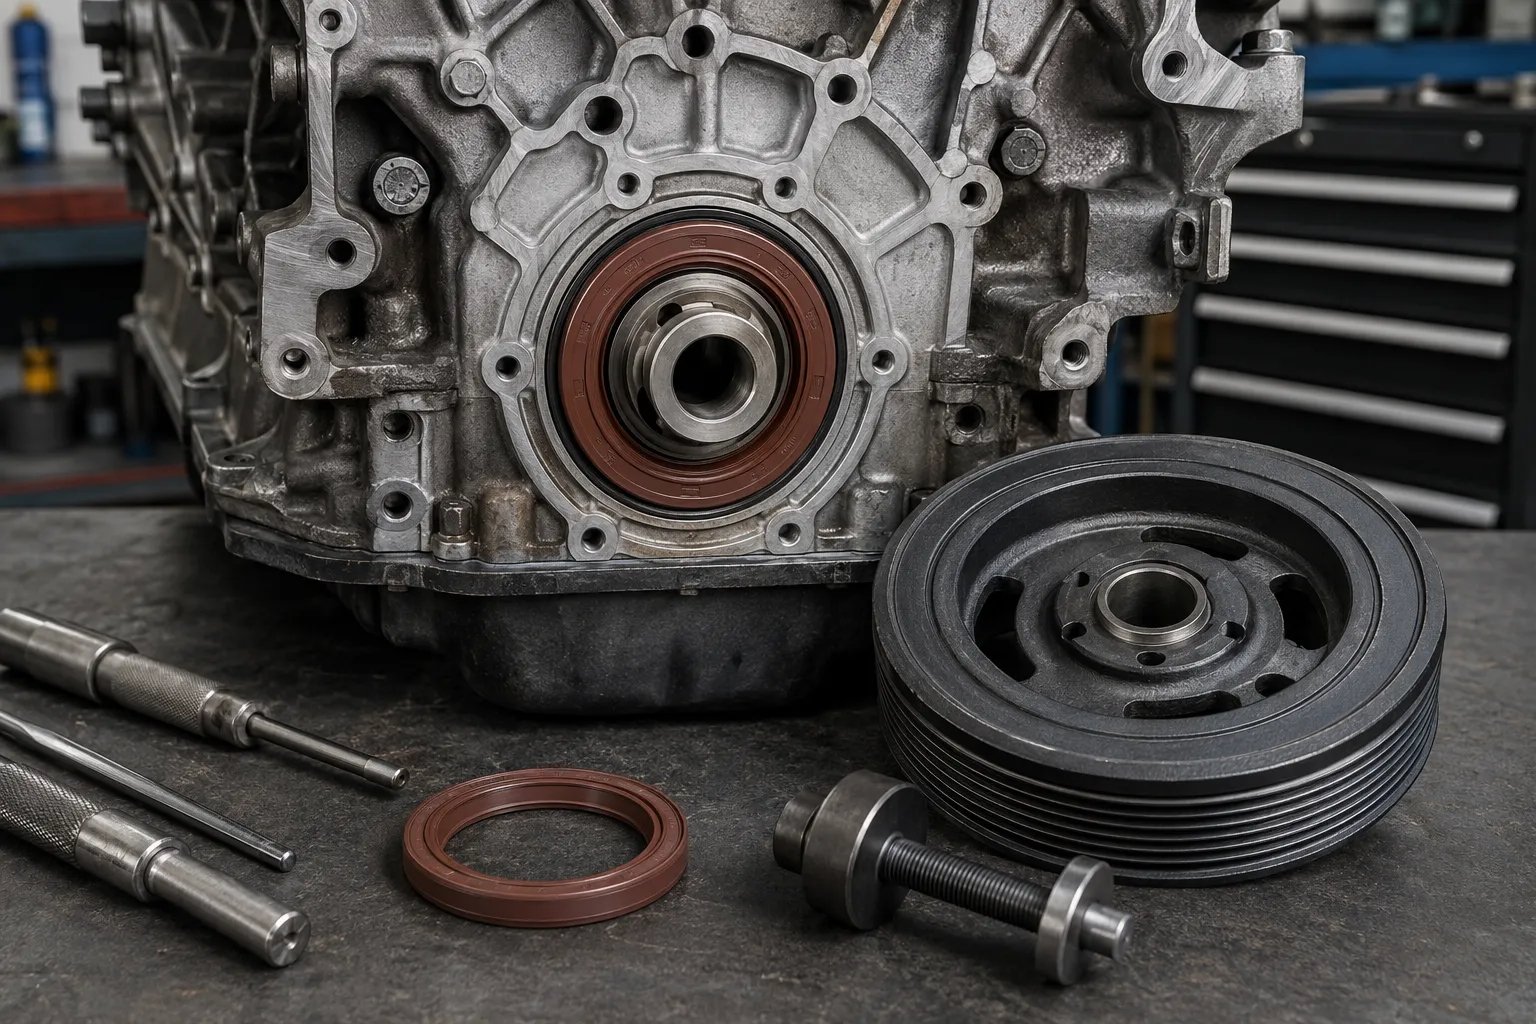
Although both components retain engine oil, their locations and replacement requirements differ. The distinction matters when diagnosing a leak, estimating repair labor, and sourcing the correct replacement part.
| Comparison | Front Crankshaft Seal | Rear Main Seal |
|---|---|---|
| Typical location | Crankshaft pulley and timing-drive end | Flywheel or flexplate end |
| Common evidence | Oil around the front cover, pulley, or timing area | Oil near the engine-to-transmission joint |
| Typical access | May require pulley, accessory drive, or timing-cover removal | May require transmission and flywheel or flexplate removal |
| Related inspection | Timing belt, sprocket, pulley, and front housing | Clutch, flywheel, flexplate, and rear housing joints |
| Primary repair consideration | Timing-drive access and seal installation depth | Transmission access and application-specific sealing design |
These are general comparisons rather than universal repair instructions. Some engines use integrated seal carriers, PTFE seals, two-piece rear seals, or other designs that require different procedures. Always consult the correct engine service information before disassembly.
How to Diagnose a Crankshaft Oil Seal Leak Correctly
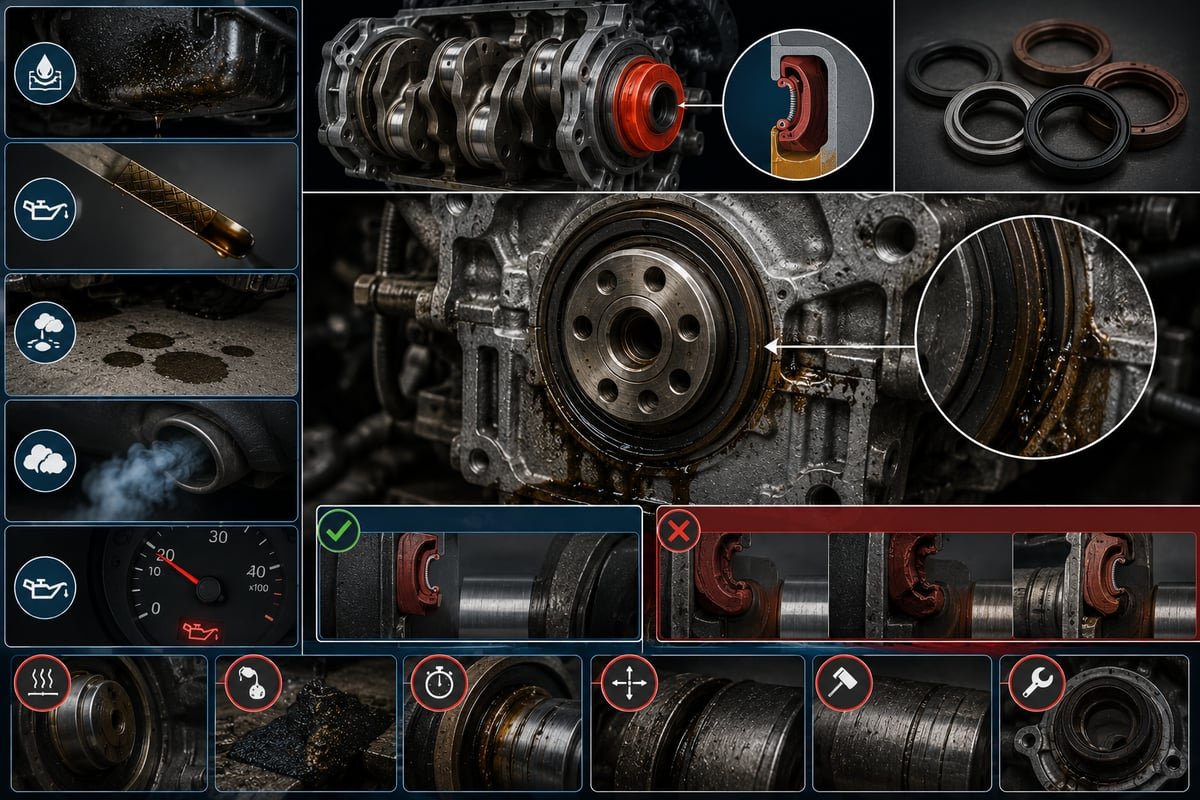
A structured diagnostic process helps prevent unnecessary parts replacement and repeated repairs. The following workflow is suitable as a general framework for workshops and maintenance teams, with all measurements and service operations performed according to the applicable engine documentation.
Step 1: Verify the Oil Source
Park the vehicle on a suitable level surface, follow the manufacturer’s safety procedure, and allow hot components to cool where necessary. Inspect the engine for oil trails, wet joints, accumulated dirt, and the highest point of fresh contamination.
Clean the suspected area using an appropriate method. If the source remains unclear, use an approved leak-detection dye or another manufacturer-recommended diagnostic method. Avoid directing high-pressure water or cleaning fluid into electrical connectors, intake openings, or other sensitive components.
Step 2: Check Engine Oil Level and Crankcase Ventilation
Confirm that the engine oil level and specification are correct. Inspect the PCV valve, breather hoses, and ventilation passages for restrictions or malfunction. If crankcase pressure appears abnormal, use the specified diagnostic test rather than replacing the seal immediately.
Also investigate conditions that could increase blow-by or affect crankcase pressure. A ventilation fault may be a relatively straightforward repair compared with replacing a rear main seal, which can require extensive disassembly.
Step 3: Inspect the Shaft and Housing
Once the seal is accessible, inspect the crankshaft contact surface for a circumferential wear groove, scratches, corrosion, and damage from previous removal attempts. Check the housing bore for burrs, contamination, scoring, and deformation.
Where the service information specifies dimensional checks, use suitable measuring equipment to verify shaft diameter, runout, or other relevant parameters. Do not substitute visual judgment for a required measurement.
Step 4: Review the Removed Seal
Examine the sealing lip for cuts, hardening, deformation, uneven contact, or a displaced garter spring where one is fitted. Check the outside diameter and metal case for installation marks or distortion.
Document the condition with photographs when investigating repeat failures or preparing a warranty claim. Seal damage can help identify whether the likely cause was installation, material degradation, contamination, or a mechanical defect, although a single damaged seal does not always establish the root cause.
Step 5: Confirm the Replacement Specification
Verify the engine code, vehicle application, original equipment part number, seal dimensions, and design. Confirm any updated part numbers or manufacturer-approved alternatives before placing the order.
For international buyers and distributors, the sourcing process should also confirm batch traceability, material identification, dimensional inspection requirements, and any applicable quality documentation. A visually similar seal should not be assumed interchangeable without engineering verification.
Selecting the Correct Replacement Crankshaft Oil Seal
Correct seal selection is essential for dependable service life. The replacement must be suitable for the actual application, not simply close to the dimensions of the old component.
Dimensions and Fit
Confirm the shaft diameter, housing bore diameter, seal width, and specified installation position. Incorrect interference fit can result in a loose seal, a distorted casing, or excessive installation force.
Where a seal uses an integrated carrier or requires a dedicated alignment tool, confirm that the complete assembly is compatible with the engine. The original part number remains a useful starting point, but application changes and superseded components must be checked.
Elastomer and Lubricant Compatibility
Engine oil formulations can contain additives that influence elastomer compatibility. Temperature exposure, oxidation, and long-term contact can further affect material behavior. Therefore, select NBR, FKM, PTFE, or another approved sealing material according to the application manufacturer’s specifications rather than a generalized material ranking.
For suppliers developing replacement programs, validate the seal against the intended lubricant, operating temperature, shaft speed, and relevant endurance requirements. Where the application is critical, request supporting technical data and compatibility evidence from the seal manufacturer.
Lip Design and Shaft Requirements
Conventional radial shaft seals may use a primary oil-retaining lip, a secondary dust lip, a garter spring, or a directional pumping feature. Specialized designs may use PTFE sealing elements or other low-friction configurations.
These features influence friction, lubricant retention, contamination exclusion, and installation requirements. A directional seal must be installed in the specified orientation, and a specialized lip design should not be replaced by a generic seal solely because the external dimensions match.
Environmental and Operating Conditions
For commercial vehicles, agricultural equipment, construction machinery, and industrial engines, consider extended operating hours, vibration, dust, temperature cycling, lubricant condition, and maintenance intervals. An application exposed to heavy contamination may need a different sealing arrangement from a passenger-car engine operating under normal road conditions.
When requesting a quotation from a seal manufacturer, provide the original part number, shaft and housing dimensions, material requirements, expected operating temperature, lubricant type, annual quantity, and relevant quality standards. This information supports more accurate technical evaluation and reduces the risk of incorrect procurement.
Step-by-Step Crankshaft Oil Seal Replacement Tips
Crankshaft seal replacement is application-specific. The following sequence outlines general principles for trained technicians; it does not replace the vehicle manufacturer’s repair manual, torque specifications, or prescribed safety procedures.
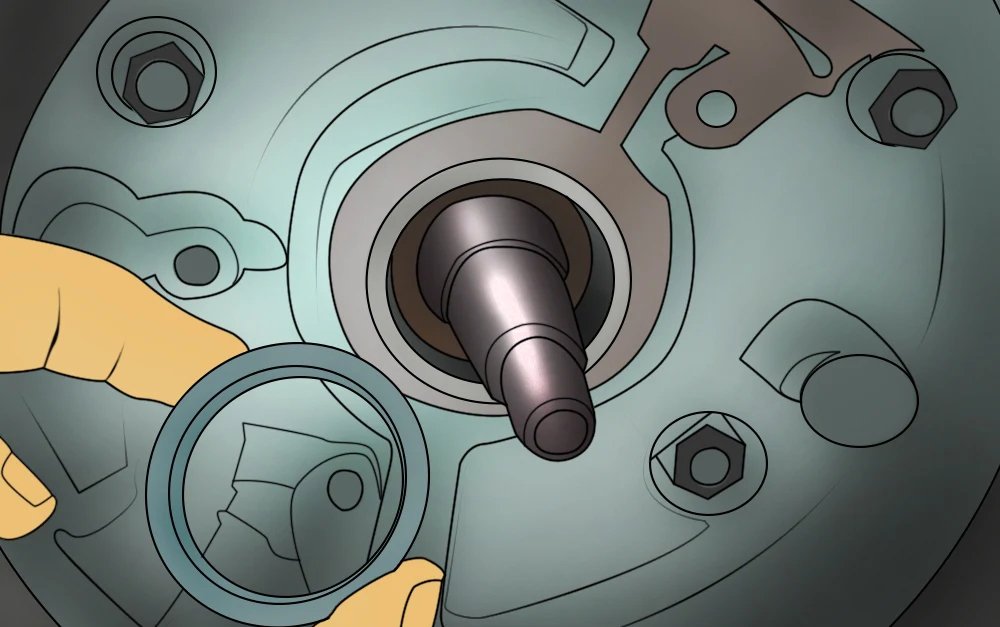
1. Prepare the Work Area and Confirm the Procedure
Obtain the correct service information, replacement seal, necessary gaskets, installation tools, and any required alignment sleeves before dismantling the engine. Disconnect the battery when specified, secure the vehicle appropriately, and follow the relevant procedures for handling the timing drive, starter circuit, and transmission.
For rear main seal replacement, determine whether the transmission, flywheel or flexplate, oil pan, rear seal carrier, or other components must be removed. For front seal replacement, identify any timing-system components that require special positioning or locking tools.
2. Remove the Old Seal Without Damaging the Shaft
Use an appropriate seal-removal tool and follow the manufacturer’s instructions. Avoid levering against a precision sealing surface or scratching the housing bore. Sharp damage to the crankshaft can create a leakage path that persists after the new seal is installed.
If the seal is fitted in a removable carrier, determine whether the carrier should be removed for controlled bench work. Replace damaged carrier gaskets or other disturbed sealing components as required by the service procedure.
3. Clean and Inspect the Installation Area
Remove old oil deposits, dirt, and loose sealant without allowing debris to enter the engine. Inspect the shaft, housing bore, and surrounding components before installation.
If the shaft has a deep wear groove, abnormal runout, or surface damage outside the permitted limits, address the condition using an approved repair method. Do not expect a replacement seal alone to compensate for a defective shaft.
4. Apply the Correct Lubrication Procedure
Conventional elastomer seals commonly require lubrication of the sealing lip before installation to prevent dry running during initial rotation. The specified lubricant and application method depend on the seal design and manufacturer instructions.
PTFE crankshaft seals are an important exception: many require a clean, dry crankshaft sealing surface and a dedicated installation sleeve. Applying oil to a PTFE lip when the manufacturer specifies dry installation can compromise sealing performance.
Installation rule: Never assume all crankshaft oil seals should be lubricated in the same way. Follow the instructions supplied for the exact replacement seal, including any requirement to retain a protective sleeve or allow a specified settling period before engine operation.
5. Install the Seal Squarely at the Specified Depth
Use the designated seal driver or installation fixture wherever required. Apply force evenly to the appropriate load-bearing portion of the seal and keep the component aligned with the housing.
Do not strike the sealing lip directly, distort the metal case, or force the seal beyond its specified seating position. Installation depth can affect the lip contact location and, on some designs, the interaction with nearby components.
For seals installed over a sharp shaft shoulder, keyway, or other feature, use the prescribed protective sleeve or installation aid. Remove temporary protection only at the stage specified in the instructions.
6. Follow Design-Specific Instructions for Rear Main Seals
Rear main seal assemblies may use a one-piece rubber or PTFE seal, a two-piece seal, a rope seal, or an integrated carrier. These designs are not interchangeable in terms of installation technique.
Some two-piece designs require a specified offset between the seal ends and the engine block or bearing-cap joint. Certain applications also require sealant at designated joints, while others prohibit additional sealant near the sealing lip. Apply sealant only where the manufacturer specifies it, and use the prescribed quantity and curing procedure.
Fel-Pro’s rear main seal installation guide explains why installation requirements differ between one-piece, two-piece, and rope-style rear seals. Use it as a general technical reference alongside the correct engine service manual.
7. Reassemble and Verify Related Components
Reinstall the removed components according to the specified sequence, torque values, and alignment requirements. Confirm that timing marks, crankshaft position, and any disturbed belt or chain components are correct before attempting to start the engine.
Inspect the timing belt or other nearby components for oil contamination and replace affected parts when required. At the rear of the engine, assess the flywheel, flexplate, and clutch components where applicable.
8. Perform a Controlled Leak Check
After reassembly, confirm the oil level and follow the manufacturer’s startup procedure. Where specified, establish oil pressure before allowing the engine to run normally. Inspect the repair area under appropriate operating conditions and recheck for fresh leakage.
Some specialized seals require a particular settling period or operating procedure before final inspection. Follow the component instructions and document the repair results, including any relevant pressure measurements or evidence of residual leakage.
Common Installation Mistakes That Shorten Seal Life
| Mistake | Possible Consequence | Preventive Measure |
|---|---|---|
| Installing the wrong seal | Poor fit, lip misalignment, or persistent leakage | Verify the part number and application dimensions |
| Damaging the lip during removal or fitting | Immediate leakage or premature failure | Use suitable removal tools and installation sleeves |
| Installing the seal at an angle | Uneven lip loading and distorted seating | Use a correctly sized driver and maintain alignment |
| Incorrect lubrication | Dry-running damage or installation-related leakage | Follow the specific material and seal instructions |
| Ignoring a worn shaft | Repeated leakage at the same contact track | Inspect surface condition and verify required dimensions |
| Leaving excessive crankcase pressure unresolved | Leakage through the replacement seal | Test the PCV and crankcase ventilation system |
When Should a Crankshaft Oil Seal Be Replaced?
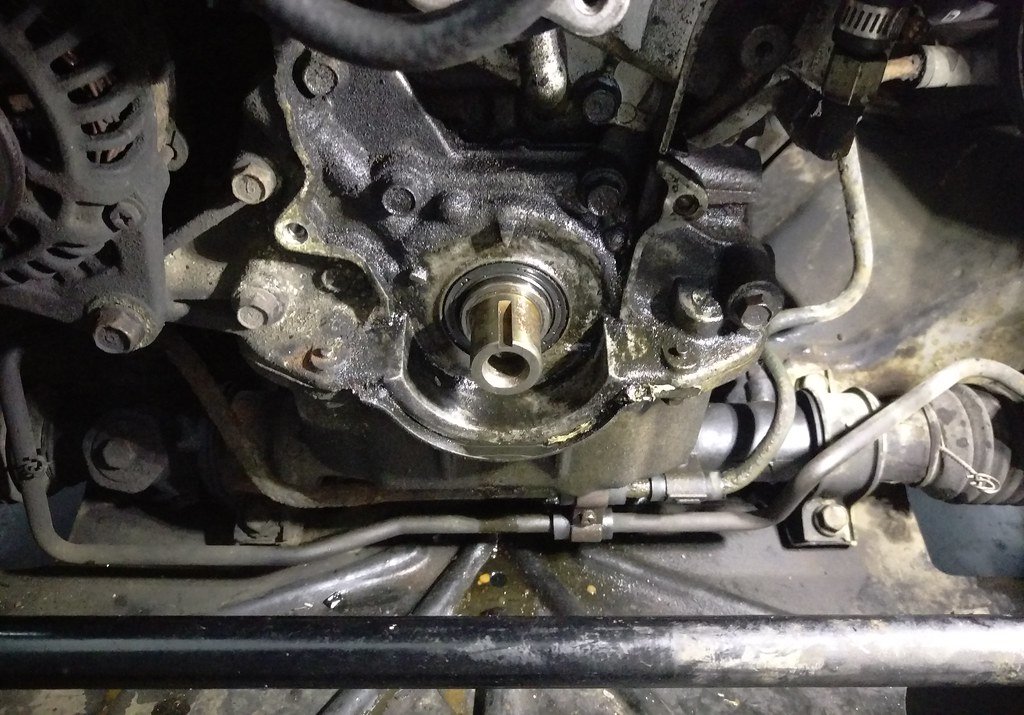
Replacement is generally appropriate when the seal is confirmed to be leaking, its sealing lip is damaged, the elastomer has deteriorated, or the component no longer meets the applicable service requirements.
There is no universal replacement mileage that applies to every engine. Seal service life depends on the compound, engine design, operating temperature, lubricant, shaft condition, and maintenance environment. Use the vehicle manufacturer’s maintenance recommendations and condition-based inspection findings rather than an arbitrary interval.
Consider prompt professional attention when any of the following occurs:
- Oil leakage increases rapidly or the engine oil level drops unexpectedly.
- Oil reaches a timing belt or another component whose operation may be compromised by contamination.
- A rear main seal leak is suspected and oil may have reached the clutch friction surface.
- A burning-oil smell or smoke suggests that leaking oil is contacting hot components.
- A recently replaced seal continues to leak, indicating a possible underlying mechanical or installation problem.
For commercial fleets and industrial equipment, maintenance planning should consider the cost of access, downtime, secondary damage, and the consequences of oil loss. A small leak may not require the same immediate response in every application, but it should always be assessed against the equipment manufacturer’s operating and safety requirements.
Crankshaft Oil Seal Procurement for Global B2B Buyers
For automotive parts distributors, repair networks, OEM purchasing teams, and aftermarket importers, sourcing the correct crankshaft oil seal involves more than comparing price and outside dimensions. Product compatibility, repeatable quality, traceability, and reliable technical support all influence long-term supply performance.
Information to Provide When Requesting a Quotation
- Application identification: Vehicle make, model, year, engine code, equipment model, and original equipment part number.
- Dimensional requirements: Shaft diameter, housing bore, seal width, and specified installation depth.
- Material requirements: Approved elastomer or PTFE design, lubricant compatibility, and operating temperature range.
- Operating conditions: Shaft speed, pressure conditions, dust exposure, vibration, and expected duty cycle.
- Quality documentation: Relevant material identification, dimensional inspection records, batch traceability, and agreed acceptance criteria.
- Commercial requirements: Forecast annual demand, order quantity, packaging, labeling, delivery destination, and any customer-specific documentation.
For technically demanding applications, ask the supplier to identify the basis of its material recommendation and clarify whether the proposed seal is an original equipment part, a verified equivalent, or a custom-engineered component. Any claim of interchangeability should be supported by application data rather than appearance alone.
Quality Checks for Replacement Seal Suppliers
A consistent supplier qualification process should evaluate dimensional conformity, material consistency, visual workmanship, sealing-lip condition, packaging protection, and lot traceability. For high-volume programs, agree on the relevant inspection methods, sampling plans, defect classification, and corrective-action process before production approval.
Depending on the application, additional testing may be appropriate to assess thermal aging, lubricant compatibility, leakage performance, friction, or endurance under representative operating conditions. Testing should reflect the actual service environment and the customer’s technical acceptance criteria.
Storage and handling also matter. Protect seals from contamination, excessive heat, direct sunlight, deformation, and incompatible chemicals. Follow the seal manufacturer’s storage guidance, particularly for long-term inventory and elastomer components sensitive to environmental exposure.
For further engineering reference, the SKF CR Seals Handbook discusses rotary shaft seal selection and failure analysis, while Fel-Pro’s rear main seal technical information covers design differences and material considerations for automotive replacement applications.
Frequently Asked Questions
1. Can I Drive With a Leaking Crankshaft Oil Seal?
It depends on the leakage rate, oil level, warning indicators, and risk to nearby components. A minor seep may allow time for a controlled repair, but rapid oil loss, low oil pressure, smoke, or oil contamination of the timing belt requires immediate attention. Stop safely and follow the vehicle manufacturer’s guidance whenever continued operation could damage the engine or create a safety hazard.
2. How Can I Tell Whether the Front or Rear Crankshaft Oil Seal Is Leaking?
A front seal leak often produces fresh oil near the crankshaft pulley, front cover, or timing-drive area. A rear main seal leak may produce oil near the engine-to-transmission joint. These locations are diagnostic clues rather than proof. Clean the area, trace the source of fresh oil, and rule out nearby gaskets, housings, and other fluid leaks before replacing either seal.
3. Why Does a New Crankshaft Oil Seal Leak After Replacement?
Common causes include an incorrect part, damaged sealing lip, improper installation depth, incorrect lubrication, shaft wear, excessive crankcase pressure, or a damaged housing. PTFE seals may also leak if installed using a procedure intended for conventional rubber seals. Review the exact installation instructions and inspect the underlying engine conditions before fitting another replacement.
4. Which Material Is Best for a Crankshaft Oil Seal: NBR, FKM, or PTFE?
There is no universally best material. NBR is widely used for conventional oil-sealing applications, FKM may be suitable for higher-temperature or chemically demanding conditions, and PTFE designs can offer specific friction and operating advantages. Actual suitability depends on the lubricant, temperature, shaft speed, seal geometry, and installation requirements. Confirm compatibility against the engine manufacturer’s specifications and the seal supplier’s technical data.
5. What Information Is Needed to Order the Correct Crankshaft Oil Seal in Bulk?
Provide the original equipment part number, engine or equipment identification, shaft and housing dimensions, seal width, material requirements, operating temperature, lubricant type, and expected order quantity. For international B2B procurement, also confirm quality documentation, batch traceability, packaging, delivery requirements, and whether the proposed replacement has been verified for the intended application.
Need Help Selecting a Crankshaft Oil Seal?
For automotive aftermarket distributors, repair workshops, OEM purchasing teams, and industrial equipment buyers, accurate application data is the starting point for a dependable replacement solution. Confirming the seal design, material, dimensions, lubricant compatibility, and installation requirements can help reduce fitment errors and prevent avoidable repeat repairs.
If you are sourcing crankshaft oil seals for a specific engine or equipment application, prepare the part number, drawings or dimensions, operating conditions, and estimated order quantity before contacting a qualified manufacturer or supplier for technical review.