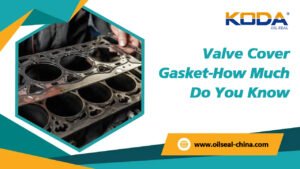
A valve cover gasket is a small but essential engine sealing component. Installed between the valve cover and the cylinder head, it prevents engine oil from escaping from the upper part of the engine while helping protect the valve train and surrounding components from contamination.
For automotive parts distributors, repair workshops, fleet maintenance teams, and engine manufacturers, understanding valve cover gasket materials, failure symptoms, fitment requirements, and installation practices is important for selecting the right replacement part and reducing repeat oil leaks.
Technical takeaway: A valve cover gasket should be selected according to the engine application, sealing groove design, operating temperature, oil exposure, and required compression. A gasket that physically fits may still fail if its material or cross-section is unsuitable.
What Is a Valve Cover Gasket and Where Is It Installed?
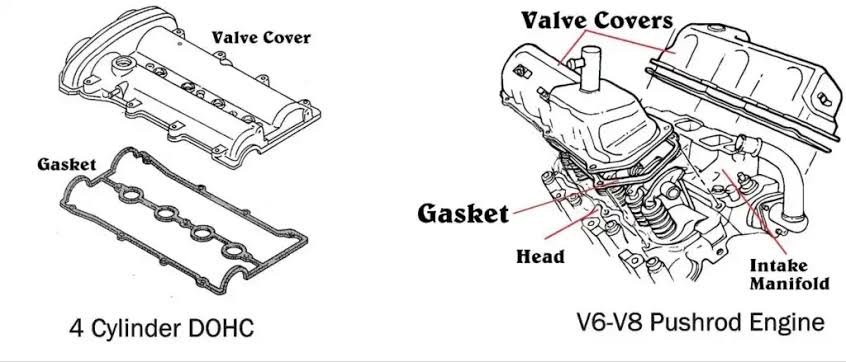
A valve cover gasket is a static sealing element fitted between the valve cover and the cylinder head. Depending on the engine design, the component may also be called a rocker cover gasket or cam cover gasket.
The valve cover encloses the upper valve train area, which may contain camshafts, rocker arms, valve springs, and other moving components. Engine oil circulates through this area to lubricate critical parts. The gasket creates a sealed joint around the cover perimeter and, on some engines, around spark plug wells and individual fastener openings.
Unlike a rotating shaft oil seal, a valve cover gasket does not seal against continuous rotational movement. It works through controlled compression between two stationary mating surfaces. Its performance therefore depends on gasket geometry, material resilience, surface condition, and correct bolt loading.
Main sealing locations
- Perimeter sealing area: Prevents engine oil from escaping around the joint between the valve cover and cylinder head.
- Spark plug tube seals: Where fitted, prevent oil from entering spark plug wells.
- Fastener seals and grommets: Seal around valve cover bolts on designs that use separate rubber washers or grommets.
- Joint intersections: Certain engine designs require a small amount of specified sealant at corners or where separate castings meet.
What Does a Valve Cover Gasket Do?
Although the gasket is not responsible for controlling oil pressure inside the engine, it performs several important functions that support engine reliability and cleanliness.
Oil leak prevention
Maintains a seal around the valve cover joint and helps prevent oil from reaching the engine exterior, exhaust components, and nearby electrical parts.
Contamination control
Helps keep dust, moisture, and other external contaminants from entering the enclosed valve train area.
Thermal movement accommodation
Maintains sealing contact as engine components expand and contract during repeated heating and cooling cycles.
Service accessibility
Allows technicians to remove the valve cover for inspection and maintenance and then restore the seal with the correct gasket.
A leaking valve cover gasket should not be ignored. Oil can accumulate around ignition components, create burning-oil odors when it contacts hot exhaust surfaces, and contribute to smoke or fire risk in severe cases. Oil loss can also become significant if the leak is left untreated.
Common Valve Cover Gasket Materials
Valve cover gaskets are manufactured from different elastomers and composite materials. There is no single material that is suitable for every engine. The correct choice depends on the original equipment design, oil compatibility, temperature exposure, flange geometry, and required compression behavior.
Rubber and molded elastomer
Molded rubber gaskets are widely used in modern passenger vehicles and commercial engines. They can be manufactured with precise profiles, locating features, and integrated sealing beads to match the valve cover groove.
Depending on the formulation, elastomer gaskets can provide good resistance to engine oil, heat, vibration, and repeated compression. Material selection must still be verified against the actual engine oil and operating temperature.
Silicone rubber
Silicone rubber is valued for its ability to maintain flexibility over a broad temperature range. It is used in certain valve cover gasket designs, particularly where heat resistance and elastic recovery are important.
However, silicone is not automatically the best choice for every engine. Its mechanical strength, compression behavior, and compatibility with the sealing groove must be considered alongside temperature performance.
Cork-rubber composite
Cork-rubber combines compressible cork particles with an elastomer binder. It is used in some traditional engine designs and can conform to certain flange surfaces under the specified clamping load.
Its suitability depends on the original cover design and the condition of the mating surfaces. Excessive tightening can cause permanent deformation, while incorrect storage or aging can reduce its sealing performance.
Other engineered composite materials
Some applications use multi-layer or reinforced gasket constructions designed to improve dimensional stability, installation control, or resistance to extrusion. Certain premium designs incorporate a rigid carrier with molded elastomer sealing beads and compression limiters.
| Material type | Typical characteristics | Selection considerations |
|---|---|---|
| Molded rubber | Flexible, application-specific profiles and sealing beads | Oil compatibility, compression, and groove fit |
| Silicone rubber | Good flexibility across a broad temperature range | Mechanical strength and engine-specific validation |
| Cork-rubber | Compressible composite construction | Flange design, compression limits, and aging |
| Reinforced composite | Can provide dimensional support and controlled sealing geometry | Carrier design, sealing bead profile, and fastener loading |
Important for buyers: Do not specify a replacement gasket by material name alone. Request the exact compound designation, hardness range where applicable, temperature limits, oil compatibility information, and dimensional drawing from the manufacturer.
Common Symptoms of a Faulty Valve Cover Gasket
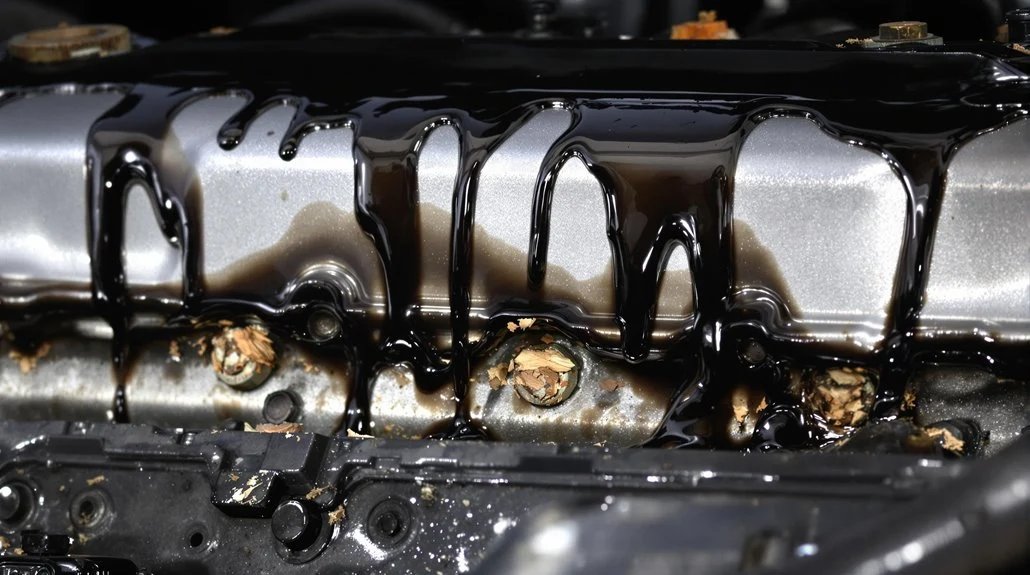
A valve cover gasket usually deteriorates gradually through heat exposure, compression set, aging, and mechanical stress. Recognizing the early symptoms can help prevent secondary damage and unnecessary repairs.
Visible oil around the valve cover
Oil wetness or fresh oil residue along the perimeter of the valve cover is a common warning sign. Before replacing the gasket, clean the area and confirm the leak source. Oil from a nearby component can travel along the engine surface and appear to originate from the valve cover.
Burning oil smell or smoke
When engine oil leaks onto a hot exhaust manifold or other hot engine components, it can produce a noticeable burning-oil odor or visible smoke. This condition should be investigated promptly because oil contacting hot surfaces can create a fire hazard.
Oil inside spark plug wells
On engines equipped with spark plug tube seals, deterioration of these seals can allow oil to collect around the spark plugs or ignition coils. Possible consequences include ignition misfires, damaged coil boots, and difficult spark plug removal.
Oil level gradually decreasing
A damaged valve cover gasket may contribute to oil consumption through external leakage. However, low oil level is not proof of a valve cover gasket failure. Other possible causes include oil pan leaks, crankshaft seals, turbocharger oil leaks, and internal oil consumption.
Oil residue around fasteners
Oil near valve cover bolts may indicate damaged bolt grommets, missing sealing washers, or an incorrectly installed gasket. Some designs use dedicated fastener seals, so replacing only the perimeter gasket may not resolve the leak.
Diagnostic caution: A leaking valve cover gasket does not normally cause an immediate loss of engine oil pressure. If an oil pressure warning light appears, stop the engine when safe and investigate the lubrication system separately rather than assuming the valve cover gasket is the cause.
Why Do Valve Cover Gaskets Fail?
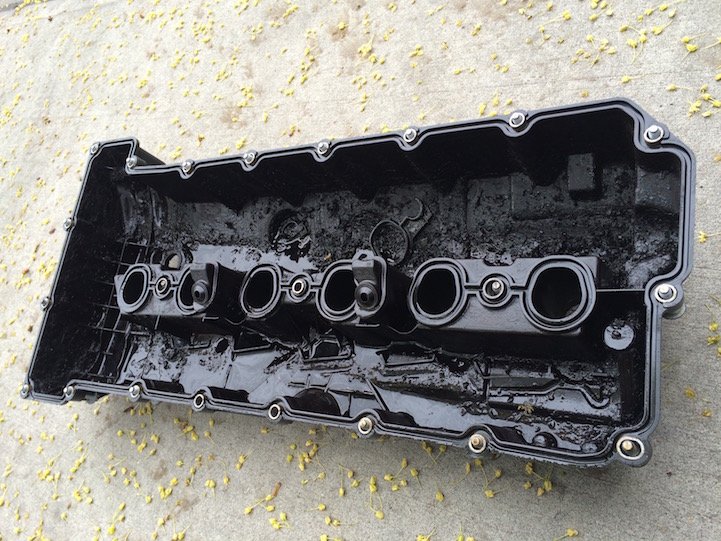
Understanding the failure mechanism is essential when choosing replacement parts and investigating repeat leakage. Replacing the gasket without correcting the underlying problem may result in another failure.
Heat aging and hardening
Repeated exposure to engine heat can change the physical properties of elastomer materials. Depending on the compound and operating conditions, the gasket may harden, lose elasticity, crack, or become less capable of recovering after compression.
Compression set
Valve cover gaskets are compressed when the fasteners are tightened. Over time, some materials develop compression set and cannot fully recover their original thickness after the clamping load changes. Reduced contact pressure can create a leakage path.
Incorrect installation
A gasket that is twisted, pinched, stretched incorrectly, or not seated in its groove may leak shortly after installation. Dirt, old sealant, and oil on surfaces that require dry installation can also interfere with sealing.
Over-tightened or uneven fasteners
Excessive bolt torque can distort a thin valve cover, damage threads, crush the gasket, or cause the gasket to split. Uneven tightening can create inconsistent compression around the sealing perimeter.
Damaged mating surfaces
Scratches, corrosion, cracks, warped flanges, and damaged gasket grooves can prevent a new gasket from sealing correctly. Replacing the gasket alone will not repair a distorted or cracked cover.
Excessive crankcase pressure
A restricted or malfunctioning crankcase ventilation system can increase crankcase pressure and contribute to oil leakage at multiple sealing points. If a new gasket leaks again soon after installation, inspect the PCV system, hoses, and ventilation passages instead of repeatedly tightening the cover bolts.
How to Inspect and Diagnose a Valve Cover Gasket Leak
A systematic inspection helps distinguish gasket failure from leaks originating elsewhere on the engine.
- Check the oil level. Park the vehicle on a level surface and follow the manufacturer’s procedure for checking engine oil. Correct the level if necessary using the specified oil.
- Inspect the upper engine. Look for fresh oil around the valve cover perimeter, fasteners, spark plug wells, and nearby components.
- Clean the suspected area. Remove accumulated oil and dirt using an appropriate engine-safe cleaning method. Avoid directing high-pressure water at electrical components.
- Recheck for fresh leakage. After cleaning, operate the engine according to safe workshop procedures and inspect the area again. A suitable UV oil dye may help locate difficult leaks when approved for the application.
- Inspect related sealing points. Check spark plug tube seals, bolt grommets, PCV connections, and nearby components that could be mistaken for a valve cover leak.
- Check the cover and mating surfaces. During disassembly, inspect for warpage, cracks, damaged grooves, corrosion, and old sealant residue.
For difficult-to-access engines, professional diagnosis may be appropriate. Always follow vehicle-specific safety instructions, especially when working near ignition systems, fuel components, hot exhaust parts, or moving engine components.
How to Replace a Valve Cover Gasket Correctly
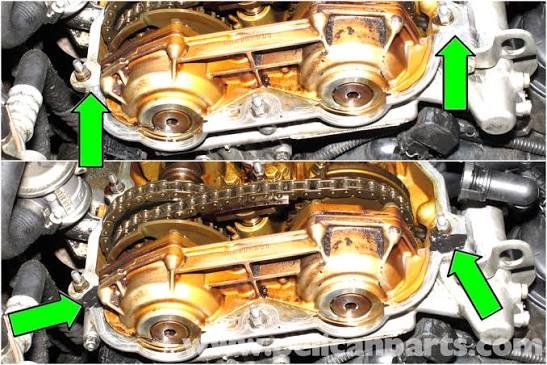
Correct installation is just as important as gasket quality. The following workflow provides a general workshop reference. The vehicle manufacturer’s service manual must take priority because gasket designs, bolt sequences, torque values, and sealant requirements vary significantly between engines.
Step 1: Confirm the correct replacement part
Verify the vehicle identification, engine code, model year, and original equipment part number. Check whether the replacement kit includes spark plug tube seals, bolt grommets, and other application-specific components.
Step 2: Allow the engine to cool
Work on a cool engine unless the vehicle-specific procedure states otherwise. This reduces burn risk and helps prevent damage caused by handling hot components.
Step 3: Remove the valve cover carefully
Disconnect or move the components specified in the service procedure. Keep dirt and loose debris out of the exposed valve train. Remove the fasteners in the recommended sequence and lift the cover without damaging the sealing flange.
Step 4: Remove the old gasket and clean the surfaces
Remove the old gasket and all residue from the valve cover groove and cylinder head sealing surface. Use tools that will not scratch or gouge aluminum or other soft sealing surfaces. Make sure no debris falls into the engine.
Step 5: Inspect the valve cover and related seals
Check the cover for cracks, distortion, damaged bolt holes, and worn gasket grooves. Inspect spark plug tube seals and bolt grommets where applicable. Replace damaged components rather than expecting the new perimeter gasket to compensate for them.
Step 6: Position the new gasket
Install the gasket in the correct orientation and ensure it is fully seated in the designated groove. Do not stretch or twist it unless the specific gasket design requires a controlled stretch-in-place procedure.
Step 7: Apply sealant only where specified
Many modern molded valve cover gaskets are designed to be installed clean and dry. Some engine designs require a small amount of specified RTV sealant at joints such as camshaft cap corners or where separate castings meet. Apply sealant only at the locations and in the quantity stated in the service instructions.
Do not coat the entire gasket with RTV unless the vehicle or gasket manufacturer specifically requires it. Excess sealant can interfere with gasket seating and may squeeze into oil passages.
Step 8: Tighten the fasteners to specification
Install the cover without disturbing the gasket. Tighten fasteners in the specified sequence and to the exact torque value for the engine. If a sequence is not provided, do not assume a universal pattern; consult the service information for that application.
Step 9: Reassemble and check for leaks
Reconnect all removed components, hoses, and electrical connectors. Start the engine and inspect the sealing area using the manufacturer’s recommended checking procedure. Confirm that there is no fresh oil leakage, abnormal noise, or warning light.
Installation mistakes to avoid
- Reusing a gasket that is cracked, hardened, swollen, or permanently deformed.
- Installing a gasket that does not match the original groove profile.
- Leaving old gasket material or oil on surfaces that require clean, dry installation.
- Applying excessive RTV or using an incompatible sealant.
- Over-tightening fasteners in an attempt to stop a leak.
- Ignoring damaged bolt grommets, spark plug tube seals, or a warped valve cover.
How Tight Should Valve Cover Bolts Be?
There is no universal valve cover bolt torque specification. The correct value depends on the engine, fastener size, cover construction, gasket design, and whether the fasteners use torque-limiting features.
Many valve cover fasteners require relatively low torque compared with major engine fasteners. Applying an assumed generic value can strip aluminum threads, deform a stamped steel cover, damage rubber grommets, or cause gasket leakage.
Use a calibrated torque wrench and follow the manufacturer’s specified tightening sequence. Where the service procedure specifies a staged tightening process, follow each stage exactly. Do not apply additional torque simply because a leak is visible; diagnose the source of the leak first.
For practical installation guidance, see Fel-Pro’s valve cover gasket installation guide, which explains gasket positioning, sealant locations, and tightening practices.
How Long Does a Valve Cover Gasket Last?
Valve cover gasket service life varies considerably. Engine operating temperature, oil chemistry, driving conditions, material formulation, installation quality, and maintenance history all influence durability.
For this reason, a fixed replacement interval based only on mileage is not reliable for every vehicle. Some gaskets remain serviceable for many years, while others may deteriorate earlier under severe heat or demanding operating conditions.
Instead of replacing every valve cover gasket at an arbitrary mileage, follow the vehicle manufacturer’s maintenance recommendations and inspect the sealing area during routine service. Replace the gasket when leakage, physical deterioration, or another confirmed defect is present.
Factors that influence service life
- Repeated high-temperature exposure and thermal cycling.
- Oil formulation and compatibility with the gasket compound.
- Engine vibration and mechanical movement.
- Crankcase ventilation condition and operating pressure.
- Gasket compression, cover rigidity, and fastener loading.
- Correct installation, storage, and handling before assembly.
How to Choose the Right Valve Cover Gasket for Your Application
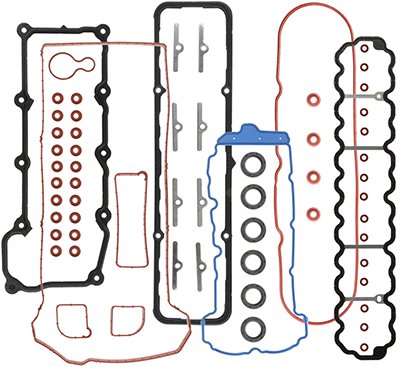
For repair shops, wholesalers, importers, and automotive parts distributors, selecting a valve cover gasket requires more than matching its external shape. A technically suitable replacement must match the engine’s sealing architecture and operating environment.
Confirm vehicle and engine compatibility
Start with the vehicle make, model, production year, engine displacement, engine code, and original equipment part number. Similar engines may use different valve covers or gasket profiles across production years and markets.
Check the gasket dimensions and profile
Verify the overall length and width, cross-sectional dimensions, bolt-hole positions, spark plug tube openings, locating tabs, and groove engagement features. For molded gaskets, the profile must match the cover’s sealing channel.
Evaluate material performance
Ask the manufacturer for the material specification, hardness where relevant, compression behavior, temperature limits, and compatibility with the intended engine oil. Material suitability should be supported by application testing or validated engineering data.
Review the complete gasket kit
Check whether the application requires additional spark plug tube seals, bolt grommets, sealing washers, or other components. A complete repair kit can reduce the risk of leaving an associated leak point unaddressed.
Assess manufacturing and quality control
For B2B sourcing, evaluate dimensional inspection, material traceability, batch consistency, production controls, packaging, and the supplier’s ability to manage application-specific drawings and revisions.
| Procurement checkpoint | Information to request |
|---|---|
| Application identification | OE number, engine code, vehicle fitment list |
| Material specification | Compound type, hardness, temperature and oil compatibility data |
| Dimensional control | Engineering drawing, critical dimensions, tolerances |
| Quality assurance | Inspection records, batch identification, test documentation |
| Packaging and supply | Part labeling, protective packaging, MOQ, lead time, and customization options |
Storage and Handling Recommendations for Distributors
Even a correctly manufactured valve cover gasket can be damaged before installation if it is stored or handled improperly. This is particularly important for distributors managing multiple materials, part numbers, and long inventory cycles.
- Keep products in their original packaging: Protect gaskets from dust, dirt, moisture, and accidental deformation.
- Avoid excessive compression: Do not place heavy objects on flexible gasket products or force them into undersized storage containers.
- Control storage conditions: Follow the material supplier’s recommendations for temperature, humidity, light exposure, and shelf life.
- Separate and identify part numbers: Use clear labels to prevent incorrect fitment during picking and distribution.
- Inspect before shipment: Check for visible cracks, deformation, contamination, damaged packaging, and incorrect labeling.
- Maintain batch traceability: Retain relevant production and inspection information to support quality investigations and customer service.
Why Work with a Specialized Valve Cover Gasket Supplier?
For international automotive parts buyers, a reliable supplier should provide more than a competitive unit price. Product consistency, correct fitment, technical communication, and dependable delivery are essential to maintaining customer confidence.
When evaluating a valve cover gasket manufacturer, consider the following capabilities:
- Experience with automotive sealing products and application-specific gasket designs.
- Ability to manufacture products according to supplied OE references, drawings, or samples.
- Material selection support based on the intended operating environment.
- Dimensional inspection and consistent batch quality.
- Support for product labeling, export packaging, and private-label requirements where available.
- Clear communication about MOQ, production lead time, sample approval, and order specifications.
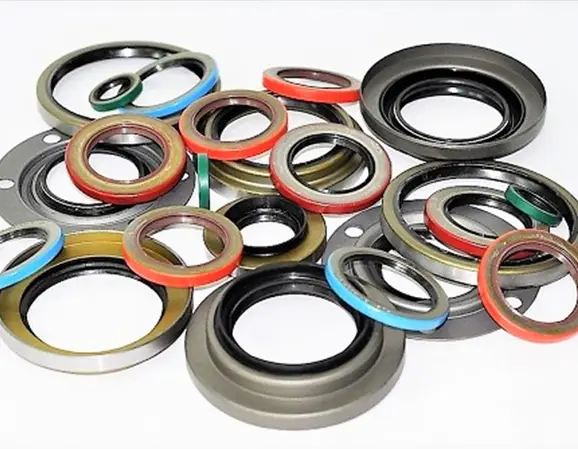
KODA Oil Seal provides a range of automotive sealing products, including valve cover gasket products. Buyers can review the available product information and contact the supplier to confirm application compatibility, specifications, and sourcing requirements.
Request Valve Cover Gasket Information
Looking for a valve cover gasket supplier for aftermarket distribution, vehicle maintenance, or OEM-related sourcing? Share your OE part number, engine application, technical drawing, or sample requirements to help identify the appropriate product.
Frequently Asked Questions About Valve Cover Gaskets
Q1: Can I drive with a leaking valve cover gasket?
A minor leak may not cause immediate engine failure, but continued driving can allow oil to reach hot exhaust components, ignition parts, or other sensitive areas. Severe leakage can also reduce the engine oil level. Have the leak inspected promptly, monitor the oil level, and stop driving if there is significant smoke, an oil pressure warning, or evidence of oil contacting hot components.
Q2: Does a valve cover gasket need RTV silicone during installation?
Not always. Many modern molded valve cover gaskets are designed to be installed clean and dry. Some engine designs require a small amount of specified RTV at particular joints or corners. Follow the vehicle service manual and gasket manufacturer’s instructions rather than applying sealant to the entire gasket.
Q3: Why does my new valve cover gasket still leak?
Possible causes include incorrect part fitment, a gasket that is not fully seated, damaged sealing surfaces, a warped valve cover, incorrect bolt torque, damaged spark plug tube seals, or excessive crankcase pressure. Check the entire sealing system before installing another gasket.
Q4: Can I reuse an old valve cover gasket?
Reuse is generally not recommended when the gasket is hardened, cracked, swollen, torn, or permanently compressed. Some manufacturers may permit reuse under specific conditions, but the service manual must explicitly support that practice. For routine replacement work, a new application-correct gasket is usually the safer choice.
Q5: How do I identify the correct valve cover gasket for an engine?
Use the vehicle make, model, production year, engine code, and OE part number as the starting point. Confirm the gasket profile, dimensions, bolt-hole layout, spark plug tube openings, material specification, and kit contents. When sourcing for multiple markets, verify fitment against the exact engine variant rather than relying only on vehicle model names.
Technical References and Further Reading
The following resources provide additional technical information on valve cover gasket construction, installation, and sealing practices:
- Fel-Pro – How to Install a Valve Cover Gasket: Installation steps, gasket positioning, RTV application, and tightening sequence guidance.
- Fel-Pro – Valve Cover Gasket Sets: Examples of molded rubber, rigid-carrier, and cork-rubber gasket constructions.
- Fel-Pro – Tips for Installing Press-in-Place Valve Cover Gaskets: Practical information about gasket seating, spark plug tube seals, and grommets.
- Fel-Pro – Installing a Stretch Valve Cover Gasket: An application-specific example showing why some gasket designs require special installation procedures.
Final recommendation: Reliable valve cover sealing depends on the combination of correct material, accurate dimensions, sound mating surfaces, controlled compression, and application-specific installation. For repair professionals and B2B buyers, verifying these factors before purchasing or installing a gasket is the most effective way to reduce repeat leakage and improve long-term sealing performance.