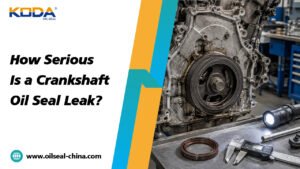
A crankshaft oil seal leak should never be judged by the size of the oil spot alone. A small leak at the front crankshaft seal may spread across the timing cover and drive belt area, while a rear crankshaft seal leak can contaminate the clutch or torque converter housing. In either case, the real risk depends on the rate of oil loss, engine operating conditions, the source of the leak, and whether the underlying cause is still present.
For vehicle owners, repair workshops, engine rebuilders, parts distributors, and OEM purchasing teams, accurate diagnosis is essential. Replacing the crankshaft oil seal without checking crankcase ventilation, shaft condition, seal installation, and adjacent sealing surfaces can lead to repeat leakage. This guide explains how serious a crankshaft oil seal leak can become, how to identify its source, and how to select and install a suitable replacement.
Important service advice: If the engine oil pressure warning light is on, the dipstick shows oil below the minimum mark, or oil is leaking rapidly onto hot exhaust components, stop the engine when it is safe to do so. Do not continue driving simply because the vehicle still runs normally.
What Is a Crankshaft Oil Seal and Why Does It Matter?
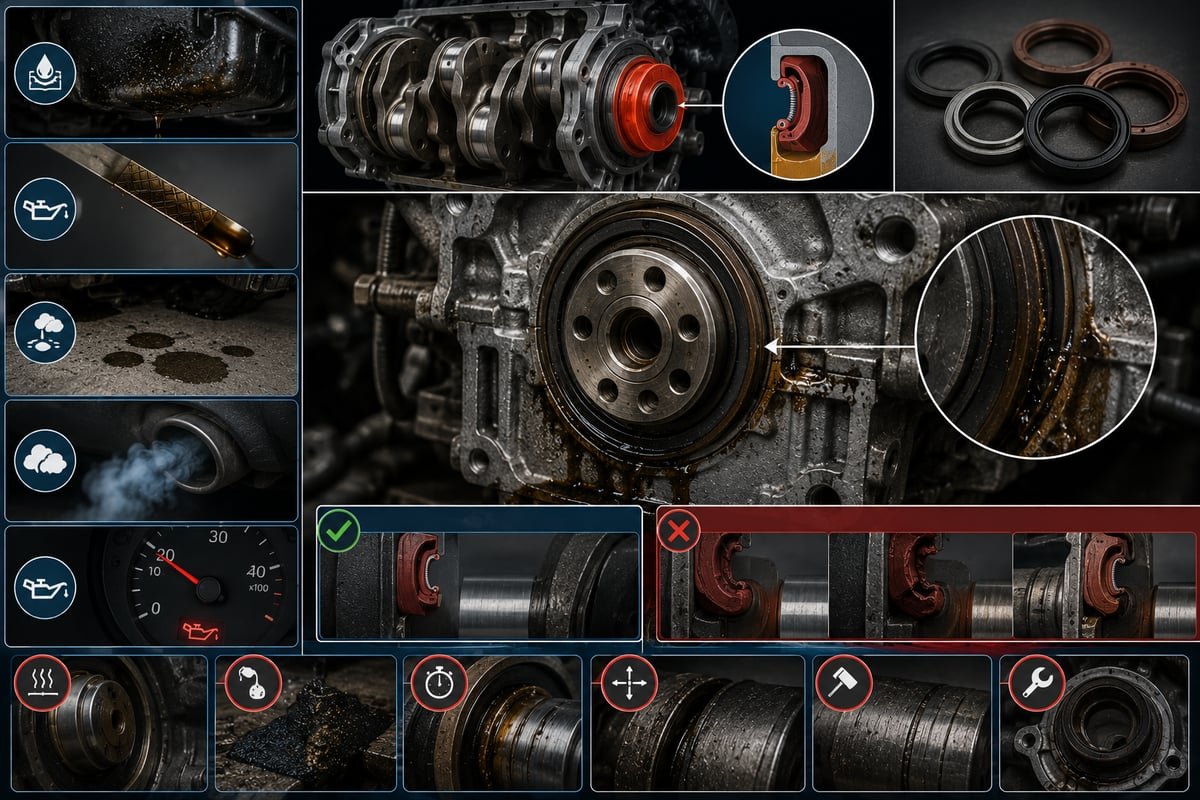
A crankshaft oil seal, also known as a crankshaft radial shaft seal or crankshaft lip seal, prevents engine oil from escaping where the rotating crankshaft passes through the engine housing. The seal maintains contact with the crankshaft sealing surface while accommodating rotation, temperature changes, vibration, and normal engine movement.
Most conventional engines use two main crankshaft sealing positions:
Front crankshaft oil seal
Installed at the timing cover or front engine housing, around the crankshaft nose. Depending on engine design, it may be close to the crankshaft pulley, harmonic balancer, timing belt, or accessory drive components.
Rear crankshaft oil seal
Installed at the rear of the crankshaft, usually around the crankshaft flange or rear sealing journal. It is commonly located behind the flywheel or flexplate and near the transmission bellhousing.
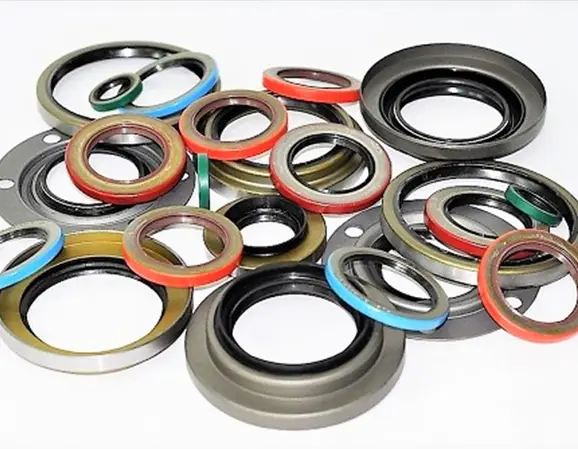
The seal typically consists of an elastomer sealing body, a flexible sealing lip, and, in many designs, a garter spring that helps maintain radial contact pressure. Some designs include a dust lip, a metal reinforcing case, or a hydrodynamic sealing feature that helps return oil toward the engine during shaft rotation.
The sealing lip and crankshaft surface work as a dynamic interface. Correct shaft finish, seal material, interference, lubrication, installation depth, and operating conditions all influence service life. A seal that is dimensionally correct but installed over a damaged shaft or exposed to abnormal crankcase pressure may still leak.
How Serious Is a Crankshaft Oil Seal Leak?
The seriousness ranges from minor seepage that requires monitoring to a major oil leak that makes continued operation unsafe. The key factors are the amount of oil being lost, how quickly the leak is progressing, whether oil is reaching hot or rotating components, and whether the engine can maintain the required lubrication level.
| Leak condition | Typical signs | Recommended response |
|---|---|---|
| Light seepage | A thin oil film around the seal area without obvious dripping. | Clean the area, confirm the source, monitor oil level, and arrange inspection. |
| Persistent leakage | Repeated oil drops, wet engine surfaces, or oil collecting on an undertray. | Schedule repair promptly and investigate the cause of seal failure. |
| Severe leakage | A visible stream or rapid oil loss, smoke, burning-oil odor, or oil reaching hot components. | Stop the engine when safe and arrange professional inspection or recovery. |
| Oil pressure warning | Oil pressure warning light, abnormal engine noise, or oil level below the minimum mark. | Switch off the engine immediately when safe. Do not restart until the cause and oil supply have been checked. |
A crankshaft seal leak does not automatically mean the engine is about to fail. However, continued oil loss can reduce the oil available for bearings, crankshaft journals, camshafts, turbochargers, and other lubricated components. If oil pressure falls below the engine manufacturer’s specification, bearing damage and severe internal wear can occur.
A rear seal leak has an additional consequence on vehicles with a dry clutch: engine oil can contaminate the clutch friction surfaces, causing slipping, shudder, or an unpleasant odor. On automatic-transmission vehicles, oil around the bellhousing must be correctly identified because transmission fluid or another engine-side leak may be mistaken for a rear crankshaft seal failure.
Common Symptoms of a Crankshaft Oil Seal Leak
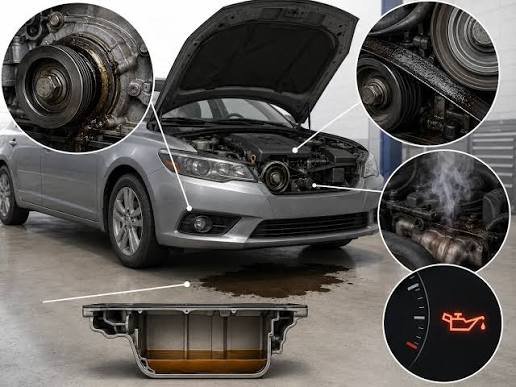
Oil spots beneath the vehicle
Oil drops on the garage floor or workshop surface are a common early warning. The position of the oil spot can provide a clue, but it does not prove the leak location. Airflow, engine covers, splash shields, and vehicle inclination can carry oil away from the original leak point.
Oil around the crankshaft pulley or timing cover
A leaking front crankshaft oil seal may leave oil around the crankshaft pulley, front cover, or lower engine area. On some engines, rotating components distribute oil over a wider area, making the leak appear to originate from several locations.
Oil inside the transmission bellhousing
Oil emerging from the lower bellhousing inspection opening can indicate a rear crankshaft seal leak. However, the rear of the engine also contains other possible leak sources, including rear cover joints, oil gallery plugs, crankshaft flange sealing components, and oil pan connections.
Burning-oil smell or smoke
Engine oil dripping onto an exhaust manifold, turbocharger, or exhaust pipe can produce a noticeable burning smell and sometimes visible smoke. This condition deserves prompt attention because oil contacting hot surfaces can create a fire hazard.
Falling engine oil level
If the dipstick level repeatedly drops between checks, an external leak may be responsible. Oil consumption through the combustion process is another possibility, so the oil level alone cannot confirm crankshaft seal failure.
Clutch slipping or abnormal clutch behavior
On manual-transmission vehicles, oil contamination of the clutch disc may cause engine speed to rise without a corresponding increase in vehicle speed. A contaminated clutch may also judder or produce a burnt odor. The clutch and bellhousing should be inspected before deciding which components need replacement.
Diagnostic reminder: Oil at the bottom of the engine is not enough evidence to condemn the crankshaft oil seal. Oil can travel down from a valve cover gasket, camshaft seal, oil filter housing, oil cooler, or oil pan joint before collecting near the crankshaft.
What Causes a Crankshaft Oil Seal to Leak?
Normal wear and elastomer aging
The sealing lip operates under continuous contact with a rotating shaft. Over time, friction, heat, engine oil exposure, and aging can change the elastomer’s flexibility. The lip may harden, lose its ability to follow minor shaft movement, develop cracks, or wear into an unfavorable contact profile.
Material selection should consider actual operating temperature, oil formulation, additives, shaft speed, and the required service interval. NBR is widely used in many conventional oil-sealing applications, while HNBR, FKM, and other elastomers may be considered for more demanding temperature or fluid conditions. No material is universally suitable for every engine.
Excessive crankcase pressure or a faulty PCV system
The positive crankcase ventilation system controls gases that pass the piston rings and enter the crankcase. A blocked breather, restricted ventilation passage, defective PCV valve, or excessive blow-by can increase crankcase pressure. This pressure may encourage oil to escape through weak sealing points, including the crankshaft oil seal.
Replacing the seal without correcting abnormal crankcase pressure can result in another leak. A professional diagnosis may include checking PCV operation, breather hoses, intake passages, and crankcase pressure using the procedure and limits specified for the engine.
Worn or damaged crankshaft sealing surface
A crankshaft that has a groove, corrosion, burr, scratch, or excessive runout may prevent the sealing lip from maintaining a consistent contact pattern. A visible wear track can be especially important when a replacement seal leaks again shortly after installation.
Inspect the seal-running surface for circumferential grooves, pitting, scoring, and contamination. Measure runout and journal dimensions where the manufacturer’s service procedure requires it. A repair sleeve may be appropriate for certain shaft designs, but compatibility, sleeve position, and installation instructions must be verified before use.
Incorrect installation
A new seal can leak immediately if its lip is cut, rolled, twisted, contaminated, or installed at an incorrect depth. Forcing a seal over a keyway, spline, sharp shaft edge, or damaged crankshaft flange without a suitable assembly sleeve can damage the sealing lip before the engine is started.
Installation tools, housing preparation, seal orientation, and lubrication requirements should follow the engine and seal manufacturer’s instructions. Some modern crankshaft seals use special lip materials or coatings and may require a dry installation. Applying grease or oil without checking the specified procedure can be incorrect.
Incorrect seal dimensions or material
A seal with the wrong inside diameter, outside diameter, width, lip geometry, or material can fail to maintain the intended sealing conditions. Similar-looking seals are not necessarily interchangeable. The original part number, engine application, housing design, shaft dimensions, and manufacturer specifications should be checked before ordering.
Excessive shaft movement or bearing wear
Crankshaft end play, radial movement, or bearing wear beyond specification can affect the seal’s contact with the shaft. If the crankshaft moves excessively, a new oil seal may not be able to compensate for the mechanical condition. Measure crankshaft end play and inspect the relevant bearings according to the engine service manual.
Seal housing or adjacent joint leakage
Oil may escape between the seal’s outer diameter and the housing, around a seal carrier, or through a nearby oil pan or rear cover joint. On some engines, the crankshaft seal is supplied as part of a carrier assembly. Replacing only the elastomer seal when the carrier or sealing face is damaged may not resolve the leak.
How to Diagnose a Crankshaft Oil Seal Leak Correctly
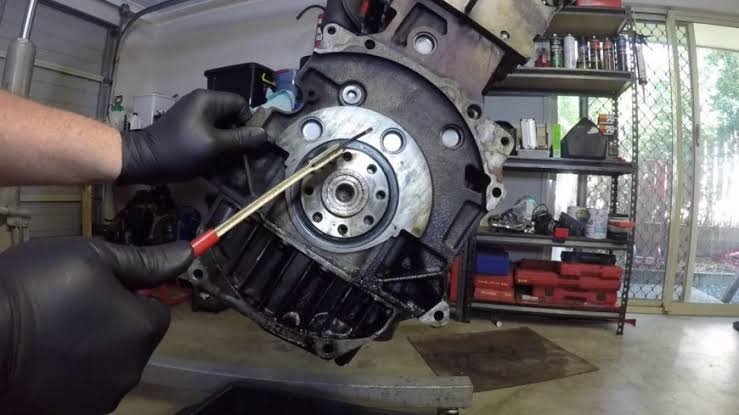
A reliable diagnosis begins by identifying the fluid and tracing it to the highest or earliest wet point. The following workflow can help technicians avoid unnecessary transmission removal, repeated seal replacement, and incorrect parts selection.
Step 1: Confirm the fluid type
Check the fluid’s color, odor, viscosity, and location, then compare it with the engine oil and transmission fluid. Color alone is not conclusive because fluid age and additives can change appearance. Use the vehicle manufacturer’s identification procedure where necessary.
Step 2: Clean the suspected area
Remove accumulated oil and dirt using an appropriate cleaning method. A clean surface makes it easier to identify fresh leakage. Protect electrical connectors, belts, and sensitive components during cleaning.
Step 3: Inspect from above to below
Check the valve cover, camshaft seals, timing cover, oil filter housing, oil cooler connections, oil pan joints, and other components above the crankshaft seal. Repair or rule out higher leak sources before concluding that the crankshaft seal is responsible.
Step 4: Use a suitable leak-detection method
Where approved for the engine and lubricant, an oil-compatible UV dye and inspection lamp can help trace the leak. Follow the dye manufacturer’s dosage and operating instructions. Do not mix incompatible additives or use a detection method that could affect the lubrication system.
Step 5: Check crankcase ventilation and pressure
Inspect the PCV valve, breather hoses, and ventilation passages. If symptoms suggest abnormal pressure, measure crankcase pressure using the engine manufacturer’s specified test method and limits. Do not assume that every engine should have the same pressure reading.
Step 6: Inspect the crankshaft seal area
If the leak is confirmed at the front or rear seal, inspect the lip contact area, shaft surface, seal housing, carrier, and adjacent joints. On rear-seal applications, check the bellhousing for the pattern and location of oil deposits before removing the transmission.
OEM technical guidance illustrates why source identification matters. A manufacturer service bulletin documents a case in which oil found in the clutch and flywheel housing could be caused by a crankshaft adaptor O-ring rather than the rear main seal. The bulletin distinguishes oil distributed around the housing from oil running down the engine or transmission face. This is a useful reminder to inspect the complete rear-engine sealing system before replacing a major component.
Read the NHTSA-hosted manufacturer technical bulletin on rear crankshaft seal leak diagnosis.
Front Crankshaft Seal Leak vs. Rear Main Seal Leak
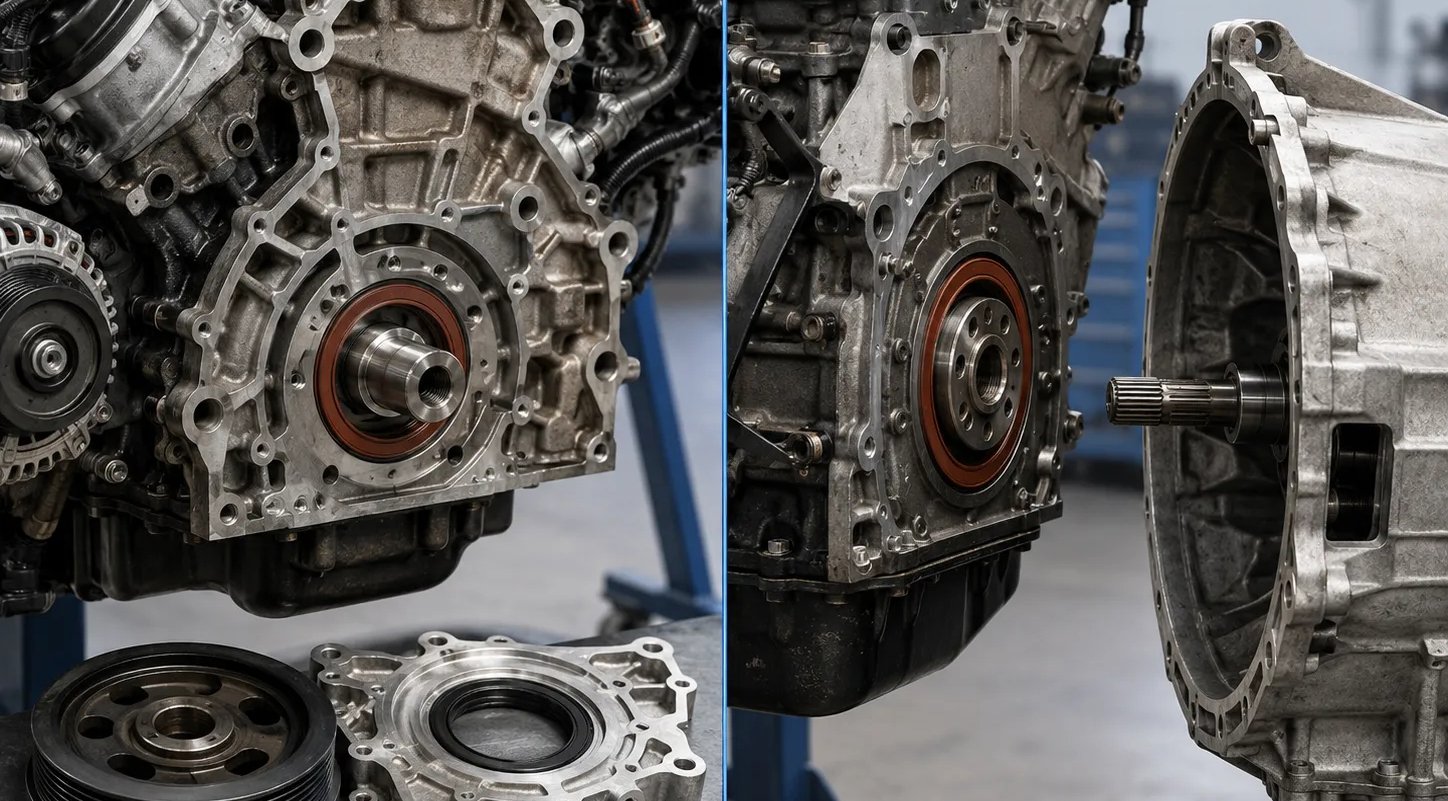
The repair scope and labor requirements differ significantly between front and rear crankshaft oil seals. The front seal is often accessible after removing the relevant pulley and timing components. The rear seal may require transmission removal, clutch or flexplate removal, and inspection of the rear seal carrier.
| Comparison | Front crankshaft seal | Rear crankshaft seal |
|---|---|---|
| Location | Front of engine, near crankshaft pulley or timing drive. | Rear of engine, near flywheel or flexplate. |
| Common clues | Oil around the front cover, crank pulley, or lower timing area. | Oil near the bellhousing or clutch inspection opening. |
| Potential secondary damage | Oil contamination of belts and nearby components, depending on engine layout. | Clutch contamination or oil accumulation inside the bellhousing. |
| Typical access | May require removal of pulley, accessory drive, or timing components. | May require removal of transmission, clutch, or flexplate. |
| Additional checks | Inspect pulley hub, shaft surface, timing components, and front cover. | Inspect rear carrier, crankshaft flange, flywheel or flexplate area, and nearby engine joints. |
Repair time and cost depend on the vehicle platform, engine configuration, labor rates, seal design, and whether related parts are damaged. A rear seal replacement is often more labor-intensive, but the actual procedure must be confirmed using the vehicle’s service information.
How to Fix a Crankshaft Oil Seal Leak
Replace the seal when failure is confirmed
If the sealing lip is worn, hardened, cracked, or damaged, replacing the seal with the correct application-specific part is usually the appropriate repair. Confirm the original equipment part number, dimensions, sealing direction, lip configuration, and material before installation.
Correct crankcase ventilation problems
If the PCV system is restricted or defective, restore the ventilation system according to the manufacturer’s service procedure. If excessive blow-by is suspected, further engine testing may be required. A new seal should not be expected to compensate for an unresolved pressure problem.
Repair the crankshaft sealing surface
A grooved or damaged sealing journal may require an approved repair sleeve, surface restoration, or crankshaft replacement, depending on the damage and engine design. Do not remove material indiscriminately from a precision sealing surface. Follow the engine manufacturer’s dimensional and finish requirements.
Replace damaged carrier seals or related gaskets
Where leakage comes from the seal carrier, retainer, oil pan joint, or another adjacent interface, repair that component using the specified gasket, sealant, and tightening sequence. Applying additional sealant over an unidentified leak is not a reliable repair.
Inspect contaminated components
If engine oil has reached a timing belt, inspect the belt and related components and replace them when required by the engine manufacturer’s procedure. If a clutch disc has absorbed oil, cleaning alone may not restore reliable friction performance; inspect the clutch assembly and follow the vehicle manufacturer’s replacement guidance.
Crankshaft Oil Seal Replacement: Key Installation Precautions
Correct installation is just as important as choosing the right replacement seal. Even a high-quality seal can fail prematurely if the shaft, housing, or sealing lip is damaged during assembly.
- Verify the part: Match the seal to the engine application and confirm the required dimensions, lip design, material, and installation orientation.
- Inspect the housing: Remove old sealant and contamination without scratching the bore. Check for corrosion, burrs, distortion, and damage.
- Protect the sealing lip: Use the specified installation sleeve or guide when passing over keyways, threads, splines, or sharp edges.
- Check the shaft: Inspect the running surface for grooves, scratches, rust, and excessive runout.
- Follow lubrication instructions: Lubricate the lip only when specified. Some seals require a particular dry-installation procedure.
- Control installation depth: Use the specified tool and position. Incorrect depth may place the lip on a worn area or interfere with nearby components.
- Avoid uneven driving force: Press the seal squarely into its bore. Do not hammer directly on the flexible lip or deform the metal case.
- Verify the completed repair: Reassemble using specified torque values, restore the correct oil level, and inspect for leakage under the manufacturer’s recommended test conditions.
SKF’s seal installation guidance emphasizes checking the bore, shaft, shaft end, keyways, dimensions, and seal condition before assembly. These checks are especially relevant to crankshaft seals because damage to the lip during installation may not be visible after the seal is pressed into the housing.
Review SKF bearing and radial shaft seal installation guidance.
How to Choose the Right Crankshaft Oil Seal
For engine manufacturers, repair networks, distributors, and wholesale buyers, the correct crankshaft oil seal should be selected by application and operating requirements rather than by appearance alone. A reliable purchasing process should cover the following technical factors.
| Selection factor | What to verify | Why it matters |
|---|---|---|
| Application | Engine model, vehicle make, year, displacement, and OE reference. | Prevents ordering a visually similar but incompatible seal. |
| Dimensions | Shaft diameter, housing bore, seal width, and installation depth. | Ensures the seal fits the shaft and housing as designed. |
| Elastomer material | NBR, HNBR, FKM, or another compound specified for the application. | Determines compatibility with temperature, engine oil, and operating conditions. |
| Seal construction | Single lip, auxiliary dust lip, spring-loaded lip, case design, or hydrodynamic feature. | Affects sealing behavior and suitability for the engine design. |
| Operating conditions | Shaft speed, temperature range, pressure, lubrication, and exposure to contaminants. | Helps determine whether the seal design and compound are suitable. |
| Quality requirements | Dimensional inspection, material control, lip condition, traceability, and validation records. | Supports consistent production and supply-chain quality. |
Common crankshaft oil seal materials
Material selection should be based on the engine manufacturer’s specification and the actual operating environment. The following overview is a general engineering reference, not a substitute for application validation.
- NBR (Nitrile Butadiene Rubber): Commonly used for many oil-sealing applications because of its general compatibility with mineral oils and cost-effective performance within its specified temperature range.
- HNBR (Hydrogenated Nitrile Butadiene Rubber): Often selected where improved heat resistance, mechanical strength, and aging performance are required compared with conventional NBR grades.
- FKM (Fluoroelastomer): Considered for applications requiring higher temperature capability and resistance to selected oils and chemicals. The exact compound must still be checked against the lubricant and service conditions.
- Other engineered elastomers: Special compounds may be used for particular engine designs, lubricants, or environmental requirements. Confirm the material specification with the seal manufacturer.
A material name alone does not define performance. Compound formulation, cure system, hardness, lip geometry, manufacturing consistency, and validation testing also affect the finished seal’s behavior.
Crankshaft Oil Seal Quality Checks for OEMs and Distributors
For B2B buyers, the purchase price is only one part of the total cost. A seal that causes repeat repairs, warranty claims, vehicle downtime, or customer returns can create much higher costs across the supply chain. A structured supplier assessment should consider both product conformity and manufacturing controls.
- Dimensional conformity: Verify inside diameter, outside diameter, width, case geometry, and critical tolerances against the approved drawing or specification.
- Material consistency: Confirm compound identification, batch control, and relevant material test records.
- Lip integrity: Inspect for cuts, molding defects, deformation, contamination, and other damage that may affect sealing performance.
- Spring and case control: Where applicable, verify spring presence, positioning, retention, and metal case condition.
- Performance validation: Request relevant leakage, endurance, temperature, or application test information where required by the project specification.
- Traceability: Confirm lot identification, inspection records, packaging information, and a defined process for handling nonconforming products.
A professional supplier should be able to review drawings, OE numbers, sample parts, application information, and annual demand before confirming a suitable product. For custom or replacement applications, technical review and sample validation are particularly important.
Can You Drive with a Crankshaft Oil Seal Leak?
Whether a vehicle can be driven depends on the severity of the leak and the engine manufacturer’s operating guidance. A light seepage with a stable oil level may allow a short trip to a repair facility in some circumstances, but this should not be treated as a general guarantee of safety.
Do not continue driving if any of the following conditions occur:
- The oil pressure warning light is illuminated.
- The oil level is below the minimum mark or is dropping rapidly.
- Oil is dripping onto the exhaust system or producing smoke.
- The leak is heavy enough to leave a continuous trail or a large pool.
- The engine develops knocking, ticking, or other abnormal mechanical noise.
- A clutch becomes contaminated or begins slipping, affecting safe vehicle operation.
If the oil pressure warning appears, switch off the engine as soon as it is safe. Adding oil may restore the level, but it does not repair the leak or prove that the engine has avoided damage. Arrange a professional inspection before returning the vehicle to service.
Practical Prevention: How to Reduce Repeat Crankshaft Seal Leaks
Preventive maintenance cannot eliminate normal seal aging, but it can reduce avoidable failures and help extend service life.
Maintain the PCV system
Inspect ventilation valves and hoses at the intervals specified by the vehicle manufacturer.
Use the correct engine oil
Follow the specified viscosity and performance standard. Avoid unapproved oil additives.
Inspect early signs
Check for fresh oil films, unusual odors, and changes in oil level during routine service.
Use correct installation tools
Protect the lip and shaft surface and follow the specified installation depth and procedure.
For fleet operators and maintenance teams, recording leak location, mileage, engine model, seal part number, crankcase pressure findings, and repair details can help identify recurring problems. This information is also valuable when discussing product improvements with a seal manufacturer.
Working with a Crankshaft Oil Seal Manufacturer or Supplier
A suitable crankshaft oil seal supplier should understand more than the nominal dimensions of a product. For replacement markets, distributors, and OEM projects, technical communication is important because engine applications may differ in shaft design, housing dimensions, lubricant requirements, and operating temperature.
When requesting a quotation or technical review, provide as much of the following information as possible:
- Original equipment part number or cross-reference number.
- Vehicle make, model, engine code, and year range.
- Seal position: front crankshaft or rear crankshaft.
- Shaft diameter, housing bore, seal width, and drawing if available.
- Required material or operating temperature range.
- Photographs of the original seal and installation location, where available.
- Estimated order quantity, annual demand, packaging, and delivery requirements.
- Any known failure history, such as lip wear, shaft grooving, hardening, or repeat leakage.
KODA Seals provides oil seal product information and supports inquiries related to sealing applications. Buyers can share an OE reference, sample, drawing, or dimensional specification for review. Product suitability should be confirmed against the actual engine requirements rather than assumed from a similar-looking part.
Visit KODA Seals or contact the team for crankshaft oil seal inquiries.
Frequently Asked Questions About Crankshaft Oil Seal Leaks
FAQ 1: Can a crankshaft oil seal leak cause serious engine damage?
Yes. A leak can become serious if oil loss reduces the engine oil level or causes oil pressure to fall below the required operating range. Insufficient lubrication can damage bearings and other internal components. The severity depends on the leak rate, oil level, engine condition, and how quickly the problem is addressed.
FAQ 2: How can I tell whether the front or rear crankshaft oil seal is leaking?
A front seal leak may leave oil around the crankshaft pulley or timing cover. A rear seal leak may produce oil inside or around the transmission bellhousing. These signs are not conclusive because nearby gaskets, plugs, and housing joints can create similar symptoms. Clean the area and trace the leak to its source before replacing parts.
FAQ 3: Why does a new crankshaft oil seal leak after replacement?
Common reasons include incorrect seal dimensions, lip damage during installation, a worn crankshaft sealing surface, incorrect installation depth, a damaged housing, abnormal crankcase pressure, or leakage from an adjacent component. Recheck the complete sealing system instead of installing another seal without further diagnosis.
FAQ 4: Does a crankshaft oil seal leak always mean the seal needs to be replaced?
No. Oil near the crankshaft area may come from a valve cover gasket, camshaft seal, oil pan joint, rear cover, oil gallery plug, or another component. Confirm the leak source first. If the crankshaft seal is defective, replace it using the correct part and installation procedure.
FAQ 5: Which material is best for a crankshaft oil seal: NBR, HNBR, or FKM?
There is no universally best material. NBR is suitable for many conventional applications within its specified operating range. HNBR may be selected for applications requiring improved heat and mechanical performance, while FKM may be appropriate for certain higher-temperature or chemically demanding conditions. The final choice should be based on the engine manufacturer’s specification, oil compatibility, temperature, shaft speed, and validated compound performance.
Technical References and Further Reading
The following technical resources provide additional information on crankshaft oil leak diagnosis, crankcase pressure, and rotary shaft seal installation. Always prioritize the service information for the specific engine when carrying out a repair.
- NHTSA-hosted manufacturer technical bulletin – Rear crankshaft seal leak diagnosis. Explains how other sealing components can cause oil in the clutch and flywheel housing.
- NHTSA-hosted GM diagnostic bulletin – Crankshaft rear oil seal and crankcase pressure. Describes crankcase pressure testing as part of oil leak diagnosis.
- SKF Bearings and CR Seals Specification Handbook. Includes practical checks for shaft, bore, seal condition, and installation.
- NNK Seals – Can New Oil Cause Seal Leaks?. Related information on rotary shaft seal leakage and failure prevention.
- KODA Seals – Car Oil Leaks: Why They Happen and How to Fix Them. Additional guidance on identifying common automotive oil leak sources.
Need a Crankshaft Oil Seal for Your Application?
Whether you are sourcing replacement crankshaft oil seals, developing an OEM sealing component, or evaluating a recurring leakage issue, accurate application information is the starting point. Share your part number, drawing, sample, or engine details to help identify a suitable product specification.