Understanding Car Oil Seals: What They Do, How They Work, and Why They Fail
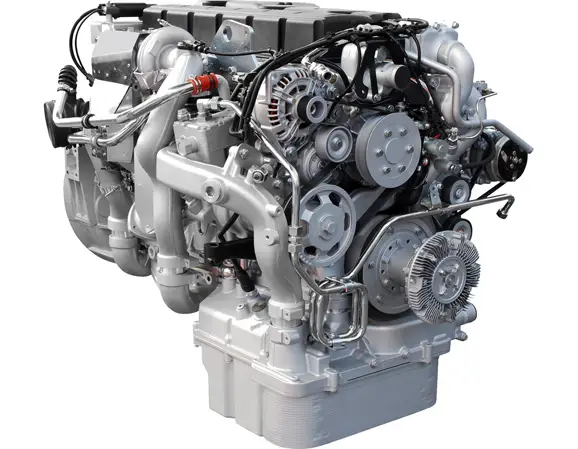
Car oil seals are small components with a disproportionately large influence on engine, transmission, drivetrain, steering, braking, and other vehicle systems. They are designed to retain lubricants, exclude contaminants, accommodate shaft rotation or movement, and maintain a controlled sealing interface while the vehicle experiences temperature changes, vibration, pressure fluctuations, shaft runout, and mechanical wear.
Although an oil seal may look simple, reliable sealing is an engineering problem involving elastomer chemistry, shaft surface condition, interference, lip geometry, temperature, lubricant compatibility, installation quality, and operating speed. A seal that is dimensionally correct can still fail prematurely if its material or design is unsuitable for the actual environment.
Key engineering point: A car oil seal should never be selected by outside dimensions alone. The correct selection requires consideration of the shaft diameter, housing, rotational speed, lubricant, temperature, pressure, shaft condition, contamination, and expected service environment.
What Is a Car Oil Seal?
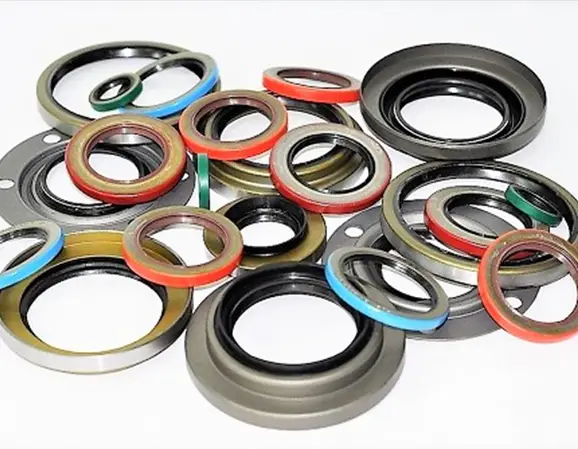
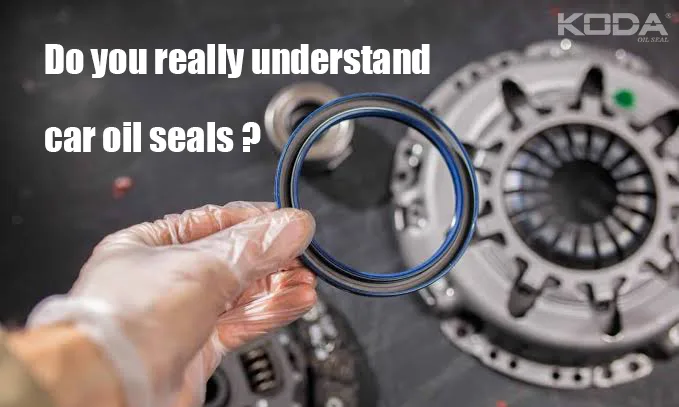
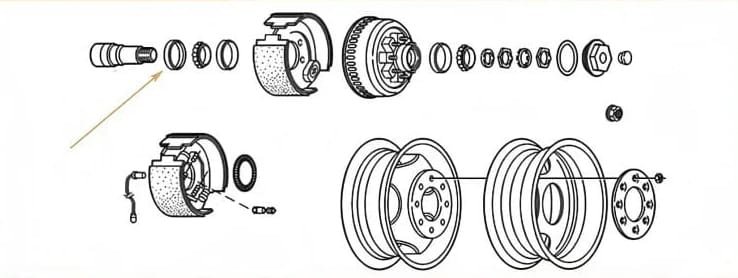
A car oil seal is generally a rotary shaft seal used to control leakage between a rotating shaft and a stationary housing. In automotive applications, common examples include crankshaft seals, camshaft seals, transmission input and output shaft seals, axle seals, differential seals, wheel-end seals, and seals used around various rotating auxiliary components.
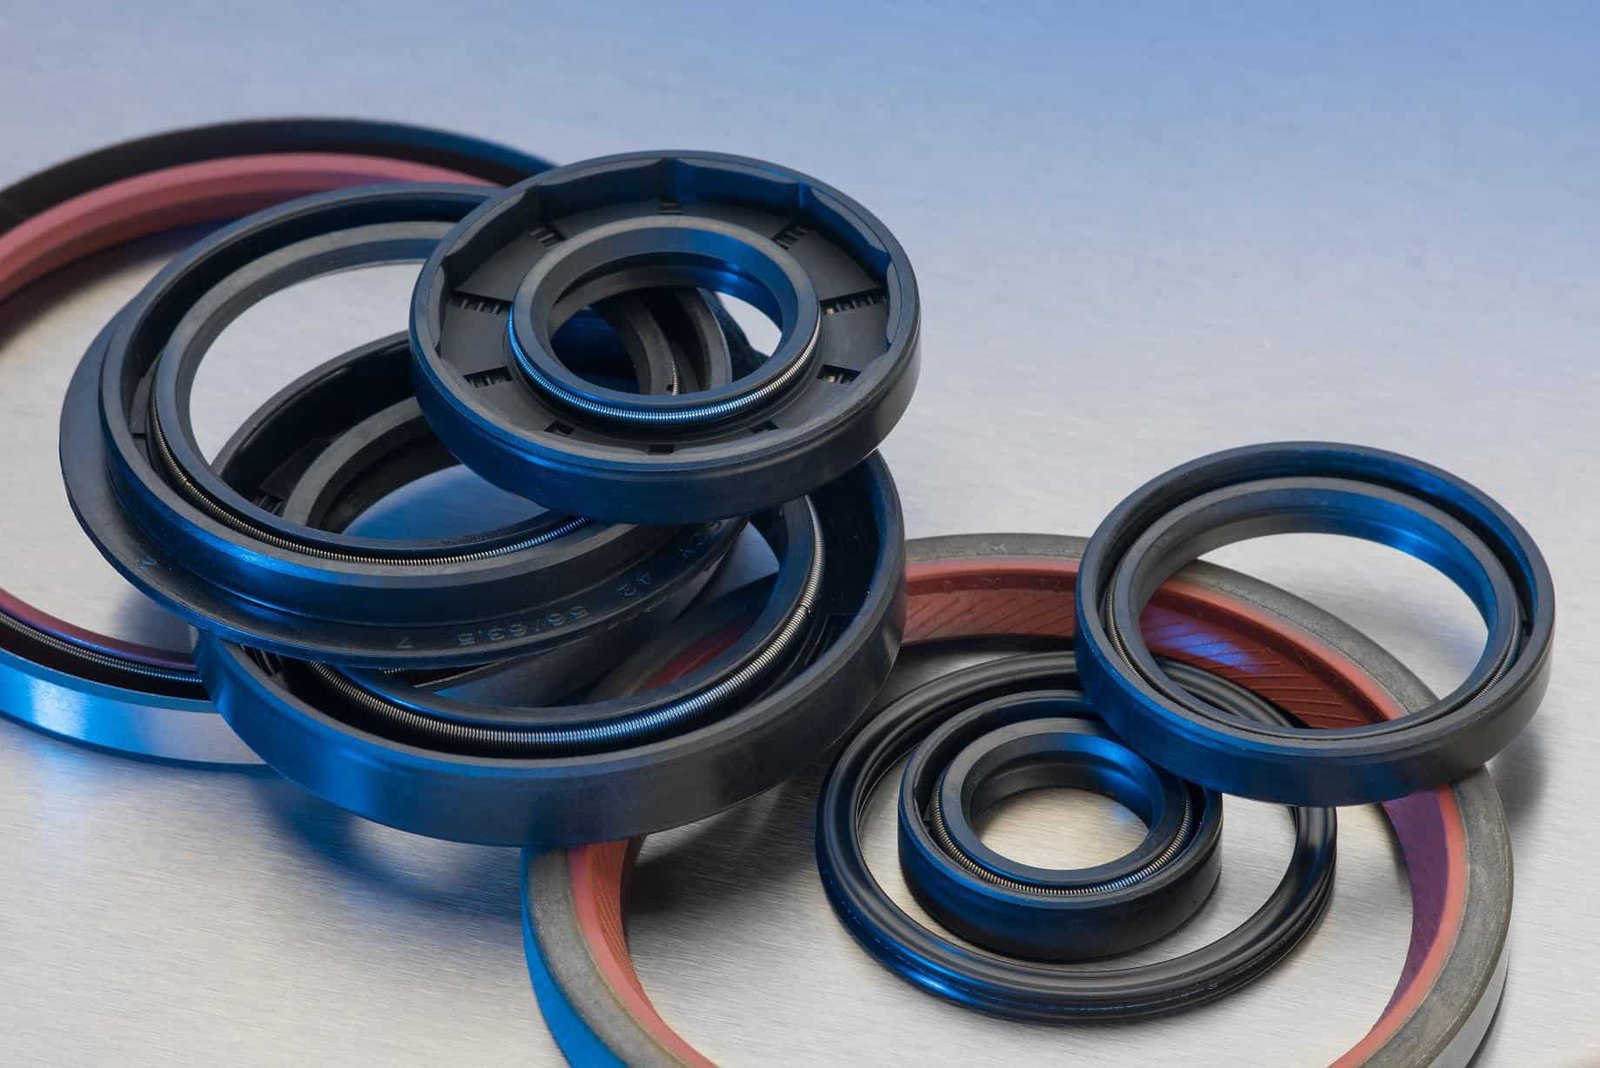
The conventional radial lip seal normally consists of an elastomeric sealing element, a reinforcing case or metal insert, and a spring that maintains radial contact between the sealing lip and shaft. Depending on the application, the seal may also incorporate a dust lip, garter spring, hydrodynamic features, protective coating, or specialized sealing geometry.
The primary functions are straightforward:
Retain lubricant: prevent engine oil, gear oil, transmission fluid, grease, or other fluids from escaping.
Exclude contamination: help prevent water, mud, dust, abrasive particles, and road debris from entering the system.
Accommodate shaft movement: maintain sealing contact despite normal rotation, thermal expansion, and small amounts of shaft runout.
Control friction: create enough contact to prevent leakage without generating excessive heat and wear.
ISO 6194-1:2007 covers nominal dimensions and tolerances for rotary shaft lip-type seals incorporating elastomeric sealing elements and also addresses shaft and housing dimensions relevant to interchangeability. ISO describes these seals as intended for low-pressure conditions rather than high-pressure applications.
For automotive buyers and maintenance professionals, a useful overview of car oil seals is helpful because different vehicle systems require different combinations of geometry, material, temperature capability, and sealing performance.
Why Are Oil Seals So Important in Modern Vehicles?
Modern vehicles place increasingly demanding requirements on sealing components. Engine compartments can experience high temperatures, transmissions operate over broad speed ranges, and drivetrain components are exposed to vibration and contamination. Electrified vehicles also introduce new requirements involving specialized lubricants, higher rotational speeds, and different thermal conditions.
An oil seal is therefore not merely a rubber washer. It is a dynamic sealing device that must maintain a controlled interface over millions of shaft rotations.
A practical way to think about a rotary oil seal: the seal must continuously balance leakage prevention against friction and heat generation. Increasing lip contact can reduce leakage initially, but excessive contact may accelerate wear, increase temperature, and shorten seal life.
How Does a Rotary Oil Seal Actually Work?
The sealing lip contacts the rotating shaft with a controlled radial load. The elastomer deforms around the shaft and creates a narrow sealing interface. Lubricant forms a microscopic film in the contact zone, which is important because a completely dry interface can produce excessive friction and heat.
The sealing mechanism is influenced by several factors:
Radial lip load
Elastomer elasticity
Shaft surface roughness and hardness
Lubricant viscosity
Rotational speed
Temperature
Shaft eccentricity and runout
Seal geometry and installation position
During operation, the seal does not simply form a static barrier. The shaft continuously moves beneath the lip, and the interface develops a complex combination of elastomer deformation, lubricant transport, friction, and heat generation.
The Role of the Garter Spring
Many radial oil seals use a garter spring to maintain radial lip loading. As the elastomer ages, loses elasticity, or changes volume because of fluid exposure and temperature, the spring helps maintain contact pressure.
However, the spring cannot compensate indefinitely for an unsuitable material, damaged shaft, excessive runout, or incorrect installation. A spring is part of the sealing system rather than a substitute for correct engineering.
The Role of the Secondary Dust Lip
Some automotive seals incorporate a secondary dust lip. Its primary purpose is contamination exclusion rather than primary fluid retention. This can be especially useful in wheel, axle, agricultural, off-road, and other environments where dirt and water are significant threats.
However, a dust lip can also add friction. Its geometry must therefore be considered together with the operating speed and temperature.
Common Types of Car Oil Seals
| Seal Type | Typical Location | Primary Requirement |
|---|---|---|
| Crankshaft Seal | Front or rear crankshaft | Engine oil retention and thermal resistance |
| Camshaft Seal | Camshaft end | Oil retention at rotating shaft |
| Transmission Seal | Input/output shafts | Fluid compatibility and rotational durability |
| Axle Seal | Axle housing | Lubricant retention and contamination resistance |
| Differential Seal | Differential shafts | Gear-oil compatibility and dynamic sealing |
| Wheel-End Seal | Hub or axle area | Contamination and grease/oil retention |
Car Oil Seal Materials: NBR, HNBR, FKM and Other Options

Material selection is one of the most important decisions in oil-seal engineering. Elastomers differ substantially in temperature capability, resistance to oils and chemicals, compression set, low-temperature flexibility, abrasion resistance, and cost.
NBR — Nitrile Rubber
NBR is one of the most widely used elastomers for petroleum-based oils and general industrial sealing. Its popularity comes from its balance of cost, oil resistance, mechanical properties, and availability.
Typical NBR formulations may operate over a broad temperature range, often approximately -30°C to +100°C or somewhat higher depending on formulation and application. These figures are general engineering ranges rather than universal material limits.
NBR is commonly considered for conventional engine oils, gear oils, hydraulic oils, and grease applications where temperatures and chemical exposure remain within the compound’s specification.
HNBR — Hydrogenated Nitrile Rubber
HNBR is produced by hydrogenating the polymer backbone of nitrile rubber. This improves resistance to heat, oxidation, ozone, and aging compared with conventional NBR.
HNBR is frequently selected for demanding automotive sealing applications where thermal aging and dynamic durability are more severe. Depending on formulation, HNBR compounds can support service temperatures around 150°C and sometimes higher for specific applications.
Expert selection tip: Do not treat “HNBR” or “NBR” as complete specifications. Two compounds with the same polymer family can have substantially different performance because formulation, curing system, fillers, plasticizers, hardness, and reinforcement all influence the final seal.
FKM — Fluorocarbon Rubber
FKM is often selected when higher-temperature resistance, fuel resistance, or aggressive chemical resistance is required. Depending on grade and formulation, FKM can support continuous temperatures approaching 200°C and may tolerate short-term excursions above that level.
FKM is particularly valuable around hot engine environments and certain fuel or lubricant systems. However, FKM is not automatically the best choice for every application. Low-temperature flexibility and compatibility with specific fluids must also be evaluated.
PTFE-Based Sealing Elements
PTFE has extremely low friction and excellent chemical resistance. PTFE-based rotary seals can be attractive in high-speed, high-temperature, or chemically demanding environments, although their design and installation requirements differ from conventional elastomeric lip seals.
Material selection should therefore follow the complete application rather than a simple “higher temperature equals better material” rule.
Typical Material Comparison
| Material | General Strength | Typical Temperature Capability* | Common Automotive Consideration |
|---|---|---|---|
| NBR | Oil resistance, cost effectiveness | Approx. -30°C to +100°C | General oil and grease sealing |
| HNBR | Heat and aging resistance | Approx. -30°C to +150°C | Demanding automotive environments |
| FKM | High-temperature and chemical resistance | Often up to around +200°C | High-temperature and aggressive fluids |
| PTFE | Low friction and chemical resistance | High-temperature capability depends on design | High-speed or chemically demanding applications |
*Temperature values are general engineering ranges only. Actual allowable temperature depends on compound formulation, lubricant, speed, pressure, geometry, and manufacturer qualification.
Hardness: Why Shore A Matters
Seal hardness is commonly expressed using Shore A hardness for rubber compounds. Automotive oil seals frequently use elastomers in the approximate range of 70–90 Shore A, although the correct value depends strongly on seal geometry and application.
A harder compound is not automatically better. Higher hardness can improve extrusion resistance and dimensional stability, but it may reduce conformability and increase sensitivity to shaft imperfections. A softer compound can conform well to surfaces but may be more vulnerable to extrusion, wear, or mechanical damage.
Hardness should therefore be considered alongside tensile strength, elongation, compression set, tear resistance, abrasion resistance, and fluid compatibility.
Understanding Compression Set
Compression set measures the tendency of an elastomer to retain deformation after prolonged compression. For dynamic oil seals, compression set is only one part of the picture, but poor compression-set resistance can indicate reduced elastic recovery after long-term exposure to heat and fluid.
When evaluating materials, engineers commonly consider standardized rubber test methods such as ASTM D395 for compression set and ASTM D2240 for rubber hardness. These standards provide test methods rather than universal pass/fail specifications for every automotive seal.
Thermal Conductivity and Seal Temperature
Elastomers generally have relatively low thermal conductivity compared with metals. Representative rubber compounds may have thermal conductivity on the order of approximately 0.1–0.3 W/m·K, although actual values vary substantially with polymer, filler, temperature, and formulation.
This matters because frictional heat generated at the sealing interface must be dissipated through the shaft, housing, lubricant, and surrounding components. If the seal operates at high speed with excessive lip loading, heat can accumulate faster than it can be removed.
A simplified engineering relationship is:
Frictional power ≈ friction force × sliding velocity
For a simplified estimate, if an effective friction force is 20 N and the shaft surface velocity is 10 m/s, the frictional power is approximately 200 W. This is an illustrative calculation, not a prediction of actual seal temperature.
The actual heat balance is much more complex because friction depends on lubrication regime, contact pressure, material, temperature, surface finish, shaft speed, and seal geometry.
Calculating Shaft Surface Speed
Rotational speed is more meaningful when translated into shaft surface velocity. The basic relationship is:
v = π × d × n / 60
where v is surface velocity in m/s, d is shaft diameter in meters, and n is rotational speed in revolutions per minute.
For example, a 50 mm shaft rotating at 3,000 rpm has a surface speed of approximately 7.85 m/s. This is already a significant dynamic sealing condition and demonstrates why a seal specification should include both shaft diameter and rotational speed rather than rpm alone.
Lubricant Compatibility
The lubricant is part of the sealing environment. Engine oil, automatic transmission fluid, manual transmission oil, differential lubricant, grease, and specialized fluids can interact differently with elastomers.
Fluid exposure can cause swelling, shrinkage, softening, hardening, extraction of formulation ingredients, or changes in mechanical properties.
| Failure Observation | Possible Mechanism | Investigation |
|---|---|---|
| Seal becomes unusually soft | Fluid interaction or plasticizer effects | Fluid compatibility and hardness comparison |
| Seal becomes hard and brittle | Thermal aging or chemical degradation | Material identification and thermal history |
| Seal swells | Fluid absorption | Mass and dimensional change after controlled immersion |
| Lip wears rapidly | Excessive friction, contamination, poor shaft finish | Microscopic inspection and shaft measurement |
Shaft Surface Finish and Hardness
Even an excellent oil seal can fail against a poor shaft surface. The shaft should be inspected for scratches, corrosion, grooves, excessive roughness, lead-in damage, and wear tracks.
A seal running continuously on a shaft can gradually create a wear groove. Once the groove becomes significant, simply installing a new seal in exactly the same location may not solve the problem.
Surface finish requirements vary with seal design and manufacturer specification. As a general engineering principle, the shaft should have a controlled, suitable finish rather than being judged solely by visual appearance.
Expert tip: When a replacement seal repeatedly leaks shortly after installation, inspect the shaft before blaming the new seal. A worn shaft, groove, excessive runout, or incorrect surface finish can reproduce the same leak again and again.
ISO Standards Relevant to Rotary Oil Seals
ISO 6194 is an important reference series for rotary shaft lip-type seals. ISO 6194-1:2007 addresses nominal dimensions and tolerances. ISO 6194-3:2009 covers storage, handling, and installation guidance. ISO 6194-4:2009 specifies general performance test procedures that may be used for qualification purposes.
ISO 6194-5:2008 addresses identification of visual imperfections, while ISO/CD 6194-6 is currently under development for specification of elastomeric materials used in rotary shaft lip-type seals.
These standards are useful because they provide a common engineering language for dimensions, terminology, installation, inspection, and performance testing. They do not mean that every seal conforming dimensionally to an ISO standard is automatically suitable for every vehicle.
ASTM Test Methods Engineers May Encounter
ASTM methods are commonly used to characterize rubber materials. Depending on the project, relevant methods may include ASTM D2240 for hardness, ASTM D395 for compression set, ASTM D412 for tensile properties, ASTM D471 for the effect of liquids on rubber, and ASTM D573 for accelerated aging in air.
The important distinction is that these methods describe how a property is measured. A test result should always be interpreted against the actual material specification and application requirements.
Installation: Where Good Seals Commonly Go Wrong
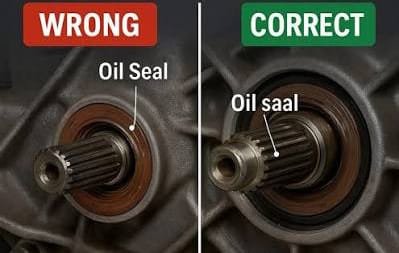
Installation is one of the most underestimated causes of premature oil seal failure. ISO 6194-3 specifically provides guidance for storage, handling, and proper installation of rotary shaft lip seals.
1. Inspect the Shaft
Remove rust, burrs, sharp edges, and contamination. Check the shaft diameter and inspect the existing wear track.
2. Inspect the Housing
The housing bore should be clean and dimensionally suitable. Damage to the bore can allow the seal to move, leak, or become distorted.
3. Confirm Seal Orientation
For conventional oil-retaining lip seals, the primary sealing lip generally faces the fluid being retained. However, seal geometry varies, so the manufacturer’s installation drawing should take priority.
4. Lubricate the Appropriate Surfaces
Where specified, apply a compatible lubricant to the sealing lip and shaft. Avoid contaminating areas where dry friction or bonding is required.
5. Use the Correct Installation Tool
Press the seal evenly into position. Avoid striking directly on the elastomeric lip. A suitable installation mandrel or driver helps maintain alignment.
6. Check Final Position
Incorrect installation depth can place the sealing lip on an inappropriate shaft location or interfere with nearby components.
Case Example: Repeated Rear Crankshaft Seal Leakage
Case Example — Industry Engineering Scenario: The following is an illustrative engineering example based on common seal-failure mechanisms. It is not a report of a real customer, vehicle, factory, or proprietary test.
Imagine an engine experiencing repeated oil leakage shortly after replacement of the rear crankshaft seal. The replacement seal has the correct nominal dimensions and the installer confirms the lip orientation.
The first assumption might be poor seal quality. A systematic investigation would instead inspect:
Crankshaft seal running surface
Shaft runout
Crankshaft endplay
Housing condition
Seal installation depth
Engine ventilation or crankcase pressure
Lubricant level and condition
Suppose inspection identifies a pronounced wear groove on the crankshaft. Installing a new seal at the original position allows the lip to run in the same damaged groove. The new seal may therefore leak even though the seal itself is manufactured correctly.
The engineering response could involve correcting the shaft condition, changing the sealing position where permitted by the design, or using an approved repair solution. The key lesson is that seal replacement is not always the same thing as sealing-system repair.
Laboratory Test Example
Laboratory Test Example: The following describes an illustrative test program and does not represent actual customer data, certified production results, or a guaranteed service-life prediction.
A laboratory evaluating two candidate elastomer compounds for an automotive rotary seal might expose standardized specimens to a representative lubricant at a controlled elevated temperature.
Measurements could include:
Hardness before and after exposure
Mass change
Volume change
Tensile strength retention
Elongation retention
Compression set
Visual cracking or surface degradation
For example, if a compound shows a large volume increase after fluid exposure while another shows only a small change, the second material may be more suitable. However, the decision should not be based on swelling alone. Dynamic wear, temperature capability, friction, low-temperature behavior, and the actual lubricant formulation must also be considered.
Failure Mode Analysis: Why Car Oil Seals Leak
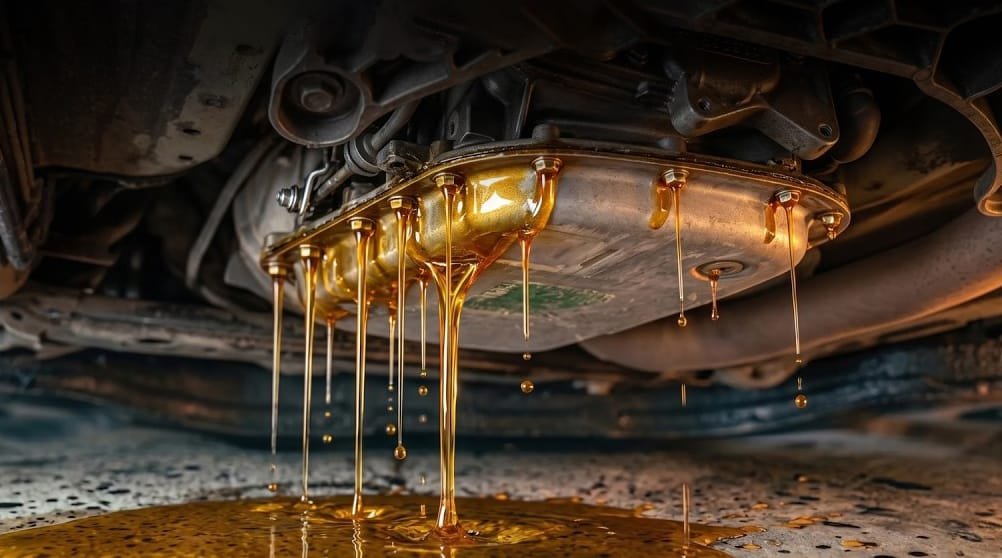
| Failure Mode | Typical Appearance | Potential Cause |
|---|---|---|
| Lip wear | Polished or worn sealing edge | Friction, contamination, poor lubrication |
| Heat cracking | Hardening and cracks | Excessive temperature or thermal aging |
| Chemical swelling | Oversized or softened seal | Fluid incompatibility |
| Groove wear | Visible shaft track | Long-term lip contact |
| Twisted lip | Distorted sealing edge | Improper installation |
| Contaminant damage | Cuts, abrasions, embedded particles | Dust, dirt, water, or installation contamination |
| Seal displacement | Seal not seated correctly | Housing interference, installation error, pressure |
Why Water and Road Contamination Matter
Oil seals often operate in environments where water, dust, mud, salt, and road debris are unavoidable. Contamination can damage the lip directly or migrate into the bearing and lubrication system.
Abrasive particles are particularly dangerous because they can create a three-body wear mechanism between the seal, shaft, and contaminant. Over time, this can accelerate shaft wear and increase leakage.
For wheel ends and off-road systems, a seal with an appropriate secondary dust lip or contamination-exclusion geometry may be more appropriate than a basic oil-retaining seal.
Corrosion Resistance and Automotive Sealing
Corrosion can affect both the elastomer and the hardware surrounding the seal. A corroded shaft can damage a sealing lip, while corrosion around a metal seal case can compromise structural integrity or installation retention.
In environments exposed to road salt, water, mud, or chemicals, material selection and protective coatings may become important. The correct solution may involve not only changing the elastomer but also improving the shaft material, surface treatment, housing design, or contamination protection.
How to Choose the Right Car Oil Seal
A professional selection process should begin with the operating conditions rather than the seal’s visual appearance.
Identify the exact shaft diameter. Measure rather than assuming.
Identify the housing dimensions. Confirm bore diameter and available installation depth.
Determine rotational speed. Convert rpm into surface speed where appropriate.
Identify the fluid. Include lubricant type, additives, and contamination.
Determine temperature. Consider both continuous temperature and short-duration peaks.
Check pressure. Conventional rotary lip seals are generally low-pressure devices, so excessive pressure may require another sealing architecture.
Evaluate contamination. Consider dust, water, mud, and abrasive particles.
Select elastomer. Confirm chemical and thermal compatibility.
Check shaft condition. Verify hardness, surface finish, runout, and wear.
Confirm installation requirements. Check orientation, lubrication, installation depth, and tooling.
Typical Automotive Applications
Car oil seals are used across numerous systems, including:
Engine crankshafts
Camshafts
Timing systems
Manual transmissions
Automatic transmissions
Transfer cases
Differentials
Drive axles
Wheel hubs
Steering and auxiliary mechanisms
Each location may impose different requirements. A high-temperature engine seal and a contaminated wheel-end seal may both be called “oil seals,” but their engineering problems are very different.
The Relationship Between Seal Design and Energy Efficiency
Seal friction contributes to mechanical losses. In high-speed rotating systems, even a relatively small increase in friction can create additional heat and consume energy continuously.
This creates an important design balance. Excessive lip contact can increase friction and temperature, while insufficient contact can increase leakage. Modern seal designs may therefore use optimized lip geometry, surface treatments, controlled interference, and hydrodynamic features to achieve the required balance.
Engineering principle: The “tightest” seal is not necessarily the best seal. The objective is controlled sealing performance with acceptable friction, temperature, wear, and service life.
Storage and Handling
Oil seals should be protected from direct sunlight, ozone-generating equipment, excessive heat, contamination, and unnecessary mechanical deformation. Long-term storage conditions can influence elastomer properties before the seal ever enters service.
Do not bend, fold, stretch, or compress the sealing lip unnecessarily. Keep seals in their original protective packaging until installation whenever practical.
ISO 6194-3 specifically addresses storage, handling, and installation considerations for rotary shaft lip seals.
How to Diagnose an Oil Seal Leak
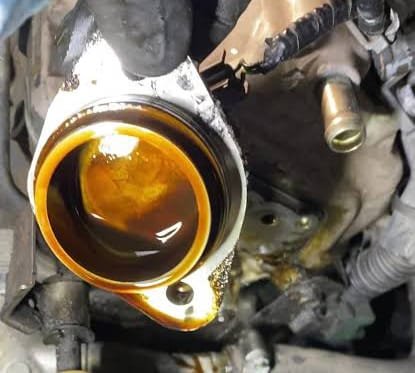
A visible oil stain does not always identify the failed seal. Oil can travel along housings, shafts, covers, or other components before dripping from the lowest point.
A systematic diagnosis should therefore include:
Cleaning the affected area.
Identifying the fluid type.
Inspecting the suspected seal area.
Checking shaft condition.
Checking crankcase or system pressure where relevant.
Inspecting adjacent gaskets and sealing joints.
Determining whether leakage occurs only during operation or also while stationary.
Replacing a seal without identifying the leakage path can result in repeated repairs.
Common Mistakes When Buying Car Oil Seals
Choosing Only by Size
Two seals can share similar dimensions while using different elastomers, lip designs, spring arrangements, or temperature capabilities.
Assuming All Black Rubber Is NBR
Color is not a reliable method of identifying elastomer chemistry. Material identification should rely on specification, documentation, or appropriate laboratory analysis.
Ignoring Shaft Wear
A replacement seal cannot automatically restore a damaged sealing surface.
Installing the Seal Dry
Unless specifically required by the seal design, inappropriate dry installation can increase friction and damage the lip during initial operation.
Using the Wrong Lubricant
A lubricant that is chemically incompatible with the elastomer can shorten service life dramatically.
How Engineers Evaluate Seal Quality
Quality evaluation should extend beyond dimensional inspection. Depending on application requirements, manufacturers may evaluate material properties, dimensional stability, visual quality, spring retention, sealing performance, dynamic durability, fluid compatibility, and temperature resistance.
For rotary seals, qualification testing can include controlled shaft speed, temperature, lubricant, pressure, and duration. ISO 6194-4:2009 provides general performance test procedures for rotary shaft lip seals and notes that such tests may be used for qualification purposes.
However, laboratory qualification is not identical to a guaranteed service life in every vehicle. Real-world conditions can vary substantially.
Expert Tips for Better Seal Selection
🔧 Tip 1: Treat the shaft, seal, lubricant, and housing as one sealing system.
🔧 Tip 2: Always verify material compatibility instead of selecting elastomer only by temperature.
🔧 Tip 3: Investigate repeated failures instead of repeatedly replacing the seal.
🔧 Tip 4: Record shaft speed and diameter because surface velocity affects friction and heat generation.
🔧 Tip 5: Use manufacturer installation instructions whenever available.
When Should a Car Oil Seal Be Replaced?
An oil seal should generally be considered for replacement when it demonstrates persistent leakage, visible lip damage, significant hardening, cracking, loss of elasticity, severe wear, or contamination damage.
During major repairs, replacement may also be sensible when access to the seal is difficult and the seal is already exposed. However, preventive replacement should always be evaluated against the actual maintenance procedure and manufacturer recommendations.
Why Premium Seals Can Be More Economical
The purchase price of a seal is usually small compared with the labor required to access it. A low-cost seal that fails prematurely can create a much higher total cost than a properly specified component.
Total cost should therefore consider:
Seal purchase price
Installation labor
Downtime
Lubricant loss
Contamination-related damage
Potential bearing or gear damage
Warranty and maintenance costs
This is why engineering teams often evaluate seals based on total system performance rather than unit price alone.
A Practical Car Oil Seal Selection Checklist
| Parameter | What to Confirm |
|---|---|
| Seal dimensions | Inside diameter, outside diameter, width and design |
| Shaft | Diameter, hardness, surface finish, runout and wear |
| Speed | RPM and calculated surface velocity |
| Temperature | Continuous and peak operating temperatures |
| Fluid | Oil, grease, fuel, additives and contamination |
| Pressure | Normal and transient pressure |
| Environment | Water, dust, salt, chemicals and vibration |
| Material | NBR, HNBR, FKM, PTFE or other qualified compound |
| Installation | Orientation, lubrication, tooling and installation depth |
Frequently Asked Questions About Car Oil Seals
FAQ 1: What does a car oil seal do?
A car oil seal primarily prevents lubricant from escaping around a rotating shaft while helping exclude external contamination. It maintains a controlled dynamic interface between the shaft and stationary housing.
FAQ 2: How long should a car oil seal last?
There is no universal service-life number. Life depends on material, lubricant, temperature, shaft speed, shaft condition, contamination, pressure, installation, and seal design. A qualified engineering test can provide application-specific information, but a laboratory result should not automatically be interpreted as a guaranteed vehicle service life.
FAQ 3: Is FKM always better than NBR?
No. FKM provides excellent high-temperature and chemical resistance, but material selection depends on the complete application. NBR may provide an appropriate and economical solution for many conventional oil-sealing environments, while HNBR can provide improved thermal and aging performance where required.
FAQ 4: Why does a new oil seal leak?
Possible causes include shaft wear, incorrect installation, damaged sealing lips, incorrect orientation, unsuitable lubricant, excessive runout, contamination, excessive pressure, or an incorrect seal specification. Replacing the seal again without investigating the underlying cause may not solve the problem.
FAQ 5: How do I choose the correct car oil seal?
Start with the shaft and housing dimensions, then evaluate rotational speed, temperature, lubricant, pressure, contamination, shaft condition, required elastomer, seal geometry, and installation requirements. The correct seal is the one that satisfies the complete operating environment rather than simply matching the dimensions.