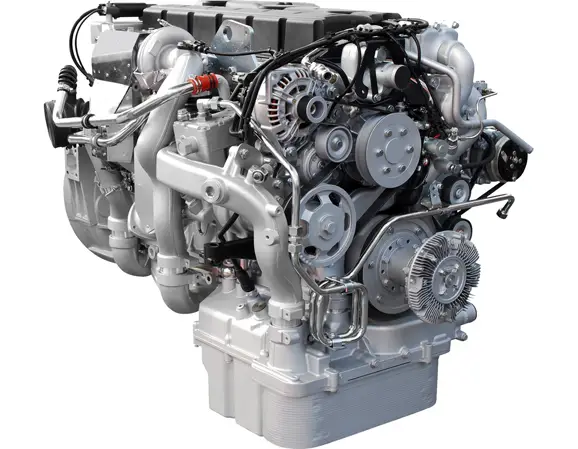

An oil seal is a small but essential component in engines, transmissions, wheel hubs, gearboxes, pumps, and other rotating equipment. Its job is to retain lubricating oil while helping prevent dust, water, and abrasive particles from entering critical mechanical assemblies. When an oil seal fails, the consequences can extend beyond visible leakage to lubricant loss, bearing damage, increased friction, equipment downtime, and costly repairs.
However, oil leakage does not automatically mean that the seal itself is defective. Premature failure often results from a combination of installation errors, shaft surface damage, unsuitable materials, excessive operating temperature, pressure fluctuations, inadequate lubrication, or mechanical misalignment. Replacing the seal without correcting the underlying problem may only provide a temporary solution.
🔎 Essential troubleshooting principle
Identify where the fluid is escaping, examine the failed component, check the shaft and housing, and review actual operating conditions before selecting a replacement oil seal.
How an Oil Seal Works and Why Failure Occurs
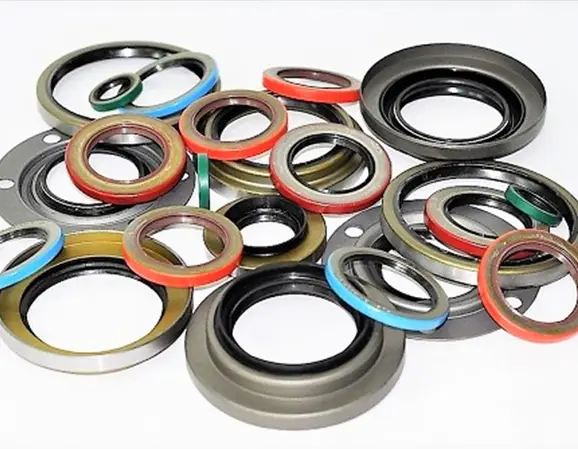
A conventional rotary shaft oil seal commonly consists of an elastomer sealing lip, a reinforcing metal case, and a garter spring that helps maintain contact between the lip and the rotating shaft. Some designs also include a secondary dust lip or specialized features for demanding operating environments.
The primary sealing lip does more than create a physical barrier. Under appropriate conditions, a microscopic lubricant film helps reduce friction between the lip and shaft. The lip geometry, contact force, lubricant supply, shaft surface finish, rotational speed, and operating temperature must remain within the design limits for reliable performance.
If this balance is disrupted, the sealing lip may overheat, wear unevenly, harden, swell, or lose contact with the shaft. In other cases, the oil may escape around the seal’s outside diameter because the housing bore is damaged or the interference fit is incorrect.
Oil seal failures can therefore be divided into two primary categories:
- Leakage at the sealing lip: Often associated with lip wear, shaft damage, incorrect installation, lubrication problems, contamination, or material degradation.
- Leakage around the outer diameter: Often associated with a damaged housing bore, incorrect dimensions, distorted seal casing, poor installation, or inadequate retention.
For additional technical information, consult the SKF industrial seals technical resources and the oil seal failure and diagnosis guide.
10 Common Causes of Oil Seal Failure
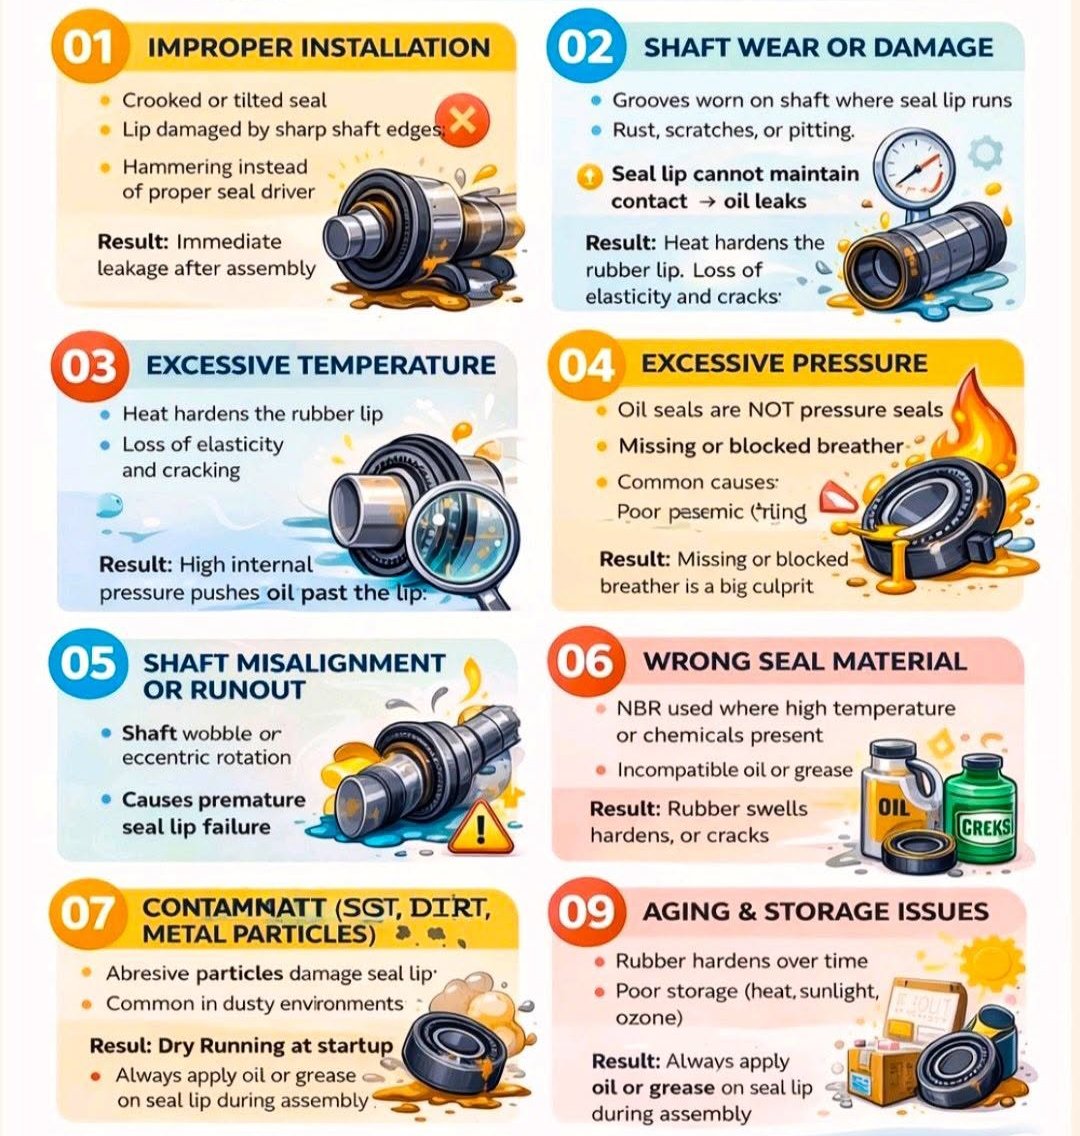
1. Incorrect Installation or Improper Handling
Installation damage is one of the first possibilities to investigate when a newly installed oil seal begins leaking. Even a correctly manufactured seal can fail immediately if its lip is scratched, the seal is pressed into the housing at an angle, or the component is fitted at the wrong depth.
Common installation mistakes include:
- Installing the seal in the wrong direction.
- Damaging the lip while passing over splines, threads, keyways, or sharp shaft edges.
- Using a screwdriver, punch, or unsuitable hammer instead of a proper installation tool.
- Pressing the seal unevenly, deforming the metal case, or dislodging the garter spring.
- Installing the seal into a dirty housing or over a shaft with burrs and scratches.
- Using the wrong seal dimensions or installation depth.
- Failing to lubricate the sealing lip when the manufacturer’s instructions require pre-lubrication.
How to prevent installation failure: Clean and inspect all mating surfaces, protect the lip from sharp edges, verify the seal orientation, and use a mandrel or installation tool that applies force evenly. Follow the equipment manufacturer’s specified installation depth rather than assuming every seal must be flush with the housing.
Where the seal must pass over a spline, keyway, or threaded section, use an appropriate protective sleeve or installation aid. Do not stretch or force the sealing lip over an unprotected sharp feature.
If a seal leaks shortly after installation, inspect the removed component for cuts, deformation, a displaced spring, and damage to the outer diameter before assuming that the seal material is defective.
2. Worn, Grooved, or Damaged Shaft Surfaces
The shaft is an active part of the sealing system. A replacement seal cannot reliably compensate for a shaft that is deeply grooved, corroded, scratched, or dimensionally incorrect.
As the sealing lip runs against the shaft, continuous contact can gradually produce a wear track. Abrasive particles, poor lubrication, excessive lip loading, and an unsuitable shaft finish can accelerate this process. When a new seal is installed over the same groove, the lip may follow the existing wear path and allow oil to escape.
Inspect the following shaft characteristics:
- Diameter: An undersized or out-of-tolerance shaft may not provide the intended sealing contact.
- Surface condition: Scratches, pitting, rust, and burrs can damage the lip or create leakage paths.
- Surface finish: Excessive roughness can accelerate wear, while an unsuitable machining pattern may interfere with lubricant retention.
- Runout and eccentricity: Excessive shaft movement can prevent consistent contact around the circumference.
- Wear-track location: A groove aligned with the old sealing lip may explain why replacement seals repeatedly leak.
Recommended action: Measure the shaft and inspect the sealing track against the equipment manufacturer’s specifications. Depending on the severity of the damage, a suitable repair sleeve, approved refinishing process, shaft replacement, or correction of the bearing problem may be necessary.
Avoid aggressive polishing without dimensional checks. Removing too much material may reduce the shaft diameter and make the sealing problem worse.
3. Excessive Temperature and Thermal Aging
Temperature affects elastomer flexibility, mechanical strength, lubricant viscosity, and the friction generated at the sealing interface. If the seal operates above its specified temperature range for extended periods, the material may harden, crack, shrink, swell, or lose its ability to maintain stable lip contact.
Heat can originate from several sources:
- High lubricant or equipment operating temperatures.
- Excessive friction caused by poor lubrication or excessive lip loading.
- Operation beyond the specified rotational speed.
- Excessive internal pressure or abnormal shaft movement.
- Heat transferred from nearby engine, gearbox, or braking components.
- Incorrect lubricant selection or lubricant deterioration.
A hardened lip may lose flexibility and fail to follow small shaft movements. A softened or swollen lip may deform, while thermal aging can reduce the material’s resistance to wear. These symptoms can overlap with chemical incompatibility and other failure mechanisms, so the appearance of the seal should be considered alongside actual operating data.
Practical solution: Verify the temperature at or near the sealing location, review the seal compound’s specified limits, and investigate the source of friction or heat. Selecting a higher-temperature material may help, but only if it is also compatible with the lubricant and suitable for the shaft speed and mechanical loading.
4. Incorrect Material Selection or Chemical Incompatibility
Oil seals are manufactured from different elastomers and other sealing materials because no single compound is suitable for every lubricant, fuel, temperature, and operating environment. A seal that performs well in one gearbox may deteriorate quickly in another application if the fluid chemistry or temperature differs.
Possible signs of material incompatibility include swelling, softening, shrinkage, cracking, loss of elasticity, surface deterioration, and premature wear. Changes in lubricant formulation or additives may also affect compatibility even when the base oil remains similar.
| Material | Typical application advantages | What to verify |
|---|---|---|
| NBR | Commonly used in many mineral-oil and grease applications. | Temperature limits, fluid composition, additives, and exposure conditions. |
| FKM | Often selected for elevated temperatures and many oil or fuel applications. | Specific chemical compatibility, compound formulation, and low-temperature requirements. |
| HNBR | Can offer improved heat, wear, and mechanical properties in suitable applications. | Actual fluid compatibility, temperature range, and mechanical requirements. |
| Silicone | Useful in selected applications requiring broad temperature capability. | Wear resistance, mechanical loading, and compatibility with the working fluid. |
| PTFE-based designs | Used in selected applications requiring low friction or specialized chemical resistance. | Shaft finish, design requirements, installation method, and operating limits. |
This table provides general guidance, not a universal compatibility rating. Performance depends on the exact compound, fluid formulation, temperature, pressure, and duty cycle. Confirm material suitability with the seal supplier and, for critical applications, conduct compatibility testing under representative conditions.
For selection assistance, review the SKF industrial sealing resources and the oil seal function and maintenance guide.
5. Insufficient Lubrication or Excessive Friction
A rotary oil seal generally relies on suitable lubrication at the lip-to-shaft interface. If the sealing edge runs dry or receives inadequate lubrication, friction and contact temperature can rise rapidly, accelerating wear and material degradation.
Insufficient lubrication may result from low oil levels, restricted lubricant delivery, incorrect lubricant viscosity, a dry startup, poor assembly practices, or an application that exceeds the seal’s design limits.
Potential warning signs include a polished or glazed lip contact area, abnormal wear, discoloration, hardening, and leakage soon after operation begins. These signs are not conclusive by themselves; shaft finish, temperature, and material compatibility should also be investigated.
Corrective measures:
- Use the lubricant specified for the equipment.
- Confirm that the oil level and lubrication delivery meet requirements.
- Pre-lubricate the sealing lip when required by the manufacturer’s instructions.
- Check for blocked passages or conditions that prevent lubricant from reaching the sealing interface.
- Investigate excessive friction, speed, pressure, or lip loading.
Simply adding more oil or grease is not always an effective repair. Excess lubricant, an unsuitable grease, or incorrect assembly may create additional problems. The objective is to restore the lubrication conditions for which the seal was designed.
6. Excessive Pressure or Pressure Fluctuations
Many conventional radial shaft oil seals are intended for low-pressure applications rather than continuous high-pressure service. Excessive internal pressure can increase lip loading, friction, and temperature, potentially deforming the sealing element or forcing lubricant past the lip.
Pressure-related problems may result from a blocked breather, restricted return passage, abnormal fluid expansion, incorrect equipment operation, or use of a standard oil seal in an application requiring a pressure-rated design.
What to check: Inspect breathers and vents, check for blocked passages, and measure pressure under actual operating conditions where appropriate. Compare the results with the seal manufacturer’s limits for the specific design, shaft diameter, temperature, and rotational speed.
Do not assume that a seal suitable for an engine or gearbox will also work reliably in a pressurized hydraulic application. A different seal design or a revised sealing arrangement may be necessary.
7. Contamination from Dust, Metal Particles, or Water
Dust, sand, metal particles, water, and other contaminants can damage the lip or shaft surface and shorten the service life of the sealing system. Abrasive particles trapped between the lip and shaft may create scoring or accelerate wear. Water and corrosive substances can contribute to shaft corrosion and lubricant deterioration.
Contamination can enter through a damaged dust lip, an exposed shaft, a poorly protected assembly, or an operating environment containing mud, road debris, or industrial particles.
To reduce contamination-related failure:
- Keep the assembly area and mating surfaces clean.
- Protect the shaft and housing during disassembly and maintenance.
- Inspect auxiliary dust lips and replace damaged components.
- Select a seal configuration appropriate for dust, water, mud, or chemical exposure.
- Inspect lubricant condition and identify the source of foreign particles.
If a failed seal contains embedded particles or has a scored contact track, replacing the seal without controlling the contamination source may lead to another failure.
8. Shaft Misalignment, Runout, or Bearing Wear
The sealing lip must maintain sufficiently consistent contact with the rotating shaft. Excessive runout, shaft eccentricity, bearing clearance, misalignment, or vibration can cause uneven lip loading. One area of the lip may lose contact while another experiences excessive friction.
Warning signs include uneven wear around the lip, repeated leakage after replacement, abnormal vibration, and a visibly damaged shaft contact track.
Check shaft runout and alignment using the equipment manufacturer’s inspection procedure. Inspect bearings, couplings, shaft supports, and related components for excessive movement. If the mechanical problem remains, a new oil seal may fail in the same way.
9. Damaged Housing Bore or Incorrect Seal Fit
Oil can leak around the outside diameter when the housing bore is damaged or the seal does not achieve the intended fit. Scratches, corrosion, burrs, excessive bore diameter, deformation, or an incorrect seal outside diameter may prevent proper retention and sealing.
Look for oil tracks around the seal’s outer edge, a loose fit, a distorted metal case, or scuffing on the outside diameter. Check the housing dimensions, roundness, surface condition, and specified installation depth.
Do not use extra sealant to compensate for an out-of-tolerance housing unless the equipment and seal manufacturers specifically approve that repair method. Excess sealant may migrate into the sealing area or block lubricant passages.
10. Natural Wear, Material Aging, and Poor Storage
Oil seals are subject to wear and aging. Over time, elastomers may lose flexibility, sealing lips may wear down, and springs or metal cases may corrode. Service life varies with operating temperature, shaft speed, lubricant, contamination, pressure, and maintenance quality.
Storage conditions can also affect performance before a seal is installed. Excessive heat, direct sunlight, ozone exposure, chemical contact, deformation, or unsuitable storage practices may damage the elastomer.
Keep replacement seals in their original packaging when appropriate, protect them from damaging environmental conditions, and follow the supplier’s storage guidance. Inspect each component before installation and avoid using seals with visible cracks, cuts, corrosion, or deformation.
Oil Seal Failure Symptoms: How to Identify the Likely Cause
The appearance of a failed seal provides useful diagnostic evidence. Record the condition before cleaning or discarding the component, and compare the observed damage with the equipment’s operating history.
| Observed condition | Possible explanation | First diagnostic action |
|---|---|---|
| Hard, cracked, or brittle lip | Thermal aging, poor lubrication, incompatible fluid, or excessive pressure | Review temperature, lubricant, pressure, and material specifications. |
| Swollen or unusually soft elastomer | Chemical incompatibility or exposure to an unsuitable fluid | Verify the actual fluid formulation and compound compatibility. |
| Deep groove on the shaft | Long-term wear, contamination, or poor lubrication | Measure shaft diameter and assess the wear track. |
| Cut or torn lip | Installation damage, sharp edges, or foreign particles | Inspect shaft entry features and installation tooling. |
| Uneven wear around the lip | Misalignment, shaft runout, bearing wear, or tilted installation | Check shaft movement, bearing condition, and installation alignment. |
| Oil around the outer diameter | Damaged housing, incorrect fit, or distorted seal casing | Inspect the housing bore and seal dimensions. |
| Repeated leakage after replacement | Root cause not corrected, incorrect replacement part, or another leak source | Recheck the complete sealing system and operating conditions. |
These observations are diagnostic clues rather than definitive conclusions. For additional failure-analysis information, refer to the SKF CR Seals Handbook and the oil seal failure diagnosis reference.
A Practical Step-by-Step Oil Seal Troubleshooting Procedure
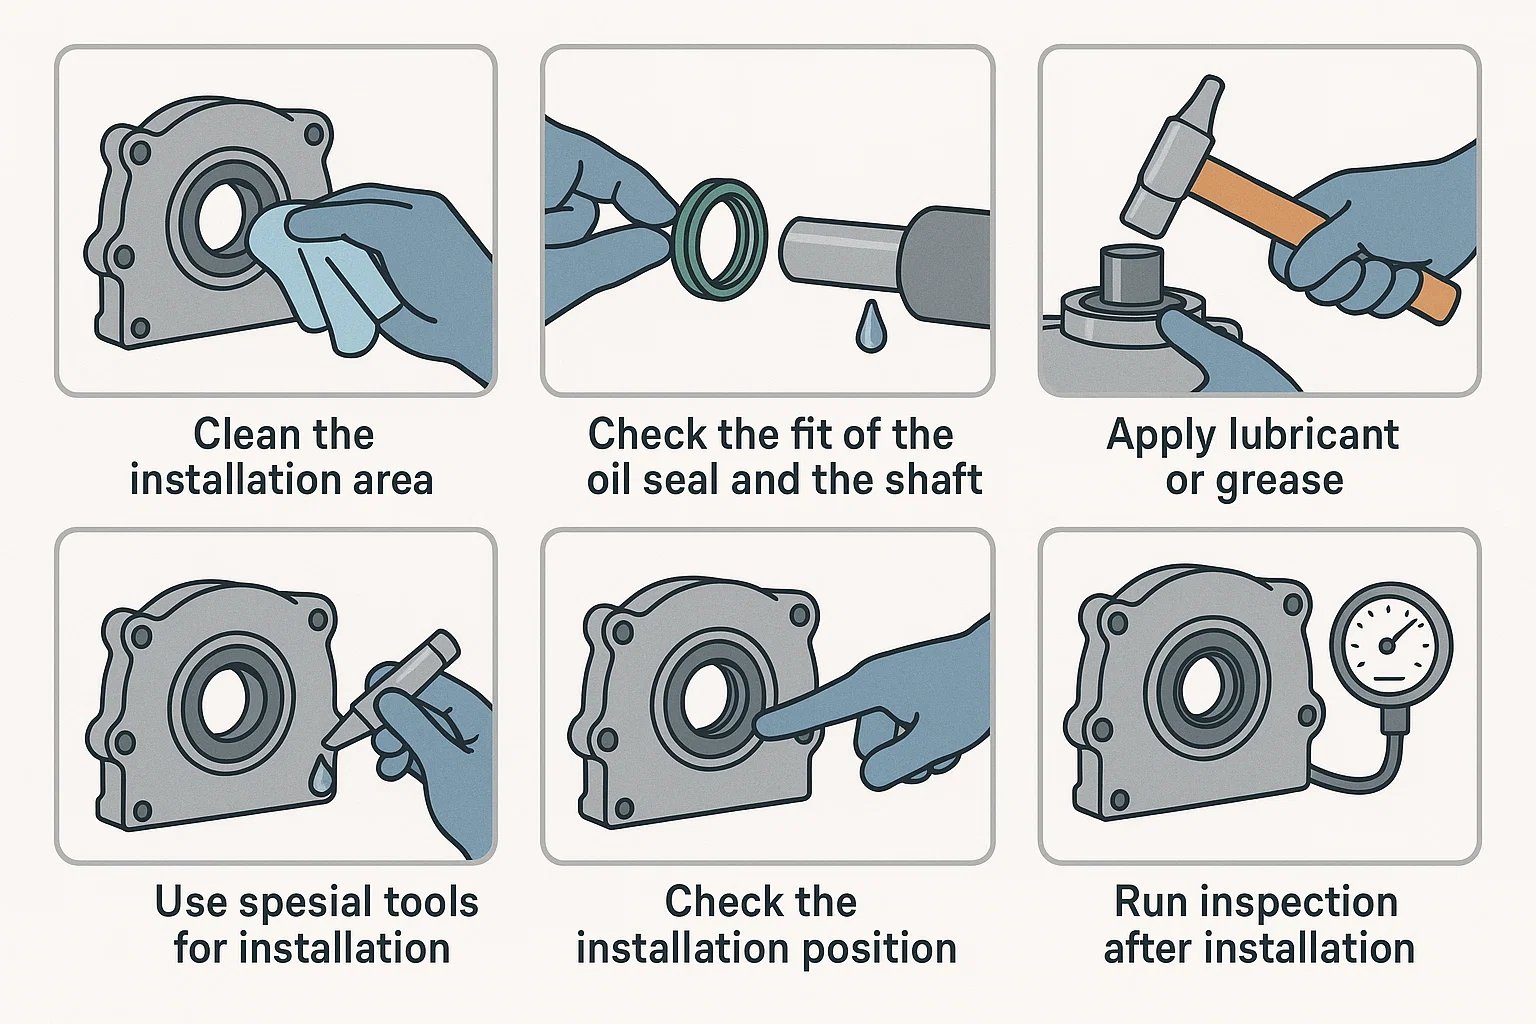
A structured inspection helps avoid unnecessary part replacement and reduces the likelihood of repeat failures. Before disassembly, follow the equipment manufacturer’s safety instructions, isolate the machine, relieve any stored pressure, and allow hot components to cool.
Step 1 — Confirm the source of the leak
Clean the surrounding area and identify where the fluid first appears. Oil can travel along a housing or shaft from a nearby gasket, connection, breather, or other sealing point.
Step 2 — Record the operating conditions
Document the lubricant type, temperature, rotational speed, pressure, operating hours, and timing of the leakage. Determine whether the leak occurs during startup, after warming, at high speed, or while the machine is stopped.
Step 3 — Examine the failed seal
Inspect the lip, spring where fitted, metal case, and outer diameter. Look for cuts, swelling, hardening, uneven wear, deformation, and evidence of contamination. Photograph the component before cleaning it.
Step 4 — Inspect and measure the shaft
Check the sealing track for scratches, corrosion, grooves, and incorrect surface finish. Measure critical dimensions and verify runout where required by the equipment specification.
Step 5 — Inspect the housing and associated components
Check the bore for damage, excessive clearance, distortion, and incorrect installation depth. Inspect bearings and related parts for abnormal movement, vibration, or alignment problems.
Step 6 — Verify the replacement specification
Confirm the part number, dimensions, material, lip configuration, temperature limits, pressure capability, and suitability for the lubricant and shaft speed.
Step 7 — Correct the root cause and reinstall
Repair damaged surfaces, correct lubrication or pressure issues, and resolve mechanical movement where necessary. Install the replacement using suitable tools and the specified procedure, then check for leakage under safe operating conditions.
How to Prevent Premature Oil Seal Failure
Preventive maintenance should address the conditions that damage the sealing interface rather than relying solely on replacing seals at fixed intervals. The appropriate maintenance strategy depends on the equipment, operating environment, failure history, and manufacturer’s recommendations.
- Use the correct seal specification: Match dimensions, material, lip design, pressure capability, and operating speed to the application.
- Maintain the shaft and housing: Correct wear, corrosion, burrs, dimensional errors, and alignment issues before fitting a new seal.
- Control temperature: Investigate abnormal heat and verify that the seal and lubricant remain within their specified operating ranges.
- Maintain proper lubrication: Use the correct fluid, maintain the specified level, and prevent blocked lubricant passages.
- Keep contaminants out: Protect open assemblies during maintenance and inspect dust-exclusion features.
- Use proper installation tools: Prevent lip cuts, casing distortion, spring displacement, and incorrect installation depth.
- Monitor shaft movement: Check bearing condition, runout, alignment, and vibration where appropriate.
- Keep maintenance records: Record the part number, failure appearance, service hours, operating conditions, and corrective actions.
For fleet maintenance and industrial applications, comparing failure patterns across machines can reveal recurring problems. If several seals fail at the same location after similar operating hours, investigate the common design, installation procedure, lubricant, shaft condition, or operating environment before assuming every replacement part is defective.
How to Select a Replacement Oil Seal Correctly
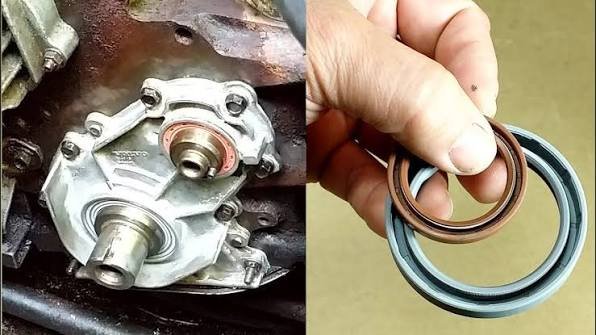
Choosing a replacement based only on the inner diameter or the appearance of an old seal can result in another failure. A reliable selection process considers the complete sealing system and the actual service conditions.
Before requesting a quotation or ordering a replacement, prepare the following information:
- Dimensions: Shaft diameter, housing bore, seal width, and required installation depth.
- Original identification: Part number, equipment model, manufacturer, and component location where available.
- Material requirements: Actual lubricant or fluid, additives, temperature range, and chemical exposure.
- Operating conditions: Rotational speed, pressure, duty cycle, direction of rotation, and startup conditions.
- Environmental exposure: Dust, water, mud, chemicals, or other contaminants.
- Shaft condition: Surface finish, hardness where specified, runout, and wear at the sealing track.
- Failure history: Leakage location, service duration, photographs of the failed seal, and previous corrective actions.
✓ Supplier communication tip
When a seal repeatedly fails, provide the supplier with the original part number, shaft and housing dimensions, lubricant specification, operating temperature, speed, and photographs of the damage. These details help distinguish a material-selection issue from installation damage or a problem with the equipment itself.
For automotive and heavy-duty machinery, verify the application using reliable part references and equipment documentation. A seal with matching dimensions is not necessarily interchangeable if its material, lip configuration, pressure capability, or rotation characteristics differ.
When Should an Oil Seal Be Replaced?
Replacement is generally necessary when the sealing lip is cut, excessively worn, hardened, cracked, chemically damaged, or no longer able to maintain the intended contact. A damaged spring, distorted casing, or loss of the correct fit may also justify replacement.
However, replacement should be accompanied by inspection of the shaft, housing, lubrication system, and related mechanical components. If the shaft is grooved, the housing is out of tolerance, or the equipment has excessive runout or pressure, fitting a new seal without correcting these conditions is unlikely to provide a lasting repair.
There is no universal service interval for every oil seal. Actual service life depends on design, material, lubricant, temperature, speed, contamination, maintenance practices, and duty cycle. Follow the equipment manufacturer’s maintenance recommendations and use condition-based inspection where appropriate.
Frequently Asked Questions
1. What is the most common cause of oil seal failure?
There is no single cause across all applications. Incorrect installation, shaft wear, poor lubrication, contamination, unsuitable material, and excessive temperature or pressure are frequent contributors. The best diagnosis combines inspection of the failed seal with measurements and operating data.
2. Why does a new oil seal leak immediately after installation?
Immediate leakage may result from a cut lip, incorrect orientation, tilted installation, a damaged shaft surface, the wrong seal dimensions, or inadequate lubrication. Excessive shaft runout or pressure may also be responsible. Inspect the complete sealing system before installing another seal.
3. Can a worn shaft cause repeated oil seal failure?
Yes. A groove, scratch, corrosion pit, incorrect surface finish, or excessive shaft movement can prevent stable sealing contact. Depending on the damage and equipment requirements, a suitable repair sleeve, approved refinishing, alignment correction, or shaft replacement may be necessary.
4. How can I determine whether an oil seal has failed because of excessive heat?
Hardening, cracking, discoloration, reduced flexibility, and abnormal lip wear can indicate heat-related damage. These symptoms may also result from poor lubrication or chemical incompatibility, so verify actual operating temperature and review the lubricant, material, pressure, and shaft speed.
5. How can oil seal service life be extended?
Use a seal suitable for the fluid and operating conditions, maintain the specified lubrication, protect the lip during installation, keep the shaft and housing within their dimensional requirements, control contamination, and monitor temperature and shaft movement. Correcting the root cause of a failure is the most important step in preventing repeat leakage.