Why Proper Oil Seal Installation Matters
Oil seals play a critical role in industrial machinery, automotive systems, hydraulic equipment, agricultural machinery and rotating components. Their main purpose is to retain lubricants, prevent fluid leakage and block contaminants from entering mechanical systems. However, even the highest-quality oil seal can fail prematurely if installation procedures are incorrect.
Improper installation may cause leakage, shaft wear, contamination, overheating and expensive equipment downtime. Understanding the correct installation methods helps maximize seal performance, extend equipment life and reduce maintenance costs.
🔧 Key Insight: Correct oil seal installation is essential for preventing leakage, reducing wear and ensuring long-term equipment reliability.
Understanding the Function of Oil Seals
Oil seals are designed to create a barrier between moving and stationary components.
Lubricant Retention
Oil seals help retain lubricants within mechanical systems to ensure smooth operation.
Contamination Prevention
They block dirt, dust, water and debris from entering sensitive components.
Pressure and Temperature Resistance
Modern sealing systems are designed to withstand demanding operating conditions.
Main Functions of Oil Seals
• Prevent lubricant leakage
• Protect against contamination
• Maintain system efficiency
• Extend machinery lifespan
Proper oil seal installation ensures these functions operate effectively throughout the seal’s service life.
Preparation Before Oil Seal Installation
Preparation is one of the most important stages in the installation process.
Inspect the Seal Carefully
Check the seal for cuts, cracks, deformation or material defects before installation.
Clean the Installation Area
All housing bores and shafts should be free from dirt, debris and old lubricant residue.
Check Shaft Condition
Shaft surfaces should be smooth and free from scratches or corrosion.
Verify Seal Dimensions
Always confirm the seal size and specifications before installation begins.
✔ Pre-Installation Checklist
• Inspect seal condition
• Clean housing and shaft
• Verify dimensions
Tools Required for Oil Seal Installation
Using proper installation tools helps avoid seal damage and improves accuracy.
Seal Installation Drivers
Installation drivers help apply even pressure across the seal surface.
Protective Sleeves
Protective sleeves prevent seal lip damage during shaft installation.
Lubricants
Compatible lubricants reduce friction during installation.
Measurement Tools
Precision measuring instruments ensure dimensional accuracy.
🛠 Recommended Installation Tools
• Seal drivers
• Protective sleeves
• Calipers and gauges
• Compatible lubricants
Using specialized tools protects the integrity of the oil seal during installation.
Step-by-Step Oil Seal Installation Process
Step 1: Clean All Components
Remove contaminants, rust and debris from shafts, housings and surrounding surfaces.

Step 2: Apply Lubrication
Lightly lubricate the seal lip and shaft surface using compatible lubricant.
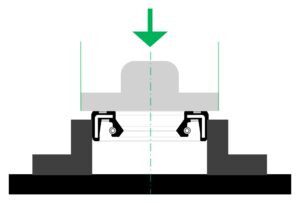
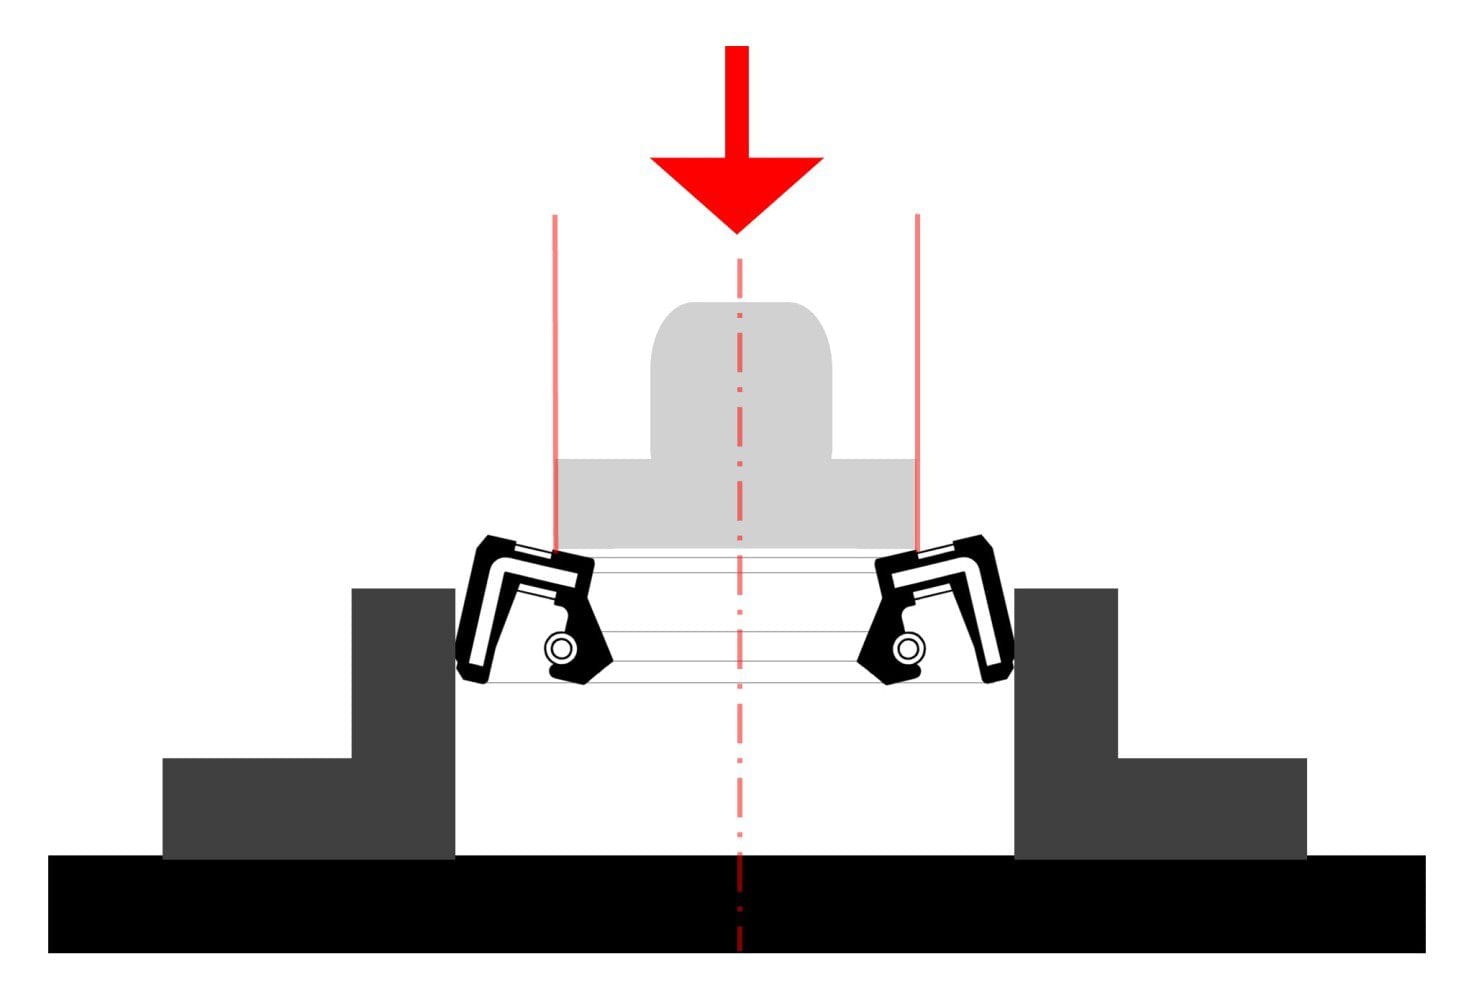
Step 3: Align the Seal Correctly
The seal should be positioned squarely to avoid uneven pressure.
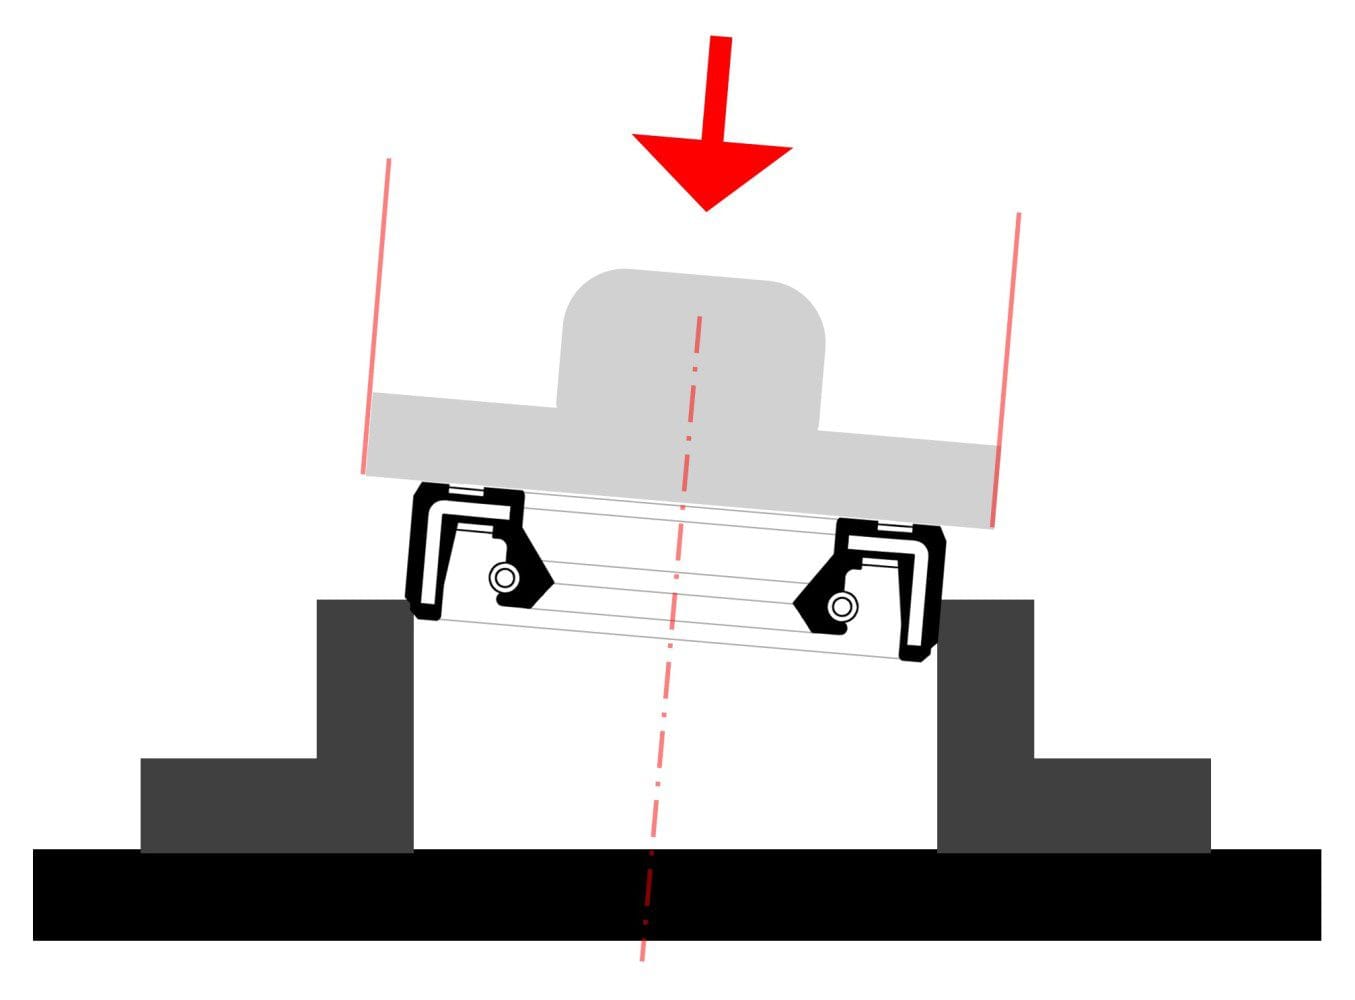
Step 4: Press the Seal Evenly
Apply steady and even force during installation.
Step 5: Verify Installation Depth
Ensure the seal sits at the correct depth according to design specifications.
📌 Installation Essentials
• Avoid excessive force
• Maintain proper alignment
• Lubricate correctly
• Protect the sealing lip
Common Oil Seal Installation Mistakes
Many seal failures result from avoidable installation errors.
Installing the Seal Backward
The sealing lip must face the fluid being retained.
Using Improper Tools
Incorrect tools may deform or scratch the seal surface.
Dry Installation
Installing seals without lubrication increases friction and wear.
Ignoring Shaft Damage
Damaged shafts can rapidly destroy new seals.
⚠ Common Installation Errors
• Improper alignment
• Excessive installation force
• Damaged sealing lip
• Incorrect seal orientation
Preventing these mistakes improves oil seal performance and durability.
The Importance of Shaft Surface Quality
The condition of the shaft greatly influences sealing effectiveness.
Surface Finish Requirements
Shaft roughness should meet manufacturer recommendations.
Avoid Sharp Edges
Sharp corners may cut or damage the seal lip during installation.
Check for Wear Grooves
Worn shafts may cause leakage and premature seal wear.
🔍 Shaft Inspection Priorities
• Smooth surface finish
• No corrosion or scratches
• Proper dimensional tolerance
• No excessive wear grooves
Lubrication and Compatibility Considerations
Lubrication selection affects both installation quality and operational reliability.
Use Compatible Lubricants
Lubricants should not chemically attack the seal material.
Prevent Dry Running
Initial lubrication helps reduce startup friction.
Avoid Over-Lubrication
Excessive lubricant may attract contaminants or affect sealing pressure.
🧪 Lubrication Best Practices
• Select compatible lubricants
• Lubricate evenly
• Avoid contamination
• Prevent excessive grease buildup
Post-Installation Inspection and Testing
After installation, verification procedures help confirm proper performance.
Visual Inspection
Inspect for visible deformation, uneven seating or damage.
Rotation Testing
Rotate shafts manually to ensure smooth movement.
Leakage Monitoring
Monitor the system during startup for any signs of leakage.
✔ Post-Installation Checks
• Confirm alignment
• Inspect seal position
• Check for leakage
• Verify smooth rotation
Routine inspection ensures long-term oil seal reliability.
Maintenance Tips for Extended Seal Life
Correct installation is only the beginning of effective sealing performance.
Maintain Clean Operating Conditions
Contaminants accelerate wear and reduce seal lifespan.
Monitor Operating Temperatures
Excessive heat may harden or degrade elastomer materials.
Inspect Equipment Regularly
Routine maintenance helps identify early signs of failure.
Replace Worn Components Promptly
Delaying maintenance may damage shafts and housings.
⭐ Long-Term Maintenance Benefits
✓ Reduced leakage risk
✓ Longer equipment lifespan
✓ Lower maintenance costs
✓ Improved operational efficiency
✓ Better machinery reliability
Future Trends in Oil Seal Installation Technology
Modern industrial systems increasingly require advanced sealing technologies and improved installation precision.
Automated Installation Equipment
Automation improves consistency and reduces installation damage.
Advanced Seal Materials
New elastomer compounds improve durability and chemical resistance.
Predictive Maintenance Systems
Smart monitoring technologies help detect early sealing problems.
🚀 Industry Outlook: Future oil seal technologies will focus on smarter maintenance, improved installation precision and enhanced sealing durability.
Frequently Asked Questions
1. Why is proper oil seal installation important?
Correct installation prevents leakage, reduces wear and improves equipment reliability.
2. What is the most common oil seal installation mistake?
Improper alignment and using excessive installation force are among the most common mistakes.
3. Should oil seals be lubricated before installation?
Yes. Proper lubrication reduces friction and protects the sealing lip during installation.
4. How can shaft condition affect oil seal performance?
Damaged or rough shaft surfaces can quickly wear out seals and cause leakage.
5. How often should installed oil seals be inspected?
Regular inspection intervals depend on operating conditions, but routine monitoring is strongly recommended.