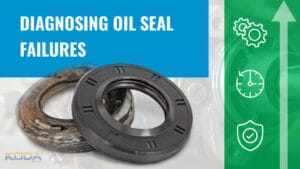
Effective solutions for oil seal fault diagnosis
Summary
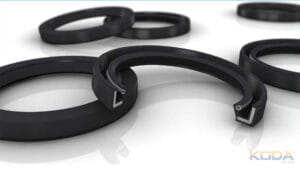
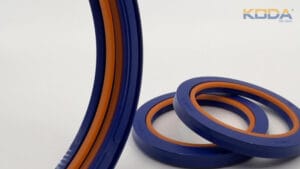
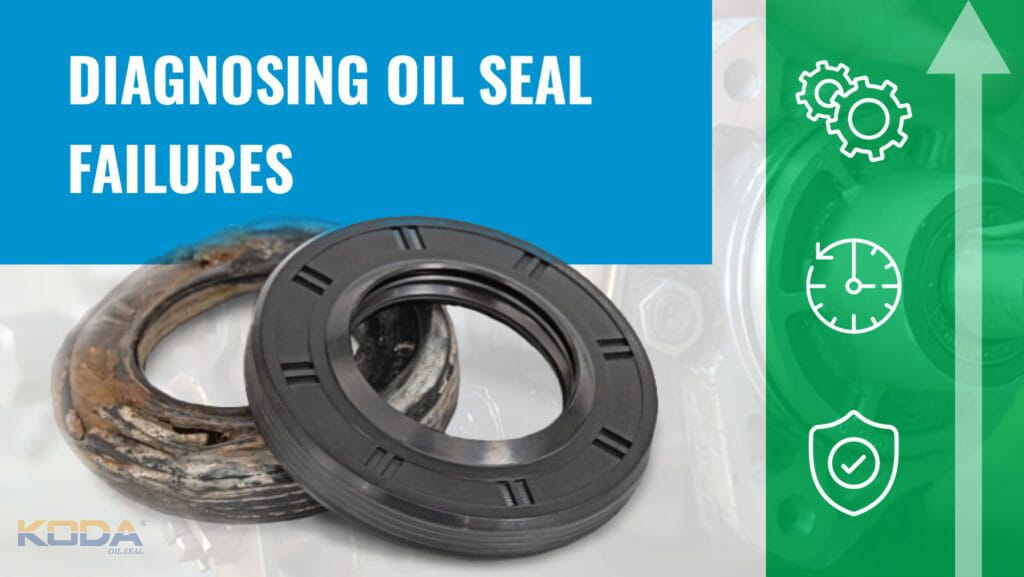
Oil seal, as core sealing elements in industrial equipment, automobiles, and construction machinery, play a crucial role in preventing media leakage and the intrusion of external contaminants. Whether it’s a motor, reducer, hydraulic cylinder, or a car engine and differential, a failure in an oil seal can not only lead to oil leakage and insufficient lubrication, but may also cause shaft wear, component damage, and increased maintenance costs and downtime losses.
Core principles of oil seal fault diagnosis
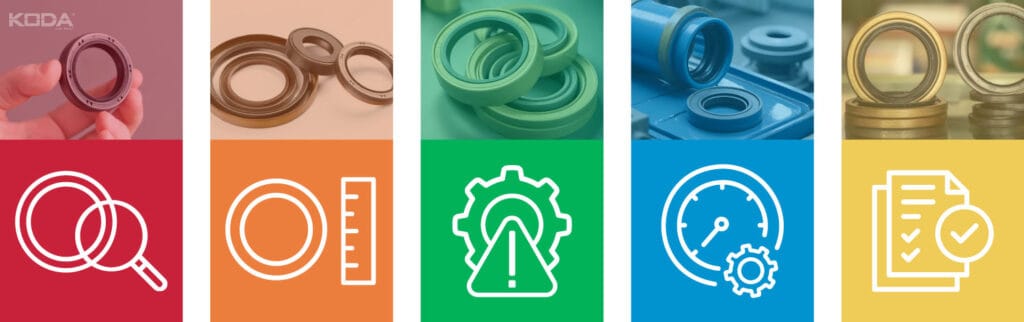
Many customers, when encountering oil seal failures, blindly replace the oil seals only to see repeated failures. The core issue is failing to identify the root cause. Oil seal fault diagnosis should follow the principle of “first observe the symptoms, then investigate, and finally resolve,focusing on three key aspects:
- Avoid blindly replacing oil seals: First, observe the fault symptoms (such as leakage, abnormal noise, overheating), and consider the equipment’s operating conditions (speed, temperature, medium) to rule out problems not related to the oil seal itself (such as shaft wear, installation misalignment).
- Prioritize checking the contact interface: 80% of oil seal failures are related to the contact state of the shaft surface and lip (such as shaft surface scratches, lip wear, insufficient lubrication).
- Find the root cause based on operating conditions: Different equipment (such as high-speed motors vs. low-speed hydraulic cylinders) and different environments (dusty vs. high-temperature) have vastly different causes of failure, requiring targeted troubleshooting.
Common Oil Seal Faults and Practical Diagnosis

Fault 1: Oil leakage
Based on high-frequency failure cases in the workshop, the six most common types of oil seal failures were categorized according to the logic of failure phenomenon → root cause → step-by-step diagnosis → practical solution → preventive measures. Each step is closely related to actual operation.
1. Fault Phenomenon
When the equipment is running, there is obvious oil seepage at the oil seal lip, which can lead to dripping in severe cases, causing the oil level in the equipment to drop and polluting the surrounding environment. This is commonly seen in equipment such as motors, reducers, and automotive differentials.
2. Core Causes
1. Oil Seal Lip Wear and Aging: After long-term operation, friction between the lip and the shaft surface leads to wear, or the rubber material ages and cracks, resulting in loss of sealing ability;
2. Shaft Surface Damage: Scratches, rust, burrs on the shaft surface, or excessive shaft surface roughness (e.g., Ra > 0.5μm) damage the lip sealing surface, leading to oil leakage;
3. Installation Misalignment: The oil seal is installed crookedly, not properly pressed in, or the lip is facing the wrong direction (e.g., the GA oil seal lip is not facing the dust side);
4. Insufficient Lubrication: Lack of lubrication between the lip and the shaft surface leads to increased dry friction and wear, or the wrong type of grease is selected (e.g., incompatible with the medium);
5. Exceeding Operating Conditions: Speed and temperature exceed the oil seal design range, causing the lip to overheat, deform, and fail to seal.
3. Step-by-Step Diagnosis
Step 1: Stop the machine and inspect the area around the oil seal. Observe the location of the leak (lip/outer edge of the oil seal) to determine whether it is a lip leak or an outer peripheral leak.
Step 2: Disassemble the oil seal and inspect the condition of the lip (whether it is worn, cracked, or aged). If the lip is smooth and undamaged, check the shaft surface (touch the shaft surface by hand to feel for burrs or scratches).
Step 3: Check the operating parameters (speed, temperature, medium) to confirm whether they exceed the oil seal’s design range (e.g., TGR oil seal speed exceeding 25 m/s).
Step 4: Check for installation marks to confirm whether the oil seal is properly pressed in, whether the lip orientation is correct, and whether there are any signs of impact (to avoid lip deformation).
4. Practical Solutions
- If the lip is worn/aged: Replace with an oil seal of the same model and material (e.g., NBR material is suitable for mineral oil, FKM material is suitable for high temperature). Clean the shaft surface and mounting hole before replacement.
- If the shaft surface is damaged: For minor scratches, polish with fine sandpaper to Ra 0.3~0.5μm. For severe scratches, replace the shaft or r
- If there is an installation misalignment: Reinstall the oil seal, using a special guide sleeve to ensure proper press-fitting and correct lip orientation (main oil seal lip facing the medium side, dust seal facing the outside).
- If lubrication is insufficient: Apply grease compatible with the medium to the lip and shaft surface. Check the oil level regularly and replenish or replace the lubricant as needed.
- If the operating conditions exceed specifications: Select a new type of oil seal suitable for the operating conditions (e.g., replace with a TGR oil seal for high-speed conditions, and an FKM material oil seal for high-temperature conditions).
5. Preventive Measures
Regularly check the condition of the oil seal lip and replace it every 3-6 months (for high-frequency operating equipment); keep the area around the equipment clean to prevent dust and impurities from entering; strictly control the equipment speed and temperature, and do not operate under overload conditions.
Fault 2: Abnormal noise from the oil seal
1. Fault Phenomenon
When the equipment is running, the oil seal area emits friction noise and screeching noise, which is more obvious during startup or high-speed operation. Over time, this will lead to rapid wear of the lip and failure of the seal.
2. Core Causes
- Insufficient Lubrication: Dry friction between the lip and the shaft surface, lacking sufficient oil film, resulting in excessive frictional resistance;
- Excessive Lip Interference: Overly tight interference contact between the oil seal lip and the shaft surface intensifies friction;
- Excessive Shaft Surface Roughness: The shaft surface is not smooth, causing abnormal noise due to friction with the lip;
- Oil Seal Deformation: Excessive hammering or pressing during installation causes lip deformation, resulting in uneven contact with the shaft surface;
- Foreign Object Intrusion: Dust or sand particles enter between the lip and the shaft surface, causing abnormal noise due to friction.
3. Step-by-Step Diagnosis
1. After stopping the machine, rotate the shaft by hand to feel the frictional resistance between the shaft and the oil seal (excessive resistance may indicate excessive interference or insufficient lubrication);
2. Disassemble the oil seal and check if the lip is deformed, if there are any foreign objects attached, and if the shaft surface is rough;
3. Check the condition of the grease. If the grease is dry or black, it indicates insufficient lubrication or the wrong type of grease was selected.
4. Practical Solutions
- Insufficient Lubrication: Add specialized grease to ensure sufficient oil film between the lip and the shaft surface, avoiding dry friction;
Excessive - Interference: Replace with an oil seal with appropriate interference (normal interference is 0.20~0.50 mm), or lightly grind the lip edge (handle with care to avoid damaging the lip);
- Rough Shaft Surface: Fine grind the shaft surface to Ra 0.3~0.5μm to remove burrs and scratches;
- Foreign Object Intrusion: Clean the shaft surface and oil seal, replace with a new oil seal, and install a dustproof device (such as a GA oil seal) to prevent foreign objects from re-entering.
Fault 3: Oil seal overheating (lips become hot, accelerating aging)
1. Fault Phenomenon
After the equipment has been running for 10-30 minutes, the oil seal area feels noticeably hot to the touch (temperature exceeds 80℃). Prolonged heating will cause the rubber lip to age, harden, and crack, shortening the life of the oil seal.
2. Core Causes
- Excessive Rotation Speed: Exceeding the oil seal’s design rotation speed intensifies friction between the lip and shaft surface, generating excessive heat;
- Insufficient Lubrication: Dry friction or insufficient grease prevents heat dissipation;
- Material Mismatch: The oil seal material lacks high-temperature resistance (e.g., NBR material used for temperatures >120℃);
- Excessive Tightening: Over-tightening the oil seal results in excessive pressure between the lip and shaft surface, leading to frictional heat generation;
- Eccentricity of Equipment: Excessive eccentricity between the shaft and housing causes uneven force on the oil seal lip, resulting in localized frictional heat generation.
3. Step-by-Step Diagnosis
1. Measure the temperature of the oil seal area using a thermometer to confirm whether it exceeds the temperature range of the oil seal material;
2. Check the equipment rotation speed and calculate the shaft surface linear velocity (v = shaft diameter × rotation speed × π/60000) to confirm whether it exceeds the upper limit of the oil seal rotation speed;
3. Check the condition of the lubricating grease, observing for signs of drying or carbonization, to determine if lubrication is sufficient;
4. Check the shaft eccentricity. If the eccentricity is too large, the equipment precision needs to be adjusted.
4. Practical Solutions
- Excessive Speed: Reduce equipment speed or replace with an oil seal suitable for high speeds (e.g., a TGR oil seal, capable of reaching 25 m/s);
- Insufficient Lubrication: Add grease, replace with a high-temperature resistant, low-friction grease, and change the grease regularly;
- Material Mismatch: Replace with an oil seal made of a high-temperature resistant material (e.g., FKM material, capable of reaching 220℃);
- Overly Tight Installation: Reinstall the oil seal, controlling the pressing force to ensure appropriate contact pressure between the lip and the shaft surface;
- Equipment Eccentricity: Adjust the coaxiality of the shaft and housing, correct equipment misalignment, and avoid uneven force on the lip.
Fault 4: Oil seal detachment or displacement (fails quickly after installation)
1. Fault Phenomenon
After the oil seal is installed, it may fall off or shift from the assembly hole after the equipment has been running for a period of time, resulting in sealing failure and oil leakage. This is common in equipment with high vibration (such as construction machinery and agricultural machinery).
2. Core Causes
- Excessive Clearance: The clearance between the oil seal’s outer diameter and the assembly hole is too large, making it impossible to secure and prone to detachment during vibration;
- Incorrect Installation: The oil seal is not pressed to the specified depth, resulting in insecure fixation;
- Excessive Equipment Vibration: Severe vibration during equipment operation causes the oil seal to loosen or shift;
- Damaged Frame: The oil seal’s metal frame is corroded or deformed, losing its supporting function and unable to be fixed in the assembly hole;
- Weared Assembly Hole: The inner wall of the assembly hole is worn and enlarged, resulting in excessive clearance between the seal and the outer diameter.
3. Step-by-Step Diagnosis
1. Disassemble the oil seal, measure the outer diameter of the oil seal and the inner diameter of the mounting hole, and confirm the fitting clearance (normal fitting clearance is 0~0.05 mm);
2. Inspect the inner wall of the mounting hole for wear, rust, and burrs;
3. Inspect the oil seal skeleton for deformation and rust. If the skeleton is damaged, it indicates a problem with the oil seal quality or installation method;
4. Observe the equipment vibration to determine if the oil seal has shifted due to vibration.
4. Practical Solutions
- Excessive clearance: Replace with an oil seal with one of a slightly larger outer diameter (custom-made as needed), or repair the mounting hole (e.g., electroplating, inserting a bushing);
- Improper installation: Re-press the oil seal, ensuring it is pressed to the specified depth. A special pressure sleeve can be used for assistance;
- Excessive equipment vibration: Install vibration damping devices to reduce equipment vibration, or select an oil seal with an anti-detachment structure;
- Damaged frame: Replace with a new oil seal, selecting one with a stainless steel frame (rust-resistant and deformation-resistant);
- Worn mounting hole: Repair the mounting hole, grinding the inner wall to a smooth surface to ensure the clearance meets requirements.
Fault 5: Lip cracking or damage (direct cause of seal failure)
1. Fault Symptoms
Cracks or gaps appear on the oil seal lip. In severe cases, the lip may fall off, preventing a seal from forming and causing a large amount of oil leakage. This is common in low-temperature, high-pressure, or improperly installed scenarios.
2. Core Causes
- Installation Scratches: During installation, the guide sleeve was not used, and the lip was scratched by burrs or sharp corners on the shaft end;
- Low-Temperature Brittleness: Under low-temperature conditions (e.g., <-30℃), the rubber material becomes brittle, and the lip is prone to cracking (e.g., NBR material has poor low-temperature performance);
- Excessive Pressure: The pressure at the sealing part exceeds the oil seal’s design range, leading to lip deformation and cracking;
- Incompatibility: The oil seal material is incompatible with the medium (e.g., NBR material used with organic solvents), causing the rubber to swell and crack;
- Long-Term Aging: With prolonged use, the rubber ages and hardens, losing elasticity, and the lip is prone to cracking.
3. Step-by-Step Diagnosis
1. Disassemble the oil seal and observe the location and shape of the crack on the lip to determine whether it is a scratch or a brittle fracture;
2. Check the equipment operating conditions (temperature, pressure, medium) to confirm whether they exceed the oil seal’s compatibility range;
3. Inspect the shaft end for burrs or sharp corners to determine if it is an installation scratch.
4. Practical Solutions
- Installation Scratches: Replace with a new oil seal. Use a dedicated guide sleeve during installation to avoid scratching the lip. Ensure the shaft end chamfer is smooth and burr-free.
- Low-Temperature Brittleness: Replace with an oil seal made of a low-temperature resistant material (such as PU material, which can withstand temperatures down to -35℃), or install insulation on the equipment.
- Excessive Pressure: Reselect an oil seal suitable for high pressure (such as a TGA oil seal, which can withstand pressures up to 4 BAR), or reduce the pressure at the sealing point.
- Media Incompatibility: Replace with an oil seal material compatible with the media (e.g., FKM material for organic solvents).
- Long-Term Aging: Replace the oil seal regularly, every 6-12 months depending on the equipment’s operating frequency.
Fault 6: Foreign object intrusion, premature wear of the lip
1. Fault Symptoms
Rapid wear of the oil seal lip, scratches and impurities on the surface, gradually reducing the sealing effect and eventually leading to leakage. This is common in environments with high dust and sediment levels (such as mining machinery and agricultural machinery).
2. Core Causes
- Lack of Dustproof Device: The absence of a dustproof oil seal (such as a GA seal) allows dust, sand, and silt to enter between the lip and the shaft surface.
- Harsh Equipment Environment: The equipment operates in a dusty, silty environment for extended periods, resulting in a large accumulation of contaminants on the shaft surface.
- Grease Contamination: Impurities mixed in the grease enter the lip with shaft rotation, accelerating wear.
- Rough Shaft Surface: The rough shaft surface easily attracts contaminants, increasing friction with the lip and exacerbating wear.
3. Step-by-Step Diagnosis
1. Disassemble the oil seal and inspect the lip surface for impurities and scratches to determine if it is due to foreign object wear;
2. Inspect the equipment’s operating environment to confirm the presence of excessive dust or sediment;
3. Inspect the lubricating grease for impurities or cloudiness.
4. Practical Solutions
- Install dustproof devices: Install GA dustproof oil seals as the first line of protection to scrape away dirt from the shaft surface;
- Improve operating environment: Clean dust and sand around the equipment and install a protective cover;
- Replace lubricating grease: Replace the lubricating grease regularly to avoid contamination and replenish with clean, dedicated lubricating grease;
- Repair shaft surface: Fine grind the shaft surface to Ra 0.3~0.5μm to remove surface impurities and scratches and reduce dirt adhesion.
Oil seal fault diagnosis tool
No specialized high-end equipment is needed; the following three types of tools can meet daily fault diagnosis needs. They are low-cost, easy to operate, and suitable for workshop practice:
1. Basic measuring tools: calipers (for measuring shaft diameter, oil seal dimensions, and fit clearance), thermometer (for measuring oil seal heating temperature), roughness tester (for checking shaft surface roughness);
2. Cleaning tools: brush, cloth, alcohol (for cleaning shaft surfaces, oil seals, and assembly holes, removing impurities and oil);
3. Auxiliary tools: special guide sleeve (to prevent scratching the lip during installation), press (for evenly pressing the oil seal), fine sandpaper (for repairing minor shaft surface scratches).
Oil seal failure prevention techniques
Prevention is worse than cure. Based on years of practical experience, we have summarized five low-cost prevention techniques to help customers reduce the frequency of oil seal failures:
1. Precise Selection: Choose the appropriate oil seal model and material according to the equipment’s operating conditions (speed, temperature, pressure, medium), avoiding blindly using generic seals (e.g., choose TGR for high-speed applications, GA+ main seal for dusty environments);
2. Proper Installation: Use specialized tools, avoid hammering or over-tightening, ensure the lip is correctly oriented, properly pressed in, and the shaft surface is free of burrs;
3. Timely Lubrication: Regularly check the condition of the grease/oil, replenishing or replacing it as needed to ensure sufficient oil film between the lip and the shaft surface;
4. Clean Environment: Keep the area around the equipment clean. Install dustproof devices in dusty environments to prevent foreign objects from entering;
5. Regular Inspection: Check the oil seal condition every 3 months. If lip wear, aging, or deformation is found, replace it promptly to prevent the failure from escalating.
Common Misconceptions in Oil Seal Fault Diagnosis
Many customers fall into the following misconceptions when diagnosing oil seal failures, leading to recurring problems and increased maintenance costs. These should be avoided:
Misconception 1: Leakage means the oil seal is broken, just replace it—Ignoring root causes such as shaft surface damage and installation errors, leakage will persist even after replacing the oil seal.
Misconception 2: The tighter the oil seal, the better—Excessive tightness leads to frictional heat and premature lip wear, actually shortening its lifespan.
Misconception 3: The more grease, the better—Excessive grease causes heat buildup, accelerates rubber aging, and easily introduces impurities.
Misconception 4: All oil seals are interchangeable—Different operating conditions and equipment require different oil seal models and materials; using the same seal for all can easily lead to failure.
Misconception 5: Ignoring dust protection—Failure to install GA dustproof oil seals in dusty environments causes rapid wear of the main oil seal lip, resulting in seal failure.
Conclusion
The core causes of oil seal failures mostly fall into five categories: improper selection, improper installation, insufficient lubrication, environmental pollution, and operating conditions exceeding specifications. When diagnosing oil seal failures, simply follow the principle of first observe the symptoms, then investigate, and finally resolve,and combine this with equipment operating conditions and practical experience to quickly pinpoint the root cause and provide a targeted solution.
Frequently Asked Questions
If equipment is leaking oil, how can you determine if it's due to a faulty oil seal?
Observe whether there are continuous oil stains or oil dripping at the sealing part, and whether the oil stains seep out along the journal or housing gaps; after ruling out oil pipe, joint, and flange leaks, if oil seeps only at the oil seal installation location, it can be basically determined that the oil seal has failed.
What are some common reasons why oil seals start leaking oil shortly after use?
The main causes include substandard shaft surface roughness/hardness, scratches, and impacts; misaligned oil seal installation, spring detachment/looseness; incorrect lubricant selection, excessive impurities; and operating temperature/pressure exceeding the rated range of the oil seal.
What causes the lip of an oil seal to harden and crack?
The main causes are prolonged operation at excessively high temperatures, incompatibility between the lubricating oil and the oil seal material (such as incompatible oils in contact with rubber oil seals), or aging and ozone corrosion causing the lip to lose elasticity, leading to seal failure.
How to solve the problem of oil seals wearing out too quickly and journals being worn into grooves?
The root cause is dust and impurities intruding into the sealing surface, abrasive-containing lubricating oil, or insufficient journal hardness. It is necessary to install a dustproof structure and filter the oil. Minor journal wear can be repaired, while severe wear requires replacement of the shaft or the use of a wrap-around oil seal.
If there is still slight oil leakage after replacing the oil seal, how should I troubleshoot it?
First, check if the installation is in place and if the lip direction is reversed; then confirm whether the shaft runout and coaxiality exceed the standard; at the same time, check whether the housing mounting hole is deformed and whether the fit clearance between the oil seal and the hole is too large.