Skip to content
Installing an oil seal with precision is key. It helps equipment function at optimal performance and increases its lifespan. This guide includes pre-installation steps, installation tips, and ways to avoid common mistakes. It provides clear, step-by-step instructions. This helps you get reliable seals every time. So, you reduce the risk of leaks and prevent mechanical failures.
Before installing the oil seal
Thorough preparation is crucial for successful oil seal installation. Aligning the oil seal, shaft, and mounting hole is crucial before treatment. This stops oil seal failure, prevents media leakage, and cuts down on early wear on parts.
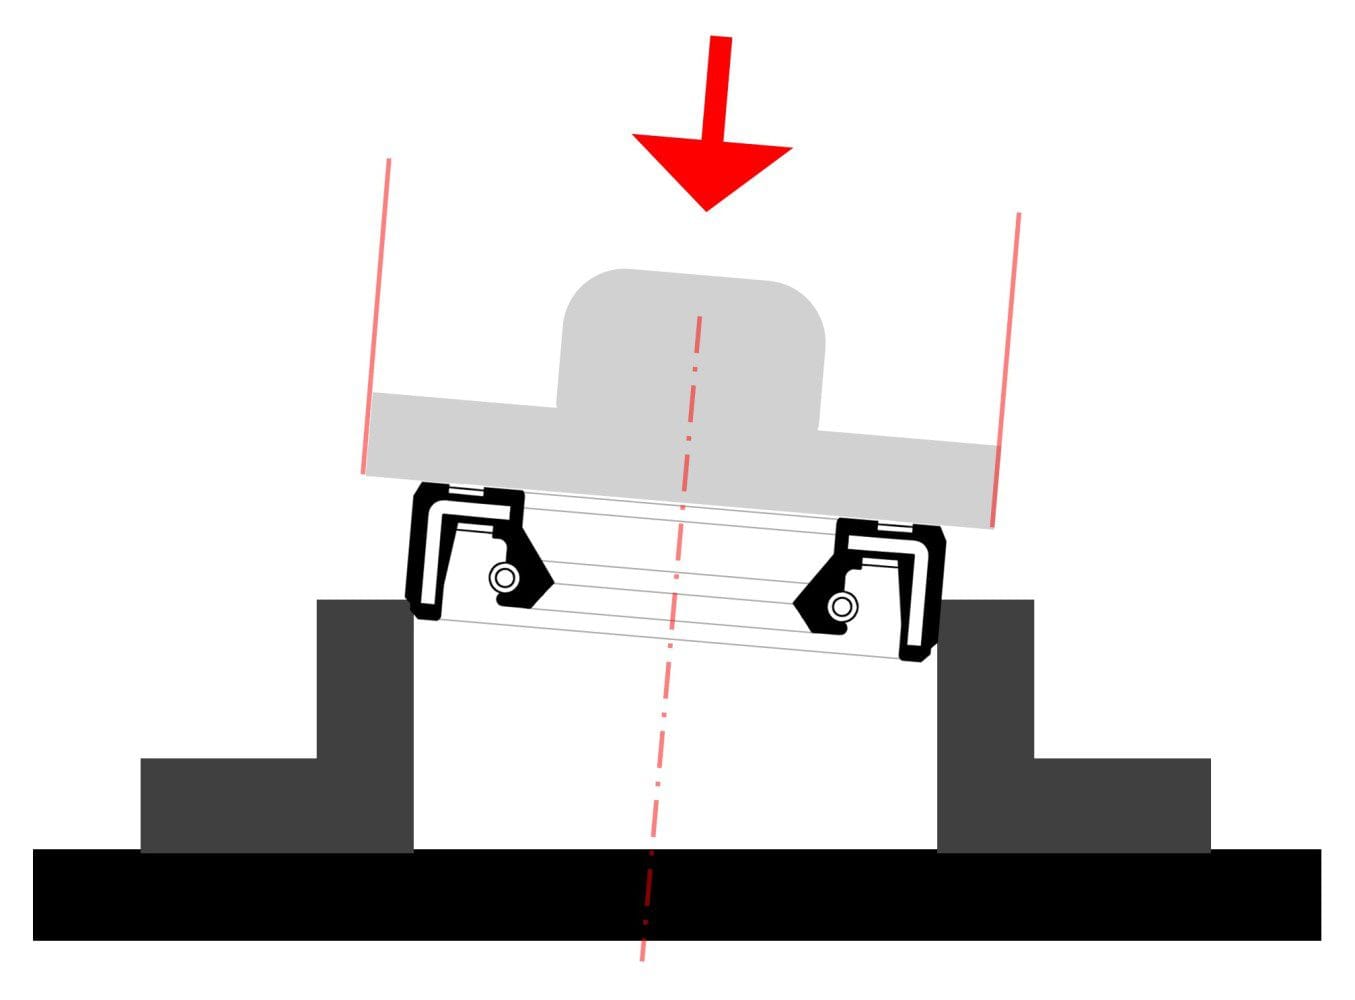
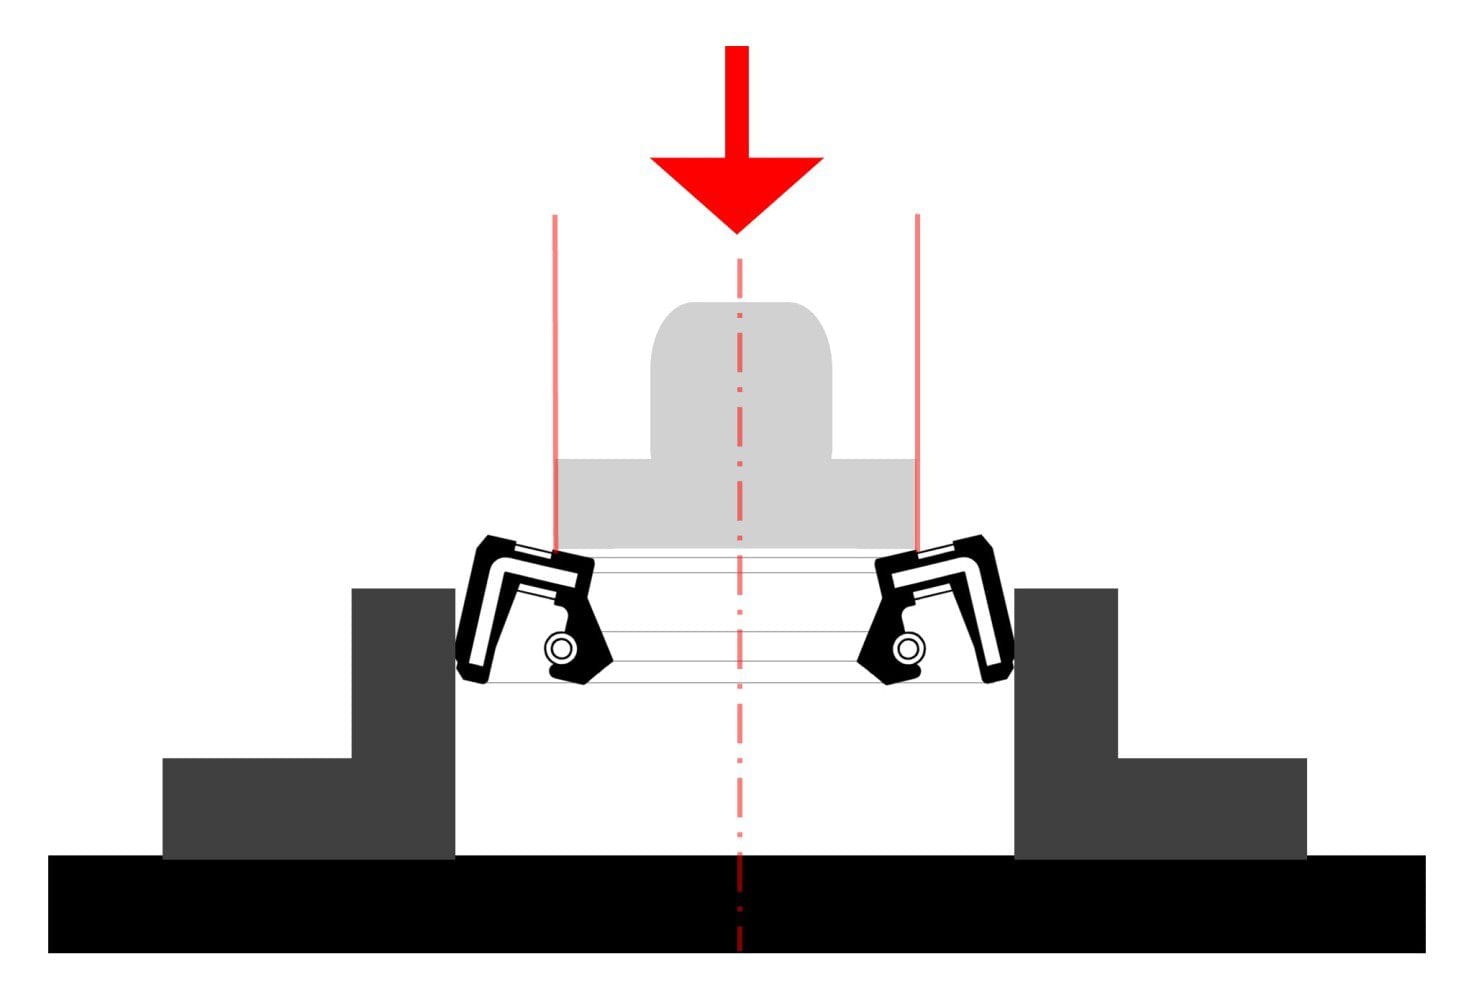
Alignment Check: Before you install, use a ruler or laser tool. Check how well the seal, shaft, and mounting hole fit together. Make sure they are concentric and perpendicular.
Misalignment causes uneven pressure. This leads to early oil seal wear and raises the risk of leakage.
Seal and Mounting Surface Inspection: Clean the seal, shaft surface, and mounting hole. This removes any leftover oil, debris, or rust.
Check all parts by looking and feeling for any defects, wear, or bending. Even small impurities or hidden damage can cause pressure leaks or seal damage.
Lubrication: Lubrication is key to smooth installation and stable initial operation. Apply a compatible lubricant in a uniform layer to the sealing lip and shaft surfaces.
Avoid too little lubrication, as it can jam seals and cause early wear. Avoid using too much lubricant. It can cause hydraulic pressure issues during installation.
Installation technology
Ensure you install seals correctly to maximize their effectiveness throughout their entire lifespan. Each technique is tailored to specific installation requirements and ensures long-term reliability.
Mounting on the outer casing surface
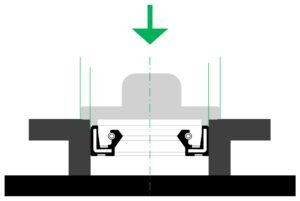
To match the seal depth with the housing surface, do this: Press the installation tool firmly against the housing’s machined end face. This ensures proper positioning. Make sure the tool is straight up and down to keep the shaft in the right spot. This technique works well when the seal must be exactly aligned with the housing end face. It helps improve installation consistency.
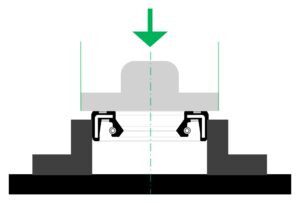
Housing Stop Installation

Adjust the seal depth of the housing stop so it is flush with the inner shoulder of the hole. This method guarantees a precise fit between the seal and the housing’s internal parts. The depth guide is essential for checking the seal’s installation accuracy.
Surface Stop Installation
This method is like the housing surface stop technology. Both use the machined housing end face to set the sealing depth. They work well in cases where the housing’s outer surface is flat. During installation, you can check the stop position by looking at it or by using a feeler gauge. This ensures the sealing depth is accurate.
Shaft Stop Installation
This technology positions the seal with exact accuracy. It aligns the installation tool with the shaft end face with precision. After installation, check the alignment. This helps to avoid misalignment problems later on.
Installation of Seal over Splines
A seal needs extra protection when going through splines, keyways, or threaded parts. This helps stop sharp parts from scratching the seal. Apply enough compatible grease to the contact surfaces and sealing lip. This reduces friction and protects the sealing lip from damage.
Strike Plate Installation
The positioning plate controls the depth of the seal and ensures proper alignment. This makes it ideal for installing large seals. During installation, keep a slow and steady rhythm. This helps ensure proper installation and prevents seal deformation.
Common Mistakes to Avoid
Avoiding common installation mistakes is key. It helps extend the lifespan and sealing power of oil seals. The following are typical problems requiring special attention and their solutions:
1. Oil Seal Tilt: If the seal isn’t aligned properly during installation, it can cause uneven contact between the sealing lip and the shaft. This leads to excess interference, which may result in uneven wear or leakage.
Use a dedicated installation tool that fits the specifications. This helps keep the oil seal centered with the shaft as you install it.
2. Oil Seal Springback: The outer diameter of the oil seal rubber can keep its shape. After you press it into the mounting hole, it might spring back and shift.
Solution: Clean the inner wall of the mounting hole with great care. A clean surface boosts friction between the oil seal and the hole. This helps reduce springback.
3. Wrong Drive Ring Choice: Picking the wrong size or material for the drive ring can lead to oil seal deformation and misalignment.
Solution: Adhere to the oil seal model and installation guidelines with precision. Choose the right drive ring to prevent any issues.
4. Insufficiently Large Installation Tool: A small drive diameter can overly compress the oil seal during installation.